
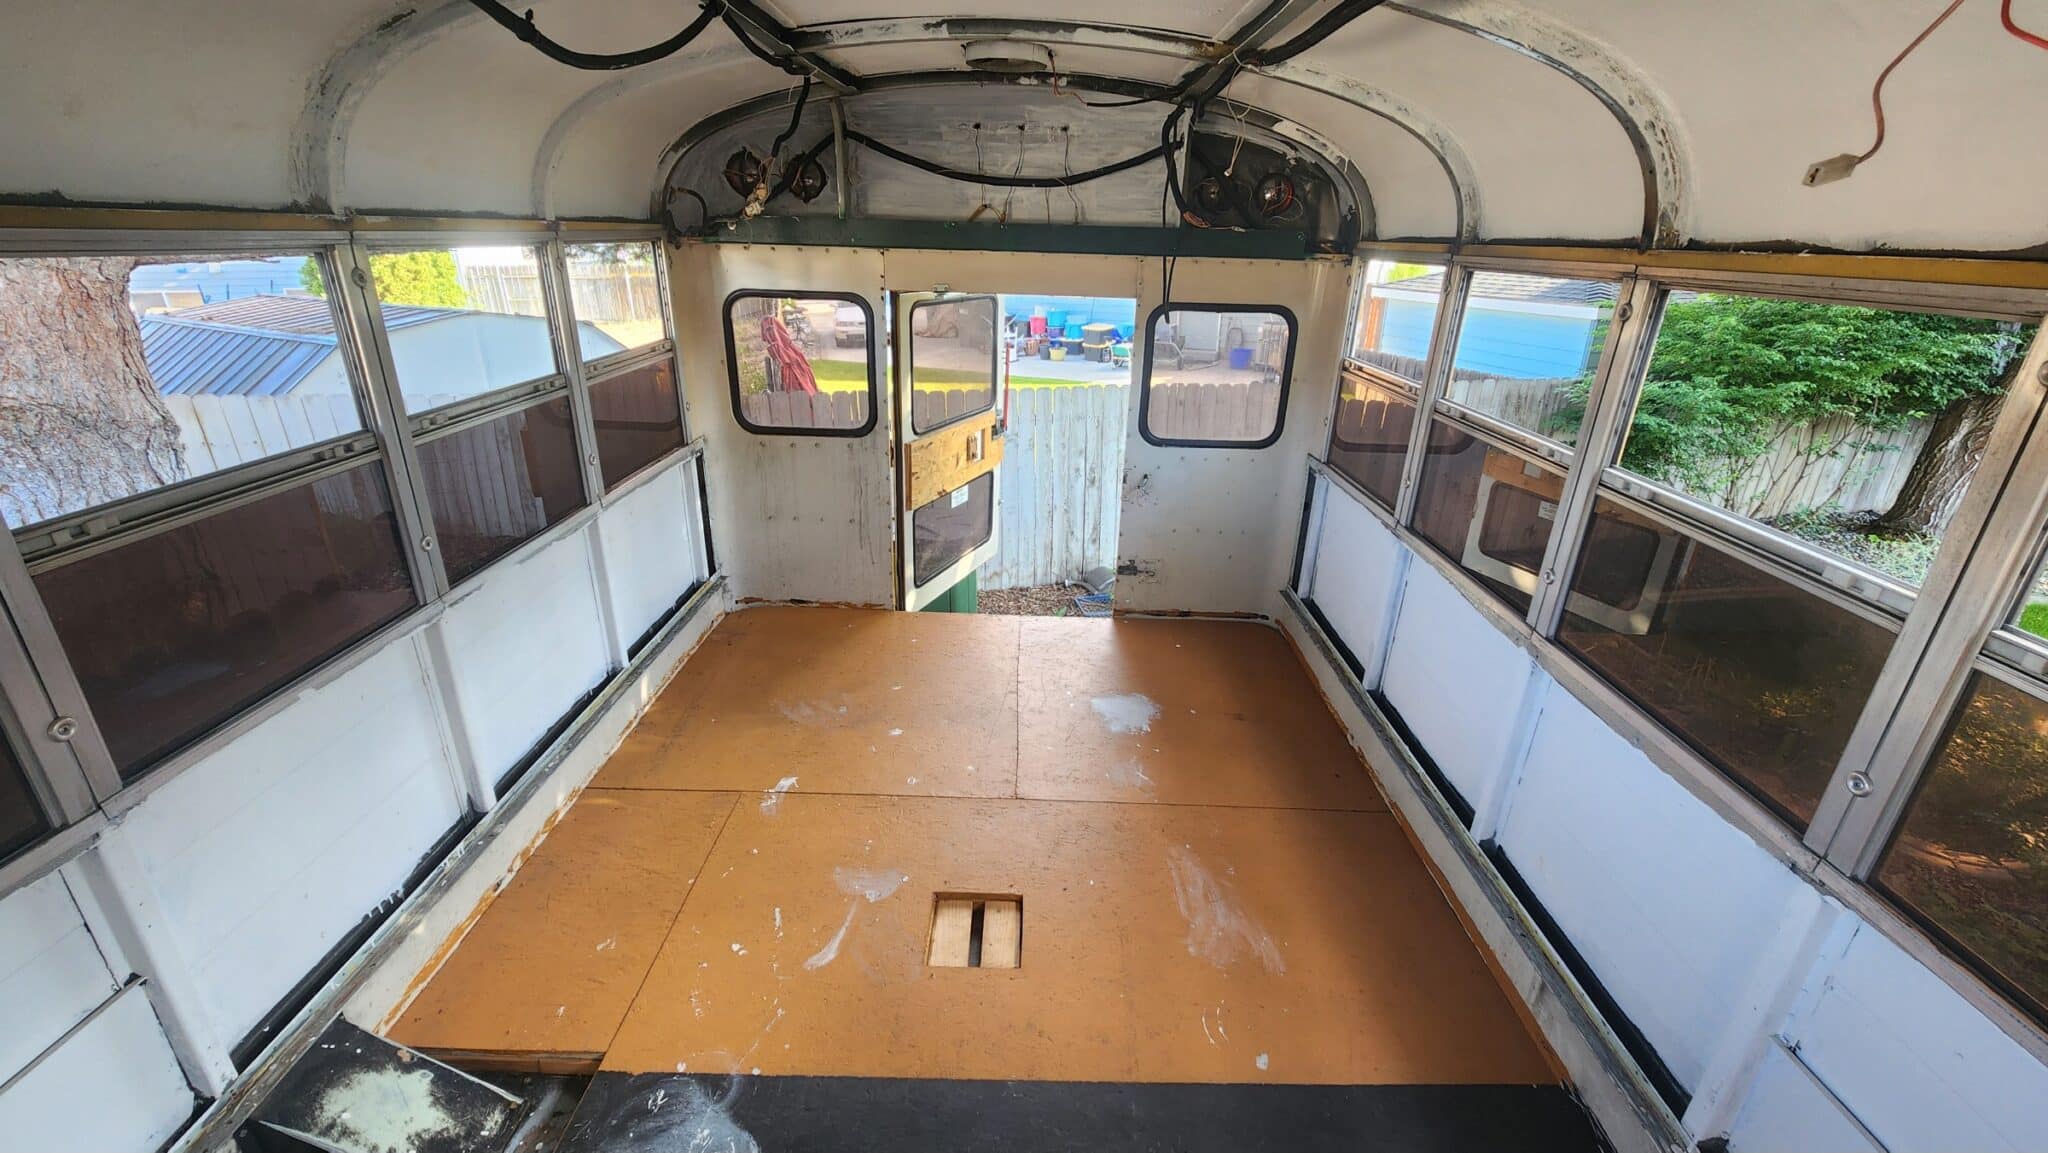
I went down the roof raise rabbit hole harder than probably any other single topic in bus conversions. And I think the reason is that it touches everything. Your headroom, your floor plan, your budget, your driving route, even whether you can park in certain places. A roof raise isn’t just a construction project — it’s a decision that ripples through your entire build and your entire life on the road afterward. I talked to builders who’d done it, builders who skipped it and regretted it, and one guy at a fab shop who’s done over forty of them and had opinions about every single one. (See our guide on Can You Raise the Roof on a School Bus? for more on this.)
This guide covers every aspect of raising the roof on a school bus conversion, from choosing your raise height and materials to the actual structural work, weatherproofing, cost breakdown, and the mistakes that keep biting people. Most builders raise between 8 and 24 inches, with 12 to 18 being the sweet spot depending on your height and goals. A DIY roof raise runs $2,000 to $6,000 in materials, while hiring a professional shop puts you in the $8,000 to $15,000 range. The project takes 2 to 6 weeks of full-time work if you’re doing it yourself, and it requires either real welding skills or access to someone who has them. If you’re still deciding whether a roof raise is even worth doing, I wrote a shorter piece on whether you can raise the roof on a school bus. This guide assumes you’ve made that decision and you’re ready to understand how it all actually works.
Why People Raise the Roof on a School Bus
The interior ceiling height on a stock school bus is right around 72 inches. That’s 6 feet exactly. On paper that sounds like enough for a lot of people. But then you start building. Your subfloor with insulation eats 2 to 4 inches. Whatever you put on the ceiling takes another inch or two. Now you’re at maybe 5’8″ of actual livable headroom, and if you’re any taller than that, you’re ducking every time you walk through your own home. (See our guide on What Is the Maximum Legal Height for a Converted Bus? for more on this.)

I assumed for a long time that roof raises were just for tall people. That was wrong.
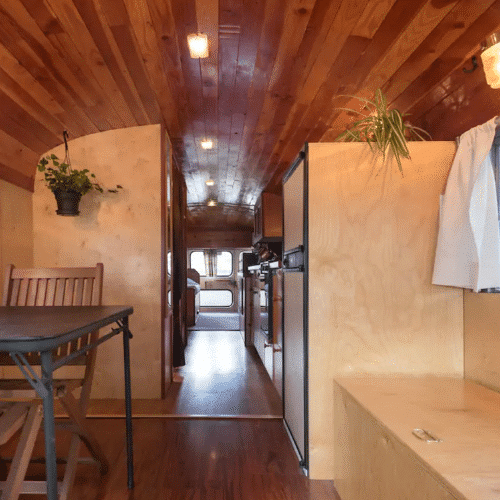
I was talking to a woman at a skoolie meetup last summer who couldn’t have been more than 5’3″. She’d done a full 18-inch raise on her Thomas flat-nose. When I asked why, she looked at me like the answer was obvious. She wanted proper upper cabinets in the kitchen. A range hood that didn’t sit two inches above her head. Ceiling fans. Hanging plants in the bedroom area. Without the raise, all that stuff would’ve been right in her face, and the bus would’ve felt like a cramped van instead of a home. With the extra height, she had room for everything and the whole space felt open. That conversation completely reframed how I think about roof raises. It’s not just about standing height. It’s about how the space feels and what you can do with the vertical real estate.
The other big driver is loft beds. If you want a sleeping loft over the cab or the back of the bus, you need vertical space for someone to sit up in bed without hitting the ceiling, plus enough clearance underneath for a couch, desk, or storage. Without a raise, a loft bed in a school bus is essentially a shelf you sleep on. With 18 to 24 inches added, it actually becomes a functional space where you can sit up, read, and not feel like you’re in a submarine.
Then there’s resale value. I looked at a bunch of completed build sale listings and the raised-roof buses consistently sold for more than stock-height builds with similar features. It’s one of the few skoolie modifications where the investment actually shows up in the sale price.
“How much did you raise the roof?”
This is probably the single most common question I saw in YouTube comments and forum threads about roof raises. People want a number they can plan around, and I get that. So I spent a while tracking what builders actually chose.

The range I found goes from about 8 inches on the low end to 24 inches on the high end. Below 8 inches isn’t really worth the effort — you’re cutting your bus apart for a gain that barely changes the feel of the interior. Above 24 inches starts creating serious structural and driving challenges that most builders don’t want to deal with.
Within that range, the distribution clusters pretty heavily around 12 to 18 inches. The 12-inch crowd tends to be shorter builders, maybe 5’8″ or under, who just need a little breathing room after losing inches to the floor and ceiling. They’re not trying to build loft beds or install massive upper cabinets — they just want to stand up straight and have a couple inches of clearance.
The 18-inch crowd is where most people land, and it makes sense once you do the math. Start with your 72 inches of stock height. Add 18 inches and you’re at 90 before finishes. Lose 3 to 4 inches for the subfloor and maybe 2 inches for ceiling treatment. You end up with roughly 84 inches of usable headroom, which is 7 feet flat. That’s genuinely comfortable for almost everyone, with room to spare for cabinets, fans, and all the overhead stuff that makes a bus feel like a home.
What stuck with me was how many people said they wished they’d gone higher. I read one comment from a guy who did 12 inches and said if he had it to do over, he’d go 16. Another who did 14 and wished he’d done 18. The reasoning is always the same — once you’ve already committed to cutting the bus apart, another 4 or 6 inches of steel is maybe $100 to $200 more in material and a few extra hours of work. But the difference in how the finished space feels is noticeable every single day you live in it.
“How high of a roof raise did you do?”
So this pops up in a slightly different context than the last one. People asking this are usually looking at a specific finished build and trying to reverse-engineer the dimensions for their own planning. Here’s what I found helps most.

The 18-inch raise is the clear winner in terms of popularity. I’d estimate at least half the roof raises I came across fell in the 16 to 18 inch range. It’s become the default recommendation in the community for good reason — it gives you that 7-foot finished ceiling height that works for pretty much everyone, it doesn’t push your overall exterior height into truly problematic territory, and the structural requirements are well-documented because so many people have done it.
I talked to one builder at a gathering who went all the way to 24 inches. He’s 6’4″ and his wife wanted hanging plants, and honestly you can’t argue with that logic. But he was upfront about the trade-offs. The build took nearly twice as long as he’d planned. The taller wall extensions flexed more during welding and needed more cross-bracing than he’d calculated. His bus looks absolutely incredible, but the 24-inch raise is a different level of commitment. He told me if he were advising someone else, he’d say go 18 unless you have a specific, concrete reason to go higher.
There’s also the partial raise option that I found interesting. Some builders only raise the living area and leave the cab section at stock height. It saves on materials and labor and gives you headroom where you actually spend your time. From the outside the transition between heights looks a little strange, I won’t pretend it doesn’t. But from the inside you honestly don’t notice it much. The couple I talked to who did this said they saved about $1,500 and probably 30 hours of labor compared to a full-length raise.
“Is this a raised roof bus or are you very short?”
I love this question because it shows up on almost every skoolie tour video where the builder looks comfortable standing up. And it’s a totally fair thing to ask, because you really can’t tell from video alone.

Here’s the quick breakdown. Someone who’s 5’6″ or shorter can usually stand comfortably in a stock school bus, especially if they keep the ceiling treatment minimal and don’t go too thick on the subfloor. At 5’8″ it starts getting tight. At 5’10” and above, you pretty much need a raise unless you’re fine ducking slightly or keeping the ceiling completely bare, which nobody actually wants to do.
But here’s the thing I keep coming back to. It’s not just about whether your head physically fits. I’m not what anyone would call tall, but I still found the idea of living in a space where I couldn’t fully stretch my arms overhead without hitting something uncomfortable to think about. There’s a psychological component to headroom that goes beyond the physical. A bus with a raised roof feels like a tiny house. A bus without one feels like a vehicle you’re camping in. That difference matters when you’re living in the thing full-time.
There’s also the option of choosing a bus with more headroom built in. Transit buses and some coach buses come with higher ceilings than school buses. I found a few builders who skipped the roof raise entirely by starting with a flat-nose bus that had 6’3″ or 6’4″ of interior clearance to begin with. After losing a couple inches to the floor, they were still at about 6 feet even. Not ideal for everyone, but it’s worth knowing about if the idea of cutting your bus in half makes you queasy. Which, honestly, it should at least a little bit. If you want to compare bus types and their dimensions, there’s a whole piece on school bus dimensions by type that breaks it all down.
“How tall is the ceiling? I’m guessing around 6’1?”
The guesses are always a little off, which is why I wanted to address this one directly. People see a finished interior and try to eyeball the ceiling height, and they usually land somewhere between 6′ and 6’3″ for buses that look comfortable. In reality, those are almost always raised-roof builds running 6’10” to 7’2″ of finished interior height.

Here’s why the perception is skewed. When you watch a tour video, the wide-angle lens makes everything look taller and wider than it actually is. A 7-foot ceiling on a wide-angle looks like it could be 6’1″ with a taller person standing in it. But if you saw that same space in person, you’d immediately feel the difference between 6’1″ and 7 feet. That’s almost a full foot of headroom, which is enormous in a small space.
The math works like this for the most common builds. Stock bus ceiling at 72 inches. Add your raise, let’s say 18 inches. That puts you at 90 inches before finishes. Your subfloor assembly is typically 2 to 4 inches depending on whether you’re doing rigid foam board or spray foam, plus your flooring material on top. Ceiling treatment is usually 1 to 2 inches for tongue-and-groove planking or thin paneling. So your finished ceiling height after an 18-inch raise lands somewhere around 84 to 87 inches, which is 7 feet to 7 feet 3 inches.
For a 12-inch raise, the finished height comes out around 78 to 81 inches, or 6’6″ to 6’9″. For a 24-inch raise, you’re looking at 90 to 93 inches finished, which is 7’6″ to 7’9″. That last number is almost standard residential ceiling height, which is wild when you think about it being inside a school bus.
If you want to see where the stock numbers start before any raise, I wrote about how tall the ceiling is inside a school bus with measurements across different manufacturers and models.
Methods: Steel vs Aluminum Channel
When it comes to the actual structural material for the raise, you’ve got two main camps, and I found strong opinions on both sides.
Steel square tubing is what the vast majority of builders use. Usually 1-inch by 1-inch or 1.5-inch by 1.5-inch, in 14 or 16 gauge. Steel is cheap, widely available, welds easily with a MIG welder, and matches the existing bus structure. The original bus body is steel, the ribs are steel, so adding more steel means you’re working with the same material throughout. No compatibility concerns, no galvanic corrosion issues.
The downside is weight. A full 18-inch raise on a 35-foot bus using steel tubing and steel sheet metal skin adds roughly 400 to 600 pounds to the vehicle. That’s real weight on a bus that’s already heavy and already close to its GVWR in a lot of builds. If weight is a concern for you, and it should be, I covered how to track it in the article on how to calculate and stay under your GVWR.
Aluminum is the lighter alternative. An aluminum-framed raise with aluminum skin panels can cut that weight roughly in half, down to maybe 200 to 300 pounds for the same 18-inch raise. That’s a meaningful difference, especially on a shorter bus with a lower GVWR.
But aluminum comes with complications. You can’t MIG weld aluminum to steel, so the connection points where the new aluminum frame meets the existing steel bus ribs need either specialized welding techniques or mechanical fasteners like bolts and rivets. TIG welding aluminum requires more skill and a different (more expensive) welder. And if you do bolt or rivet aluminum directly to steel without a barrier between them, you’ll get galvanic corrosion — basically the two metals react to each other in the presence of moisture and one of them deteriorates. You need plastic or rubber isolation washers at every contact point.
I found that most DIY builders go with steel because it’s simpler and cheaper, and most professional shops default to steel too unless the customer specifically requests aluminum. The weight savings from aluminum are real, but for a lot of builds the added complexity and cost aren’t worth the 200-odd pounds you save when there are lighter things to cut elsewhere in the build.
There’s a third option I came across a few times — using steel for the structural frame but aluminum for the skin panels. You get the structural simplicity of an all-steel frame with some weight savings on the sheet metal. Just make sure you isolate the aluminum panels from the steel frame to prevent corrosion.
Structural Reinforcement: What Actually Goes Into the Frame
This is the part that separates a roof raise that holds up for 200,000 miles from one that starts cracking and flexing after the first pothole.

The basic concept is straightforward. You’re extending each of the bus’s existing structural ribs upward by your raise height. At every rib location — usually spaced 24 to 30 inches apart — you weld a new vertical post between the cut edge of the original wall below and the roof rib above. Then horizontal bracing ties all those vertical posts together along the top and bottom of the new section.
Where it gets more nuanced is diagonal bracing. Without diagonals, you’ve basically got a ladder frame that can rack sideways. Some builders add a diagonal brace in every other bay. I saw one build where the guy did full X-braces in every single bay, which is probably more than necessary for an 18-inch raise with normal interior weight, but he was planning heavy upper cabinets and a 24-inch raise, so it made sense for his situation.
I had a conversation with a guy at a fabrication shop who’s done dozens of these, and he said something that stuck with me. He told me the framing design is almost never the problem. Most people come up with a perfectly adequate frame layout. The problem is the welds. People who’ve done a weekend welding class or watched some YouTube videos and bought a Harbor Freight welder, running cold welds that look okay on the surface but have no real penetration into the base metal. His exact words were “those welds are just sitting on top, they’re not actually joined.” He said he’s had people bring buses in for him to inspect and he could break their welds off with a hammer.
His recommendation, and I pass this along to everyone I talk to about roof raises, is to get someone experienced to physically check your welds before you put the full weight of the roof on them. If you can’t break the weld by hitting it with a hammer, it’s probably fine. If you can, start over on that joint.
A 220-volt MIG welder in the $400 to $700 range is what most DIY builders use. It handles 16-gauge tubing and bus sheet metal without issues. But here’s the thing — owning a welder and knowing how to weld are two very different things. Practice on scrap steel until your beads are consistent and you understand heat management before you touch the bus.
“How much does a roof raise cost?”
This is the one everyone wants to know, and I found a lot of vague answers online that weren’t helpful. So let me break it down as specifically as I can based on everything I’ve gathered.
DIY Materials Only (18-Inch Raise, Full-Size Bus)
Steel square tubing for the frame: $400 to $800. You need vertical posts at every rib location around the entire bus perimeter, plus horizontal rails top and bottom, plus diagonal bracing. For a 35-foot bus that’s roughly 150 to 200 linear feet of tubing, depending on your bracing approach.
Sheet metal for skinning the new section: $300 to $600. You need enough 16-gauge steel to close up the gap all the way around. Some builders save a little money by using 18-gauge for the skin since it’s not load-bearing, it’s just closing the opening.
Welding consumables: $150 to $300. Wire, shielding gas, contact tips, grinding discs. These add up faster than you’d expect, especially if you’re learning as you go and making more passes than an experienced welder would.
Seam sealer, primer, and paint: $100 to $200. Use real automotive seam sealer, not silicone caulk. POR-15 or Rustoleum primer on all bare metal. Don’t skimp here — the $30 you save on cheap primer comes back as $500 in rust repair later. (See our guide on How to Paint a School Bus (DIY vs Professional) for more on this.)
Miscellaneous: $100 to $200. Clamps, cutting discs, hardware, the random stuff you didn’t plan for. There’s always something.
Total DIY materials: $1,050 to $2,100.
If you don’t already own a welder and plasma cutter, add $400 to $700 for the welder and $300 to $500 for the plasma cutter. So potentially $1,750 to $3,300 all in. But those tools get used throughout the rest of the build, so it’s not money lost on a single step.
Hiring a Professional Fab Shop
Most quotes I found fell between $8,000 and $10,000 for a full-size bus with an 18-inch raise, including materials and labor. I’ve seen quotes as low as $5,000 from small rural shops and guys who do roof raises as a side business, and as high as $15,000 from established shops in major metro areas.
The challenge isn’t just cost, it’s finding a shop that’ll do it. A lot of fab shops have never worked on a bus and don’t want the liability or the shop space commitment. You might call ten or fifteen places before you get a yes. When you do find one, ask to see previous work. A general welding shop that’s never done a roof raise may not understand the structural considerations specific to a vehicle that drives at highway speed.
The Hybrid Approach
This is the option I kept seeing people recommend, and after looking at the numbers, I think it makes the most sense for a lot of builders. You do the cutting, bracing, and prep work yourself. Then you hire a welder at $50 to $80 per hour for the structural framing and roof reattachment — figure 20 to 40 hours depending on the raise height and the welder’s speed. Then you handle sealing, priming, and painting yourself.
Total cost with this approach: $2,500 to $5,000.
One guy I was chatting with online took exactly this route. He did all the grunt work — cleaning, cutting, prep, temporary bracing. His buddy who welds professionally came in for two weekends and knocked out all the structural work. Cost him $1,500 in cash and beer for his friend’s time plus about $2,200 in materials. Under $4,000 total with professional-quality welds on every structural joint. He said it was the best decision he made in his entire build, and I believe him. (See our guide on What Is the Best Way to Paint a School Bus? for more on this.)
Tools You’ll Need
If you’re doing the raise yourself, here’s the tool list I put together from talking to builders who’ve been through it.

Plasma cutter ($300 to $500). This is the primary cutting tool. It slices through bus sheet metal like it’s nothing. An angle grinder with a cutoff wheel works too, but it’s slower, messier, and harder to keep on a straight line over a 35-foot cut.
MIG welder, 220V ($400 to $700). Handles everything you need for steel tubing and sheet metal. If you’re going aluminum, you’ll need a TIG welder instead, which costs more and requires more skill.
Angle grinder ($50 to $100). For grinding welds smooth, cutting small pieces, and prep work. You’ll go through a lot of grinding discs.
Levels and measuring tools. A long spirit level, a laser level if you can swing it, a chalk line, and a good tape measure. Accuracy matters enormously here — if your cut line drifts even half an inch over the length of the bus, you’ll fight that error through every subsequent step.
Clamps. Lots of them. C-clamps, bar clamps, locking pliers. You need to hold things in position while you tack weld, and you can never have too many clamps.
Safety gear. Welding helmet with auto-darkening lens. Welding gloves. Long thick sleeves. Ear protection. Steel-toe boots. Face shield for grinding. This isn’t the part of the build where you improvise on safety equipment. Molten steel and plasma arcs don’t care about your schedule or your budget.
Jacks or supports for the roof. Bottle jacks, ratchet straps, temporary cross-braces — whatever method you choose to hold the roof in position after cutting. This is critical and I’ll explain why in the next section.
Weatherproofing: The Step That Makes or Breaks the Whole Thing
I’m putting this in its own section because it’s where the most roof raises fail. Not structurally — they leak. And a leaking roof raise will destroy your interior work, grow mold behind your walls, and turn what should’ve been a source of pride into an ongoing headache.
After all your welding is complete, grind every seam smooth and inspect it carefully. I mean inch by inch, looking for pinholes, gaps, incomplete beads, anything that could let water through. Then spray the bus with a hose — a hard spray, not a gentle mist — and have someone inside looking for drips. Do this from every angle. Water finds paths you’d never expect.
Automotive seam sealer goes on every joint, inside and out. This is the stuff body shops use for panel replacement work. It stays flexible, which matters because a bus flexes constantly going down the road. Silicone caulk seems like it would work but it bonds poorly to bare steel and peels off with vibration over time. Don’t use it.
Primer and paint go on all exposed metal immediately. Bare steel starts rusting within days in most climates. POR-15 or similar rust-converter primer first, then your topcoat. And don’t forget the inside surfaces — the metal you’ll never see again once the insulation and wall panels go up is the metal that rusts for years without anyone knowing.
For the roof junction where the original roof meets the new raised section, pay special attention. This is the most leak-prone seam on the entire raise. Some builders weld a small drip edge above this joint — a little lip that forces water to run down the side instead of pooling at the seam. That’s clever and I’d recommend it. On top of that, Eternabond tape over the exterior seams adds another layer of protection. It’s what RV repair guys use on roof seams and it holds up to UV, temperature swings, and road vibration for years.
One builder I was talking to online learned the hard way about the bottom seam. He put all his attention into sealing the roof junction and forgot that the bottom of the new section — where it meets the original bus body — also needs to be sealed. Water running down the sides of the bus pooled at that seam and found its way inside. He didn’t discover it until he saw brown staining on his fresh insulation months later. Seal top and bottom with equal attention.
Impact on Driving: Height, Clearance, and Weight
Overall Height After a Raise
A stock full-size school bus sits at roughly 10 feet 6 inches tall. Add an 18-inch raise and you’re at 12 feet. If you put a rooftop air conditioner up there, add another 12 to 14 inches. Now you’re at 13 feet to 13 feet 2 inches.
Most interstate highway overpasses in the US have a minimum clearance of 14 feet. You’re fine on interstates and major highways. But city bridges, railroad overpasses, old downtown underpasses, and parking garages can be anywhere from 9 to 13 feet. I found a database of low-clearance bridges and there are literally thousands of them under 13 feet across the country.
The practical guidance I heard over and over: keep your total height including everything on the roof under 13 feet if you want to drive without constant stress. Under 12’6″ if you want to sleep soundly. An 18-inch raise with mini splits instead of a rooftop AC unit keeps most builds safely in that range.
Get a trucker GPS app like CoPilot or Hammer that filters routes by vehicle height. Know your exact height. One builder I talked to mounted a height indicator pole on his front bumper — a piece of PVC pipe cut to his exact roof height. If it contacts something, he stops before the roof does. Simple and effective. I covered the legal side of height limits in maximum legal heights for converted buses if you want the state-by-state details.
Weight Added
A steel roof raise adds approximately 400 to 600 pounds to the vehicle. Aluminum brings that down to 200 to 300. Neither number is trivial when you’re already tracking every pound toward your GVWR, but it’s manageable for most full-size buses. The weight sits high on the vehicle, though, which slightly raises the center of gravity. I didn’t find anyone who said this created noticeable handling issues, but it’s worth being aware of, especially in crosswinds.
Wind Resistance
A taller bus catches more wind. This isn’t a major issue at normal highway speeds, but a few builders mentioned being more aware of crosswinds after their raise, especially on open highway through flat terrain. One guy in Kansas said he could feel the difference on windy days but it never felt unsafe, just something he adjusted to.
Common Mistakes People Make
After going through dozens of build threads and conversations, the same problems showed up repeatedly. I wanted to put them all in one place.

Not bracing the roof before cutting. If the roof shifts even slightly while you’re cutting, everything afterward — framing, alignment, sealing — gets exponentially harder. I read about a build where the roof dropped two inches on one side because the bracing failed, and the builder spent triple the time fixing the twist compared to what proper bracing would have taken.
Cold welds with no penetration. Looks fine from the outside, falls apart under stress. The bus vibrates constantly, the roof is heavy, wind pushes against it. Surface-level tack jobs will crack. Get your welds inspected.
Rushing the sealing. The frame is done, the roof is back on, and the builder is excited to start the interior. So they do a quick pass with seam sealer and move on. Six months later there’s water stains on the ceiling panels. Take the time. Hose test. Inspect. Seal again. Hose test again.
Not accounting for total exterior height. Some builders plan their raise based purely on interior comfort and forget about what’s going on the roof. Then the AC unit pushes them over 13 feet and half their planned travel routes are suddenly off limits.
Cutting through wiring or fuel lines. There’s stuff running through those walls. Electrical wiring, possibly plumbing, fuel lines. Map everything before you cut. One guy hit a fuel line with his plasma cutter and described the next five seconds as the most athletic moment of his life.
Going too conservative on height. I keep coming back to this because I saw it so many times. People who did 10 or 12 inches wishing they’d done 16 or 18. Once the bus is cut open, adding a few more inches is minimal extra work. Going back later to add height means essentially starting over. If you’re torn between two numbers, go with the higher one.
Doing the work in bad weather without adequate cover. Your bus will be open to the sky for a period. If it rains during that period, you’ve got water pooling on freshly cut steel, which means rust, and water getting into places you can’t reach once the roof goes back on. I read about a builder who started his raise in October, ran into delays, and had an open-topped bus sitting in rain for three weeks. He had to sandblast and re-prime the entire interior. Time the project for dry weather or have serious tarping ready.
Before and After: What Changes
Here’s a quick reference for what different raise heights actually give you in terms of finished interior ceiling height, assuming a stock 72-inch starting point, 3 inches lost to subfloor, and 2 inches lost to ceiling treatment.
8-inch raise: ~75 inches finished (6’3″). Tight for anyone over 5’10” but workable for shorter builders who mainly want overhead cabinet space.
12-inch raise: ~79 inches finished (6’7″). Comfortable for most people. Starting to feel like a real living space.
14-inch raise: ~81 inches finished (6’9″). Good middle ground. Room for ceiling fans and upper cabinets without things feeling tight.
18-inch raise: ~85 inches finished (7’1″). The sweet spot. Comfortable for virtually everyone. Room for loft beds, full upper cabinets, ceiling fans, hanging plants, all of it.
24-inch raise: ~91 inches finished (7’7″). Approaching standard residential ceiling height. Incredible amount of space but significantly more challenging to build and more impact on driving.
Related: How Do You Remove School Bus Windows?
So Where Does This Leave You
After spending way more time on this topic than I originally planned, here’s where I ended up. A roof raise is the single most transformative modification you can make to a school bus conversion. Everyone who’s done one says so. The only regret anyone has is not going high enough.
If you’ve got welding skills or know someone who does, and you can set aside $2,000 to $5,000, the result fundamentally changes what the bus is. It goes from a vehicle you’re camping in to a space you’re actually living in. For most people, 18 inches is the number. It gives you that 7-foot finished ceiling without pushing your exterior height into dangerous territory or requiring dramatically more materials and skill than a shorter raise.
The step-by-step process is covered in more detail in how to raise the roof on a school bus if you want the focused walkthrough. This guide is about the full picture — every decision, every cost, every trade-off — so you can go in knowing exactly what you’re getting into. And if you’re still nervous about cutting your bus in half, that’s probably healthy. Every builder I talked to said they were nervous too. They also all said they’d do it again without hesitation.