Water is the thing that separates a converted bus from a road trip vehicle. You can sleep in a bus with no plumbing. You can eat cold food and use gas station bathrooms. But once you have running water, a sink, a shower, a way to wash dishes at 10 PM in the middle of nowhere — that’s when it starts feeling like home. I’ve spent a ridiculous amount of time digging into this topic, talking to builders, reading forum threads at 2 AM, and I think I finally have a handle on how all the pieces fit together. (See our guide on How Do You Get Water in a Converted Bus? for more on this.)
A skoolie water system has five parts: a freshwater tank (usually 40-100 gallons), a 12V water pump to pressurize the lines, PEX tubing running to your fixtures, a water heater for hot water, and a gray water tank underneath to catch what goes down the drains. The whole setup costs between $800 and $2,500 depending on tank size, heater type, and how many fixtures you’re running. It’s honestly simpler than most people think, and most builders with zero plumbing experience get it done in a long weekend.
For a more focused breakdown of the basics, we’ve got a separate article on how you get water in a converted bus. This guide goes deeper into every component, the decisions you need to make, and the stuff that trips people up.
—
How do they get water?
I remember the first time someone asked me this and I realized I didn’t actually have a good answer. Like, I knew buses had water tanks, but where does the water come from? Do you just pull up to a fire hydrant with a hose? Do you buy it?
It’s way less dramatic than that. There are basically three ways people fill their tanks and most skoolie owners end up using all three at different times.
Campground and RV park hookups. When you’re at a site with a water connection, you hook up a food-grade drinking water hose (the white or blue ones, not the green garden hose from your garage) and either fill your onboard tank or run directly off the hookup. Direct hookup means unlimited water as long as you’re parked there. This is what most people use when they’re staying somewhere for more than a couple days.
RV dump stations and fill stations. A lot of gas stations, rest stops, and travel centers have potable water fill stations. Sometimes they’re right next to the dump station. Sometimes they’re a separate spigot on the side of the building. Some are free, some charge a few bucks. I’ve seen people drive right past these without realizing they’re there.
Any outdoor spigot. This is the one that surprises people. Friends’ houses, churches, fire stations, laundromats, the side of a gas station. Anywhere there’s an outdoor faucet and someone willing to let you use it. Carry a 50-foot drinking water hose and a splitter and you can fill up from almost anything. Some people keep 5-gallon jugs in the bus as backup and just fill those at water fountains or grocery stores when the tank gets low.
Love the floor plan but with showers and washer etc. what size tank do you have and how’s water pressure?
Tank size is one of those decisions that sounds simple until you actually start thinking about it. And then you’re three hours into a spreadsheet calculating daily water usage per person and wondering how you got here. (See our guide on What Size Water Tank Do You Need for a Skoolie? for more on this.)

Here’s what I’ve found from talking to people and reading way too many build threads. A solo person who takes short showers and doesn’t go crazy with dishes can get a week out of 30-40 gallons. A couple doing the same is looking at 40-60 gallons for a week. Family of four, you want 60-100 gallons, and even then you’re filling up every 4-5 days unless everyone is really disciplined.
Most full-size skoolies end up with a 50-80 gallon freshwater tank. That seems to be the sweet spot. Short buses run smaller, 20-40 gallons, just because of space constraints.
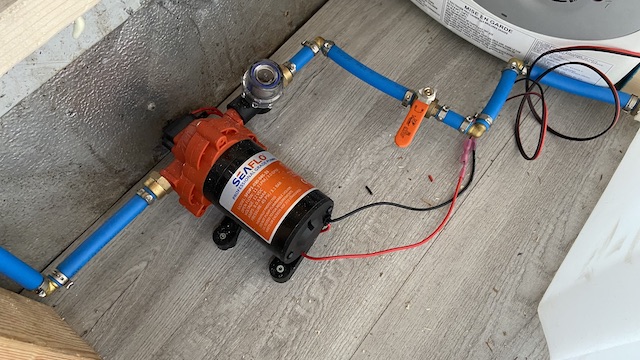
Now, water pressure. This is where people worry and they don’t need to. A 12V RV water pump handles this entire job. The two brands you see everywhere are Shurflo and Flojet, and they run $50-$100. You wire it to your 12V system, plumb it inline between your tank and your fixtures, and that’s it. When you open a faucet, the pump senses the pressure drop and kicks on. Close the faucet, pump shuts off. It delivers 40-60 PSI which feels basically like a normal house faucet.
The pump is loud though. I should mention that. Not like, jackhammer loud, but you can hear it cycling on and off when someone’s running water. Some people mount theirs on rubber isolators or stick them inside a cabinet with foam lining to dampen the noise. If you’re a light sleeper and your partner gets up for water at 3 AM, you’re going to hear the pump. Just something to think about.
How do they connect to a water source?
There’s a piece of hardware called a city water inlet, and this is one of those small details that makes life so much easier. It’s a little panel you mount on the outside of your bus — looks like a small hatch with a garden hose connection behind it. When you’re at a campground or anywhere with a hose hookup, you connect directly to this inlet and it bypasses your tank entirely. Water goes straight from the source, through a pressure regulator, into your plumbing lines. Your pump doesn’t even turn on.
For filling the tank, most people install a gravity fill port. It’s literally just a hole in the side of the bus (or through the floor if the tank is inside) with a cap on it. You stick your hose in, turn the water on, wait until it’s full. Some builders get fancy and add a tank level gauge so they know how full they are without guessing. You can get simple float gauges for $15-$30 or electronic ones that read out on a panel inside the bus.
The one thing I’d say is don’t skip the pressure regulator on your city water inlet. Campground water pressure varies wildly. Some sites push 80-90 PSI, which can blow fittings and even damage your pump if it backfeeds. A $10 brass pressure regulator set to 45 PSI solves that problem permanently.
How big are your water tanks?
I kind of covered sizing above but there’s another dimension to this question that’s worth getting into, and it’s weight. Water weighs 8.3 pounds per gallon. I know I keep repeating this number across different articles but I think people don’t fully internalize it until they do the math for their specific tank. (See our guide on What Kind of Toilet Should You Use in a Skoolie? for more on this.)
A full 80-gallon tank is 664 pounds. That’s the weight of a large motorcycle sitting inside your bus, and it shifts when you drive. A full 100-gallon tank is 830 pounds. If you’re already pushing your GVWR — and a lot of builds are closer than people realize — that water weight matters.
A couple months back I was looking at a build tour on YouTube and the guy had two 65-gallon tanks, one for fresh and one for gray. That’s 130 gallons of potential water weight, over a thousand pounds. He was in a short bus. I kept thinking about his rear axle and whether anyone had done the math on that. Maybe he had, maybe he hadn’t, but it’s the kind of thing that nags at me.
Some people deal with this by never filling their tank completely before driving. Fill it when you arrive, drain it before you leave. Others just size conservatively and accept that they’ll fill up more often. There’s no perfect answer, it depends on your bus, your build weight, and how much driving you’re doing versus staying put.
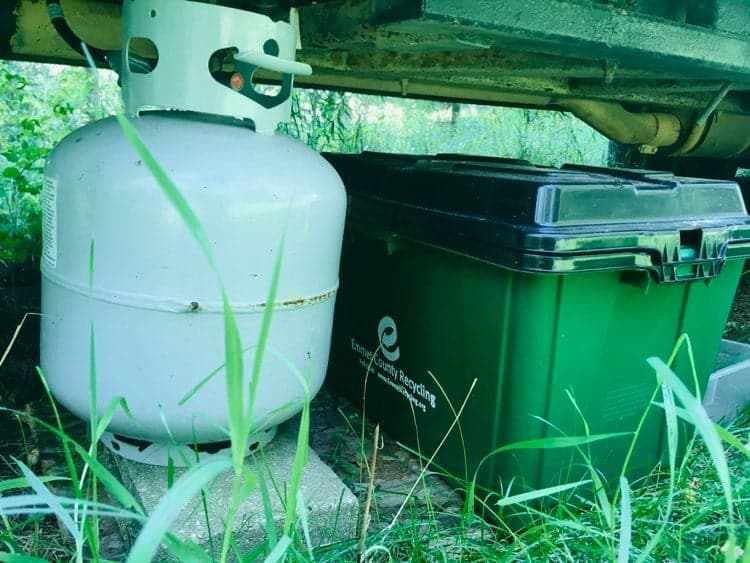
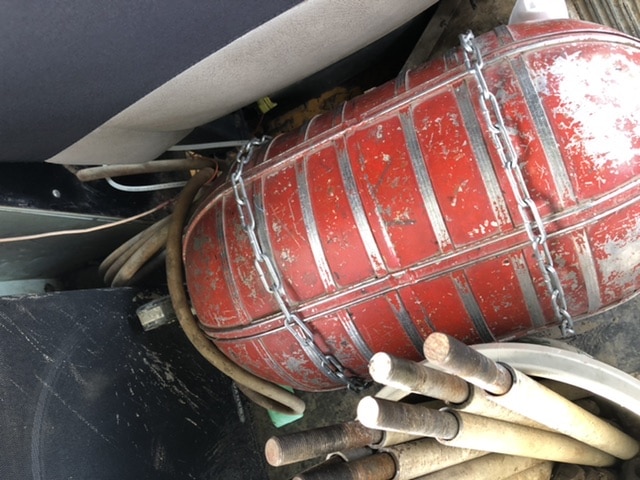
Why isn’t that water tank outside underneath the bus?
Good question. There IS a lot of room under there, and under-bus mounting is absolutely a thing. You bolt the tank to the frame rail, it frees up interior space, and it keeps the weight low which helps with handling. A lot of transit bus conversions and coach builds have their tanks underneath.
So why doesn’t everyone do it?
Freezing. That’s the whole answer, really.
If you ever plan to be anywhere below 32 degrees, an under-bus freshwater tank is going to freeze. And a frozen tank means no water, frozen lines, and potentially cracked fittings. You can add heat tape to the pipes and a tank blanket or heater pad to the tank itself, but now you’re drawing power to keep your water from turning into ice, and if your power system has a bad night, you wake up to a block of ice where your water used to be.
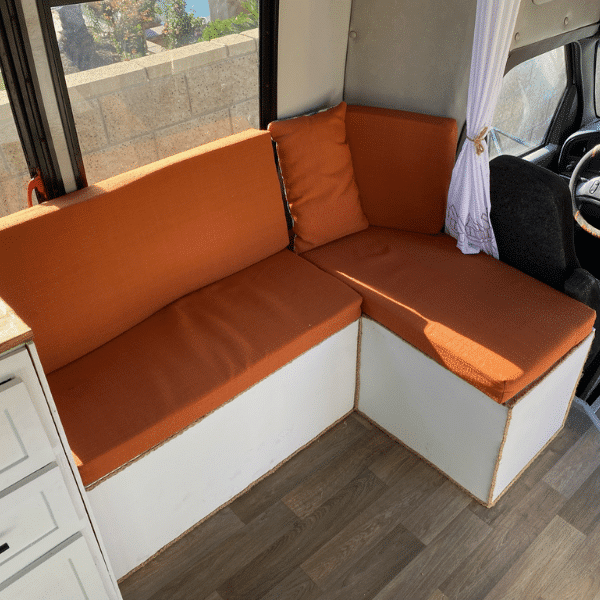
Interior tanks avoid this completely. Your bus’s insulation and heat keep the water liquid. The tradeoff is losing some interior space, but most people tuck the tank under a bench seat or a raised platform and it doesn’t eat into their living area that much. (See our guide on How Do You Do Laundry Living in a Bus? for more on this.)
Here’s what a lot of builders end up doing and I think it’s a smart compromise: freshwater tank inside, gray water tank outside. The gray tank can freeze without really hurting anything because you’re not drinking from it and gray water doesn’t expand the same way clean water does in a sealed tank (most gray tanks vent). If it freezes, you just wait for it to thaw. Annoying, not catastrophic.
Is it possible to put a shower on recycled water looping through a purifier?
So this is one of those ideas that sounds brilliant on paper. Recirculate your shower water through a filter, save a ton of water, shower as long as you want. I’ve seen this question come up a bunch and I went down a rabbit hole on it for a while.

The short answer is yes, systems like this exist. There’s a product called Showerloop that’s an open-source design for exactly this. And there are some marine and off-grid shower systems that filter and recirculate. The water goes through multiple stages — usually a sediment filter, activated carbon, and UV sterilization — and loops back to the showerhead.
But here’s where it gets complicated for a bus build. These systems add cost ($500-$1,500 for a decent setup), they add complexity (more things that can break), the filters need regular replacement, and you’re still not getting truly clean water on each loop. It’s filtered enough for showering but I wouldn’t drink it. And the UV component needs power.
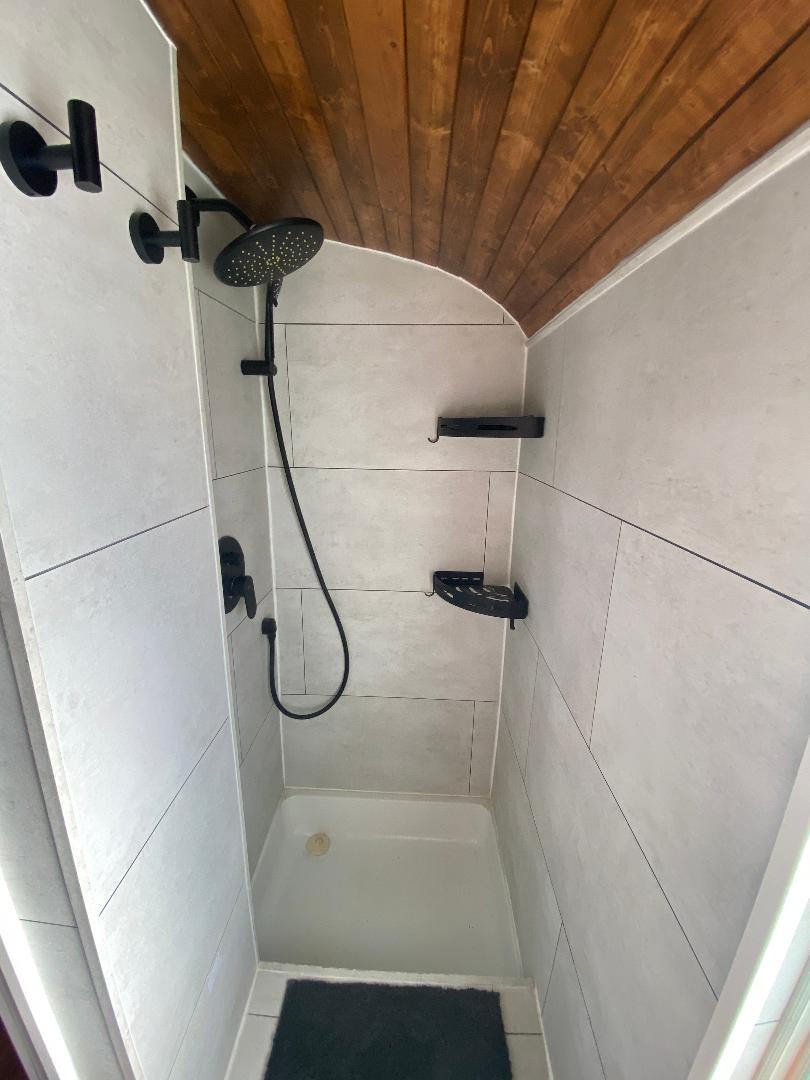
Honestly, most skoolie builders solve the water conservation problem the simpler way. Navy showers. Wet yourself down, turn off the water, soap up, turn the water back on to rinse. A full shower takes 2-3 gallons this way. That’s so little water that the complexity of a recirculation system doesn’t really pay off unless you’re doing extended off-grid trips with very limited water resupply.
I’m not saying don’t do it. If the engineering challenge excites you and you’ve got the budget, go for it. But for most people, a low-flow showerhead and the discipline to turn the water off while you lather is going to get you 90% of the way there for $20 instead of $1,000.
What kind of toilet?
I could write a whole article just about toilets in buses and the conversations get weirdly passionate. People have strong opinions about this.
Three main options and they each come with their own tradeoffs.
Composting toilets are the most popular choice in skoolies and it’s not even close. Nature’s Head ($960) and Airhead ($1,100) are the two big names. They work by separating liquids from solids. The solids mix with coconut coir or peat moss and decompose. The liquids drain into a separate bottle you dump every couple days. A small fan vents any smell outside through a hose.
Does it smell? No. I mean, I haven’t used one personally, but I’ve talked to probably a dozen people who have and they all say the same thing — if you’re doing it right, it smells less than a regular toilet. The key is the separation. It’s when liquid and solid mix that things get foul. Keep them apart, keep the fan running, and add enough coir, and you’re fine.
Cassette toilets are the budget option. $100-$300. It’s a self-contained portable unit with a removable waste tank. You pull the tank out, carry it to a dump station or bathroom, empty it, and put it back. It’s not glamorous but it works and it takes up very little space. A lot of short bus builders go this route.
Standard RV flush toilets with a black water tank are the third option and honestly, most builders avoid this route. A black water tank adds weight, takes up space underneath (or inside), requires dump station access more frequently, and the plumbing is more complex. If you’re building a coach bus conversion and you have the space and the weight budget, sure. But for a typical skoolie, composting or cassette is the way to go.
How do you dispose poops and waste materials?
Alright so this is the question everyone wants to ask but some people feel weird about it. Let’s just get into it.
If you’re running a composting toilet, the solid waste decomposes over the course of a few weeks. When the solids bin is full, you dump it into a trash bag and throw it in a dumpster. Yes, really. It looks and smells like dirt at that point, not like what it started as. The liquid bottle gets dumped into any toilet, outhouse, or even on the ground in a remote area (urine is sterile and biodegradable). You dump the liquid every 2-3 days for a couple, maybe every day and a half if there are more people.
If you’re running a cassette toilet, you take the waste cassette to any RV dump station or even a public restroom and empty it. Most cassette toilets use a chemical treatment that breaks down waste and controls odor.
If you went the black water tank route, you’re doing the same thing every other RV in America does — pulling up to a dump station and draining your tank through a sewer hose. Dump stations are at most campgrounds, many gas stations, and truck stops. There are apps that map them out.
The reality of waste management in a bus is way less gross than people imagine. I talked to a couple who’d been full-timing in a skoolie for three years and they said emptying their composting toilet was less unpleasant than cleaning a cat litter box. Take that for what it’s worth.
OK now where do you get all of this water from to take a bath, wash your dishes, and to drink???
I love this question because you can feel the frustration in it. Like, all these pretty bus tours showing off their kitchens and showers and nobody explains where the water actually comes from.
Everything runs from the same freshwater tank. Your kitchen sink, bathroom sink, shower — all pulling from the same tank through the same pump. The only question is whether you trust your tank water for drinking.
Most builders install some kind of water filtration for drinking water. At the basic level, that’s a countertop Berkey filter or an under-sink two-stage filter. At the more serious level, people run a whole-house style sediment filter plus a carbon block filter plus UV sterilization. I’ve seen setups that cost $50 and setups that cost $600 and everything in between.
Here’s what I’d do and I think most experienced builders would agree. Put a basic sediment filter inline before your pump to catch any gunk in the tank. Then put a good carbon filter under the kitchen sink for your drinking water. That two-stage approach covers you for almost any water source you’ll encounter. If you’re really concerned about water quality, add a UV light after the carbon stage. But honestly, if you’re filling from potable water sources (campgrounds, city water spigots, grocery store water fill stations), a carbon filter is plenty.
A note about bathing specifically, since the question asks about taking a bath. You’re not taking a bath in a skoolie. I mean, I’ve seen one or two builds with tiny soaking tubs and they look miserable. You’re taking showers. Short showers. And if you embrace that early, the water system makes a lot more sense because you’re not trying to fill a bathtub out of a 50-gallon tank.
—
Putting It All Together: What the System Actually Looks Like
Let me walk through how all these pieces connect because I think seeing the full picture helps.
Your freshwater tank sits either inside the bus (under a seat, in a cabinet, under a raised bed platform) or outside mounted to the frame. A hose runs from the bottom of the tank to your 12V water pump. From the pump, a line splits and runs through PEX tubing to every fixture. One line goes to the water heater, and from the heater, hot water lines run to the fixtures in parallel with the cold lines.
PEX is the tubing of choice for almost every bus build. It’s the same flexible plastic pipe used in modern houses but it’s even better for buses because it handles vibration and flexing without cracking. It’s also freeze-resistant, which doesn’t mean it can’t freeze, but when it does freeze it’s less likely to burst than rigid pipe. PEX comes in red (hot) and blue (cold) so you can color-code your lines, and the fittings are either crimp, clamp, or push-fit. Push-fit (SharkBite style) fittings are the easiest for beginners, no special tools needed.
For hot water, you’re choosing between a tankless propane water heater ($150-$400) or a small tank-style heater ($200-$500). I’ve been looking into this a lot and the tankless option seems to win for most bus applications. It only fires when you turn on the hot water, so it doesn’t waste propane keeping a tank warm. The Camplux and Fogatti brands keep showing up in build threads. The downside is tankless heaters need a minimum flow rate to fire, so if you barely crack the faucet, sometimes the heater won’t kick on. Tank heaters don’t have that problem, but they take up more space and use more energy.
Gray water from your sinks and shower drains by gravity into a tank underneath the bus. This is where all the soapy water, food particles, and shower runoff goes. You dump it at an RV dump station or, depending on local regulations and what products you’re using, some people disperse it on the ground in appropriate areas. Using biodegradable soap matters here because you’re not just dumping it into a municipal sewer system.
Winterizing: The Part Nobody Wants to Think About
If you’re traveling to cold climates or storing your bus for the winter, you need to winterize your plumbing. I’m not going to pretend this is fun because it isn’t, but it’s straightforward.
The basic process is: drain all your tanks, open all your faucets, then pump non-toxic RV antifreeze through the entire system. You disconnect your water heater (don’t push antifreeze through it), hook the pump intake to a jug of antifreeze, and run each faucet until you see pink liquid coming out. Then you’re good.
In the spring, you reverse the process. Flush the lines with fresh water until the antifreeze is gone. Refill your tanks. Done.
The people who skip winterizing and then post about cracked fittings in April, I feel for them but also, this is a known thing. It takes an hour and costs about $15 in antifreeze. Just do it.
If you’re a full-timer who chases warm weather, you might never need to winterize. Plenty of people spend November through March in the southwest and never see a freeze. But if you’re stationary in the midwest or northeast over winter, this isn’t optional.
Related: Can You Put a Washer and Dryer in a School Bus?
Realistic Costs for a Complete Water System
I like putting real numbers on things because “it depends” isn’t helpful when you’re trying to build a budget. Here’s what a typical water system runs.
Freshwater tank (50-80 gallon): $100-$300. Prices vary a lot based on shape and material. Polyethylene tanks from places like Class A Customs or Amazon are on the cheaper end. Custom-shaped tanks cost more.
Gray water tank (30-50 gallon): $80-$200.
12V water pump (Shurflo or Flojet): $50-$100.
PEX tubing, fittings, and valves: $100-$200 for a full bus depending on how many fixtures you’re running.
Water heater (tankless propane): $150-$400.
City water inlet with pressure regulator: $30-$50.
Hoses, fill port, and miscellaneous fittings: $50-$100.
Composting toilet (if we’re including that): $900-$1,100 for a Nature’s Head or Airhead. Or $100-$300 for a cassette toilet.
Water filtration: $50-$200 for a basic two-stage setup.
Total without toilet: $560-$1,350. Total with composting toilet: $1,460-$2,450. Total with cassette toilet: $660-$1,650.
You can go cheaper if you’re resourceful. I’ve seen people build their own composting toilets for under $100 using a 5-gallon bucket system (look up “humanure handbook” if you want to go that route). And you can find tanks on Craigslist or Facebook Marketplace for way less than new.
You can also spend way more. Fancy water heaters, electronic tank monitors, multi-stage filtration with UV, recirculation pumps for instant hot water. Some builds I’ve seen have $3,000-$4,000 in their water system alone. But the core system, the stuff that actually matters for daily living, is under $1,500 for most people.
—
Water seemed like the most intimidating part of a bus build to me when I first started researching all this. All these tanks and pumps and lines and heaters and drains. But the more I looked into it, the more I realized it’s actually one of the more straightforward systems. It’s way less complicated than electrical, honestly. Water goes in a tank, a pump pushes it through pipes, it comes out your faucets, drains into another tank. That’s the whole thing.
The decisions that actually matter are tank size (don’t go bigger than you need because of weight), tank placement (inside if you’ll see freezing temps), and toilet type (composting wins for most people). Everything else is just plumbing, and if you can connect a garden hose to a sprinkler, you can connect PEX to a faucet. The fittings are actually easier.
Figure out your water system early in the build because it affects your floor plan, your weight budget, and where your drains need to go. But don’t overthink it. People with zero plumbing experience build functional water systems in buses every single day, and you will too.
cblkfp
3p2v50
b5ogax
9e8pm1