
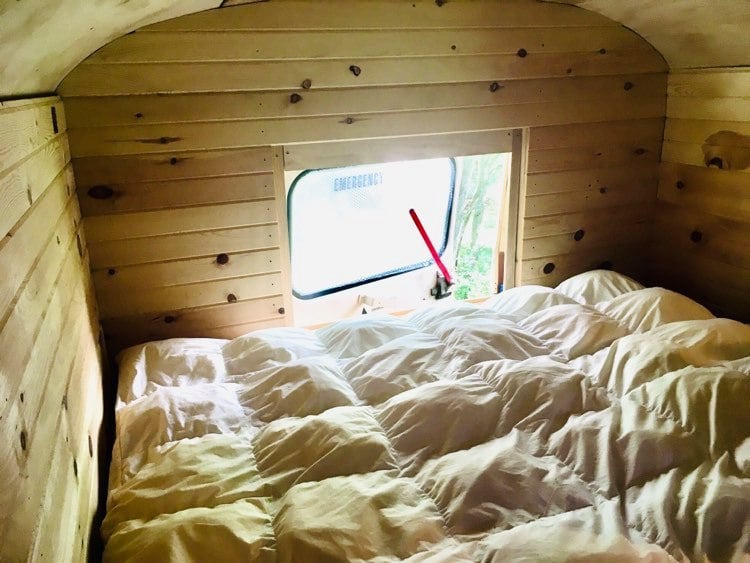
If there’s one part of a bus build that affects everything else, it’s the bedroom. Where your bed goes dictates your floor plan. How big it is dictates what’s left for everything else. And whether you sleep well on it dictates whether you actually enjoy living in a bus or just tolerate it. I spent a ridiculous amount of time on this topic because I kept finding people who nailed the kitchen, nailed the bathroom, and then slept on something terrible every night for two years. (See our guide on Can You Put a Bathroom in a School Bus? for more on this.)
This guide covers every major approach to skoolie bedrooms — where to place the bed, what mattress sizes actually fit inside a bus, fixed platforms, Murphy beds, convertible dinettes, bunks, loft beds, custom solutions, mattress types that hold up to bus living, under-bed storage design, framing a bed platform properly, running electrical near the sleeping area, privacy solutions for a vehicle with 20 windows, and how to deal with the ventilation and moisture issues that come with sleeping in a metal box. Whether you’re building for a couple, a solo traveler, or a family with kids who are going to outgrow everything you build, this is the stuff I wish someone had laid out for me in one place when I started planning.
Where Do You Sleep in a Bus Conversion?
This question comes up constantly from people who are just starting to think about bus life, and it’s a fair one. In a house, the bedroom is obvious. In a bus, you’re carving a sleeping area out of a metal tube that used to haul kids to school. There’s no master suite, no hallway to a back room. You’re picking a spot and building it yourself.
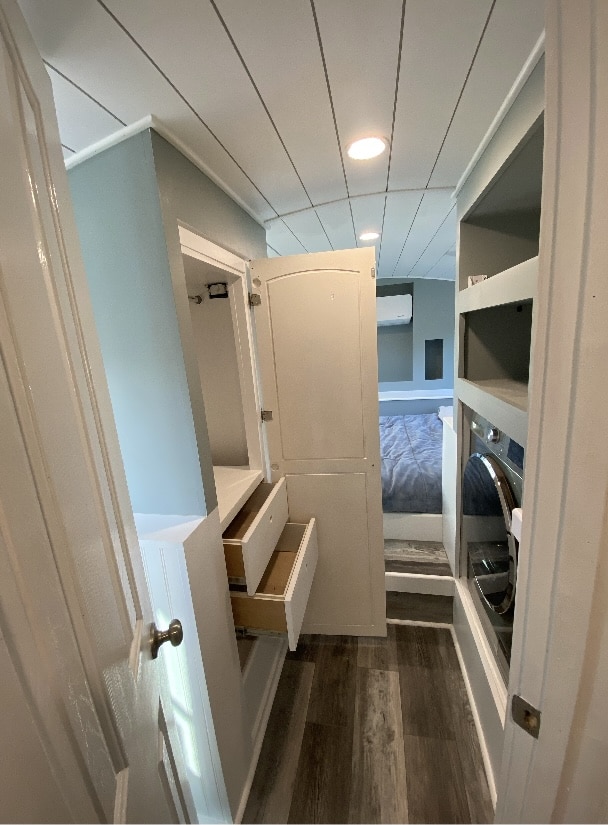
The three most common placements are the rear of the bus, somewhere in the middle, and up in a loft arrangement. Each one comes with trade-offs that ripple through the rest of your floor plan, and I learned pretty quickly that the placement decision has to happen early. Like, before you frame anything else. The bed anchors the layout. Everything else flows from where you put it. (See our guide on 7 Skoolie Floor Plan Ideas for Every Bus Size for more on this.)
Bed Placement: Rear, Mid-Bus, or Loft
Most skoolie builds put the bedroom in the rear of the bus, and there’s a reason it works so well. The rear gives you the most privacy, puts the bed as far from the driver’s area as possible, and usually has the widest uninterrupted floor space. In a rear-engine bus, there’s often a raised section over the engine compartment that naturally becomes a platform for the bed. You’re basically getting free height for under-bed storage without building anything extra.
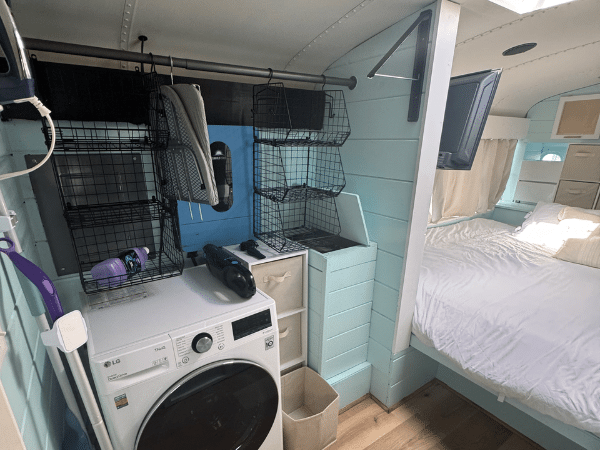
But rear placement isn’t always the right call. I was looking at a build last year where the guy put his bedroom in the middle of the bus, right between the kitchen and the living area. His reasoning was that he wanted the back of the bus for a workshop and gear storage, and honestly, it made total sense for his lifestyle. He was a mountain biker, and having that massive rear cargo area with a roll-up door he fabricated was more valuable to him than a private bedroom. (See our guide on How to Build a Skoolie Bathroom (Shower, Toilet, and Plumbing) for more on this.)
Mid-bus bedrooms work best with a Murphy bed or a convertible setup because a permanent bed in the middle of your floor plan creates a traffic flow problem. You’re walking around it all day. Some people solve this by raising the mid-bus bed high enough to walk under, which creates a sort of loft situation, but you need ceiling height for that. In a standard bus with 72-inch ceilings, it’s tight. You’d need about 40 inches of clearance underneath to walk through without ducking, which leaves maybe 28-30 inches above the mattress. Enough to sleep, not enough to sit up. (See our guide on 6 Best Flooring Options for a School Bus Conversion for more on this.)
Loft beds are the third major option, and they show up most often in builds where the owner raised the roof or bought a bus with naturally high ceilings. The idea is simple — put the bed up high, reclaim the floor space underneath for living. I saw one build where a couple put their queen mattress on a loft platform about 50 inches off the floor, right at the rear of a roof-raised bus. Underneath they had a full couch and a reading nook. It was genuinely one of the most livable small spaces I’d come across. But the guy told me he bumped his head getting in and out of bed about once a week for the first month before he learned the muscle memory. So there’s that.
“Why not put the bathroom at the very back and the bedroom in the middle?”
Someone asked this in a build video comments section and it’s actually a layout that works for some people. The argument is that plumbing is simpler if the bathroom is near the back where you can run drain lines straight down to the tanks, and the bedroom gets a more central, protected location. I’ve seen a handful of builds do this successfully. The trade-off is privacy — your bedroom is sandwiched between the living area and the bathroom, with foot traffic on both sides. For a solo build or a couple without kids, it can work. For a family where someone’s always walking past at 2 AM, it’s less ideal.
One thing I didn’t think about until I saw someone bring it up in a build forum — bed placement also determines your emergency exit access. If your bed blocks the rear emergency door, that’s a safety issue. Make sure you can still get to it, even if it means hinging part of the bed platform.
Standard Mattress Sizes That Fit (And Ones That Don’t)
“How long is your bed? Is it custom made to fit the bus or is it a standard length?”
This is one of the most common questions I see, and I get it. Nobody wants to spend $800 on a custom mattress if a standard one fits just fine. The good news is that a standard queen fits in most full-size school buses. The interior width of a typical full-size bus runs about 90 inches wall to wall. A queen mattress is 60 by 80 inches. Run it sideways and the 80-inch length fits with about 5 inches of clearance per side. That’s enough room for a thin shelf or just a little breathing room so the mattress isn’t jammed against the walls.
Here’s where the sizes break down:
- Twin (38 x 75): Fits anywhere, good for bunks, solo builds, or kids
- Twin XL (38 x 80): Same width, 5 inches longer, worth it for taller people in bunk setups
- Full (54 x 75): Works sideways in most buses, the go-to for short bus builds
- Queen (60 x 80): The most popular choice for couples in full-size buses, fits sideways with room to spare
- King (76 x 80): Technically fits in a full-width bus but kills your walkway, I’d only consider this in a wide-body or flat-nose
- RV Short Queen (60 x 75): 5 inches shorter than standard, exists specifically for tight spaces, surprisingly comfortable if you’re under 6 feet
Short buses throw a wrench in things. A lot of them have interior widths closer to 72-76 inches, which means a queen running sideways is too long. Your options are a full-size mattress, a short queen, or a custom cut. Custom foam mattresses from companies like DIY Mattress or FoamByMail let you specify exact dimensions. I found most people pay between $400 and $800 for a decent custom cut, which isn’t cheap, but it’s the only way to get a perfect fit in a nonstandard space.
If you’re running the bed lengthwise instead of sideways, that eats significantly more of your floor plan. A queen running lengthwise takes up 80 inches of bus length instead of 60. That’s almost 7 feet of your bus dedicated to the bed. In a 40-footer it’s manageable. In a shorty, it’s brutal.
Framing the Bed Platform
This is one of those things that seems straightforward until you actually start building and realize the bus isn’t cooperating. A flat floor in a house is flat. A bus floor has ribs, humps over the wheel wells, and sometimes a noticeable slope toward the rear. I talked to a builder once who assumed the floor was level, framed everything square, and ended up with a platform that rocked like a seesaw. Had to shim the whole thing after the fact.
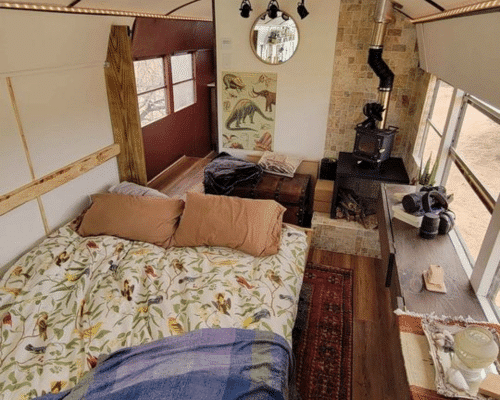
The typical approach is a frame made from 2×4 or 2×6 lumber, depending on the height you want. 2x4s give you about 20 inches of platform height if you stack a horizontal frame on vertical legs. 2x6s get you closer to 24-26 inches, which is the sweet spot for serious under-bed storage. I’ve seen a few builds go with steel tube framing — square tubing welded into a frame and bolted to the bus ribs. It’s stronger and takes up less space than lumber, but you need a welder and you’re adding weight.
The critical thing is how you attach the frame to the bus. You’ve got three connection points to work with: the floor, the walls, and sometimes the ceiling if you’re building a loft. For the floor, lag bolts through the bus floor steel work, but drill pilot holes and use some kind of sealant underneath to prevent rust around the penetration. For the walls, you’re bolting into the bus ribs, the vertical steel members that give the bus its structure. Those ribs are spaced at roughly 24-inch intervals but not always consistently, so measure your actual bus, not a diagram.
Some builders run a ledger board along each wall, bolted to every rib it crosses, and then attach the platform frame to the ledger boards. This spreads the load across multiple ribs instead of concentrating it. I like this approach because it’s also more forgiving — if one rib connection loosens up from road vibration, the others still hold.
One mistake I kept reading about — people building the platform tight to the walls without leaving any gap. The bus flexes when it drives. The walls move slightly. If your platform is wedged hard against both walls, either the platform or the wall panels are going to crack. Leave a quarter inch of gap on each side. You can cover it with trim later.
For the surface, the debate that never dies is slats versus solid plywood. Every builder I talked to who’d been living in their bus for more than a year said the same thing — slats. Solid plywood traps moisture between the mattress and the wood, and in a bus where temperature swings cause condensation constantly, that’s a direct path to mold. Slats let air circulate underneath the mattress. It’s such an easy thing to do and it prevents so many problems. Space them about 2-3 inches apart and use 1×4 boards. Some people use bed slat kits from IKEA and just cut them to width.
Fixed Platform Beds
The fixed platform bed is the workhorse of skoolie builds. Build a frame, throw a mattress on it, done. No daily setup, no folding, no converting. You get out of bed in the morning and the bed is still a bed when you come back at night.
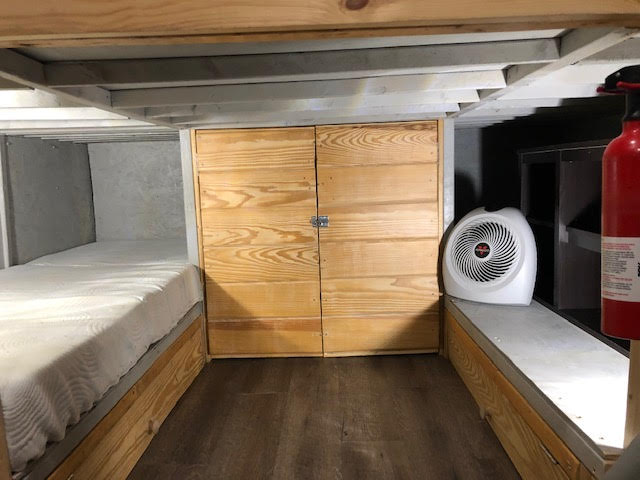
I like fixed platforms because they’re structurally simple and they give you the most storage underneath. Most people build with 2×4 or 2×6 lumber, bolted to the bus walls and sometimes to the floor. The platform height usually lands between 18 and 30 inches depending on how much garage space you want underneath. At 24 inches, you’ve got room for big Rubbermaid totes, toolboxes, camping gear, all the stuff that doesn’t have a home anywhere else in the bus.
Now, there’s a trade-off with a fixed bed that nobody sugarcoats. In a full-size bus, giving up the rear 6-8 feet to a permanent bed is fine. You’ve still got 30+ feet of living space. In a short bus, that same bed is eating 25% of your usable square footage. I read through a thread once where a couple converted a 24-foot short bus with a fixed queen in the back and within six months they tore it out and built a Murphy bed because they felt claustrophobic during the day. The bed was great for sleeping and terrible for living.
Ceiling height matters too. If your bus has a stock 72-inch ceiling and you raise the platform 24 inches, you’re down to 48 inches of headroom above the mattress. Fine for sleeping, but you can’t sit up comfortably. I’d keep the platform at 18-20 inches in a stock-height bus. If you’ve raised the roof, you’ve got more room to play with.
“How do you change bed sheets in an area that tight?”
This came up in a build video and I laughed because it’s the kind of thing you never think about until the first laundry day. If your bed is wedged wall to wall with 3 inches of clearance on each side, you can’t just walk around the bed flipping sheets like you would at home. Most people end up standing at the foot of the bed, leaning over, and wrestling with the fitted sheet from one end. A few builders I read about deliberately left 8-10 inches on one side of the bed specifically so they could squeeze between the mattress and the wall for sheet changes. It sounds minor until you’re doing it every week. Some people use sleeping bags or duvets instead of tucked sheets entirely, just because it’s easier. No judgement. Practicality wins in a bus.
Murphy Beds and Wall Beds
Murphy beds are probably my favorite solution for short and medium buses, and the mold question is the one everybody asks eventually. I talked to a guy at a meetup who had a Murphy bed in a 28-foot bus, and the way he described it made me understand why people go through the extra effort. During the day, the bed folds flat against the wall and he had a full living room. At night, he’d pull it down in about 30 seconds and it was a completely normal queen bed. Two rooms in the space of one.
But here’s the thing. When that bed is folded up against the wall, whatever moisture was on the mattress surface is now pressed between the mattress and the wall panel. You slept on it for eight hours, your body put off heat and moisture all night, and now you’re trapping all of that against a surface where it can’t evaporate. Do this daily for a few months and you’ve got mold.
The fix is airflow. Use slats for the bed platform surface instead of solid plywood. When the bed is in the upright position, those gaps between the slats let air move through and the mattress can actually dry out. If you need a solid backing for structural reasons — some Murphy bed mechanisms require it — drill a grid of 1-inch ventilation holes every 6-8 inches across the entire panel and put a breathable mesh over it. Not plastic. Something that lets air through.
The hardware itself runs about $200-400 for a decent set of gas struts or spring mechanisms. The tricky part in a bus is anchoring. You’re not bolting into wall studs like a house. You’re bolting into bus ribs, which are spaced at irregular intervals and aren’t always where you need them. I’ve seen builders weld steel tabs to the bus ribs to create solid anchor points, which is the strongest approach. Lag bolts into a wooden wall frame work, but the constant folding and unfolding puts stress on those connections over time and they can loosen.
And one thing the guy at the meetup told me twice, so I’ll pass it along — strap the mattress to the frame. When you fold a Murphy bed up, gravity wants to pull the mattress out. Without straps or a retention bar, you fold the bed up and the mattress slides right onto the floor. It’s one of those obvious things that you don’t think about until it happens.
Convertible Dinette Beds
The convertible dinette is the other big space-saving move. During the day it’s a table with bench seats. At night, the table drops down to fill the gap between the benches, the cushions rearrange, and it becomes a bed. In theory, it’s brilliant.
In practice, it depends entirely on whether this is your primary sleeping surface or a secondary one. For a guest bed or a kid’s sleeping area, a dinette conversion is great. You use it as a table 90% of the time and convert it a few nights a month. But if it’s where you sleep every single night, you’re setting up and tearing down your bed 365 times a year. I’ve talked to a couple people who did this and they both said the same thing — they were fine with it for about two weeks and then started leaving it in bed mode all the time, which defeats the purpose.
A typical dinette converts to roughly a full-size sleeping area, about 54 by 75 inches. You’re not getting a queen out of a standard dinette unless you build an oversized one, and at that point you’re not really saving space anymore. For a solo traveler or a couple who sleeps close, it works. For two adults who like to spread out, it’s gonna feel tight every night.
The cushions are the hardest part to get right. They need to be firm enough to sit on comfortably during the day and soft enough to sleep on comfortably at night. Those are kind of competing goals. Most people end up with cushions that are adequate at both but excellent at neither. High-density foam helps — at least 4 inches thick, 2.0 lb density or higher. Anything less and you’ll feel the plywood underneath by the second night. Some builders keep a separate mattress topper rolled up somewhere and throw it on during bed conversion, which actually solves the problem pretty well.
Bunk Beds and Loft Beds for Kids
“The question is: children go through growth spurts, and these bunk beds will not fit the growing kids”
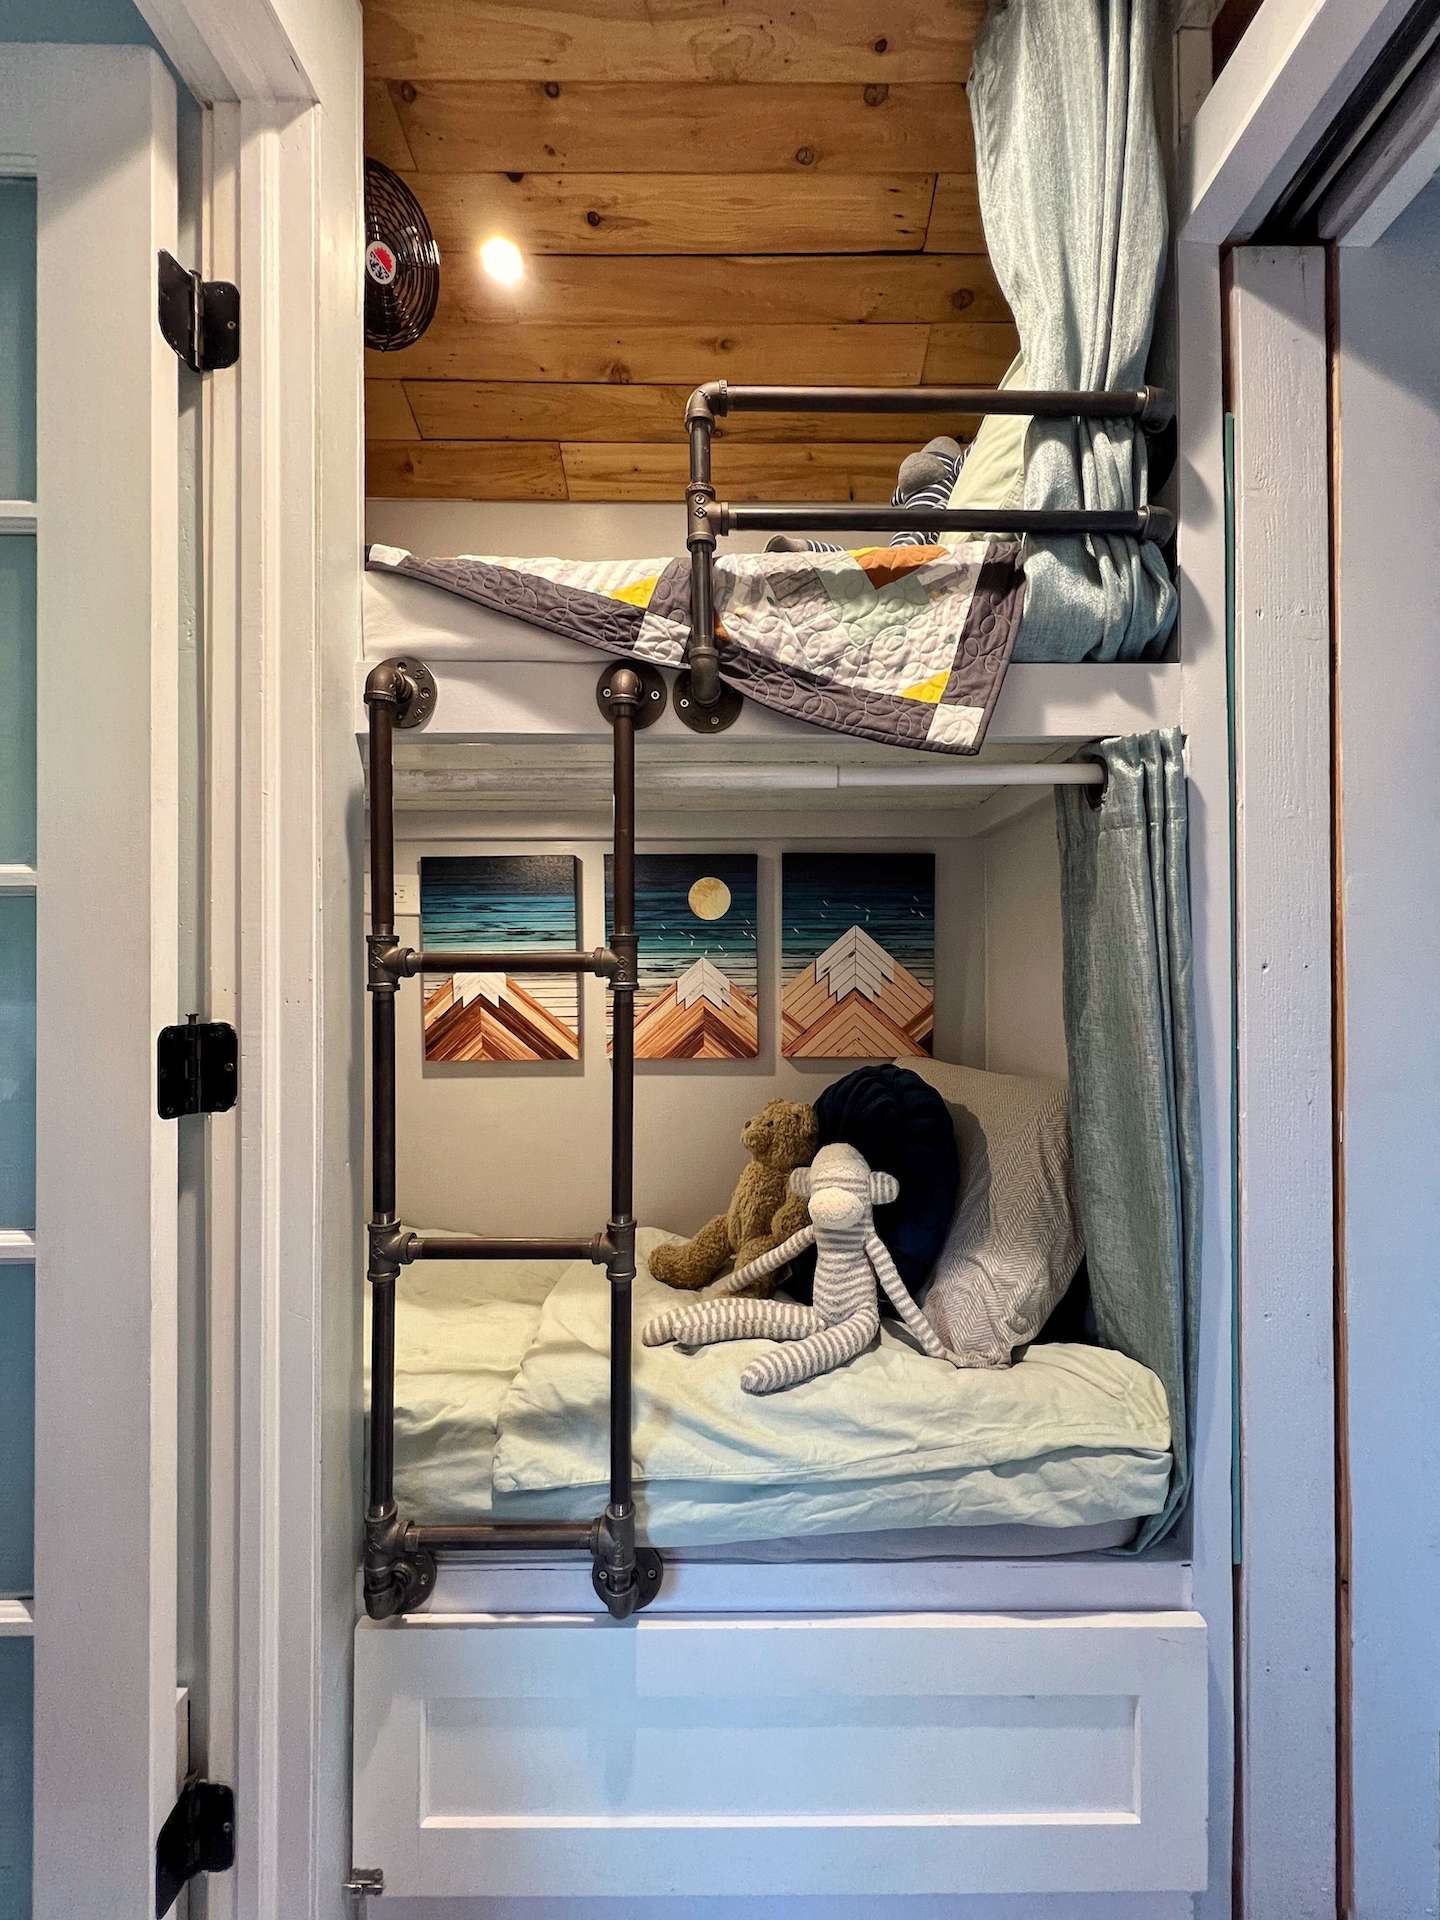
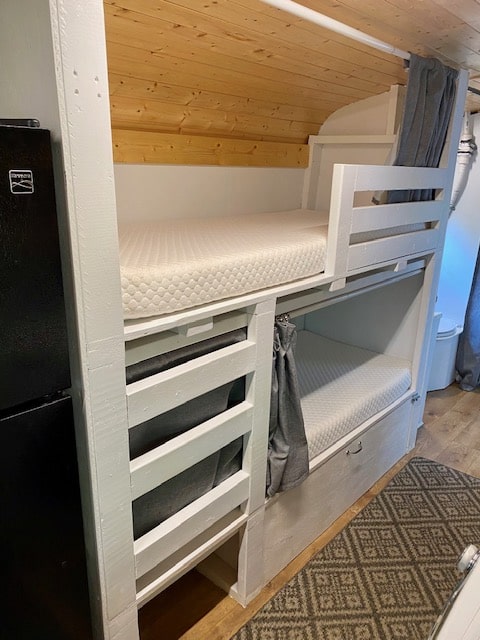
Alright, this is the one that gets families stressed out, and I totally understand why. You’re building a sleeping space for a person who is physically going to be a different size in two years. Most skoolie bunks are somewhere between 24 and 30 inches wide and 60 to 72 inches long. Perfect for a kindergartner. Fine for an 8-year-old. By the time they’re 12 or 13, they’re hanging off the edge and the bunk that felt like a bedroom now feels like a shelf they’ve been crammed onto.
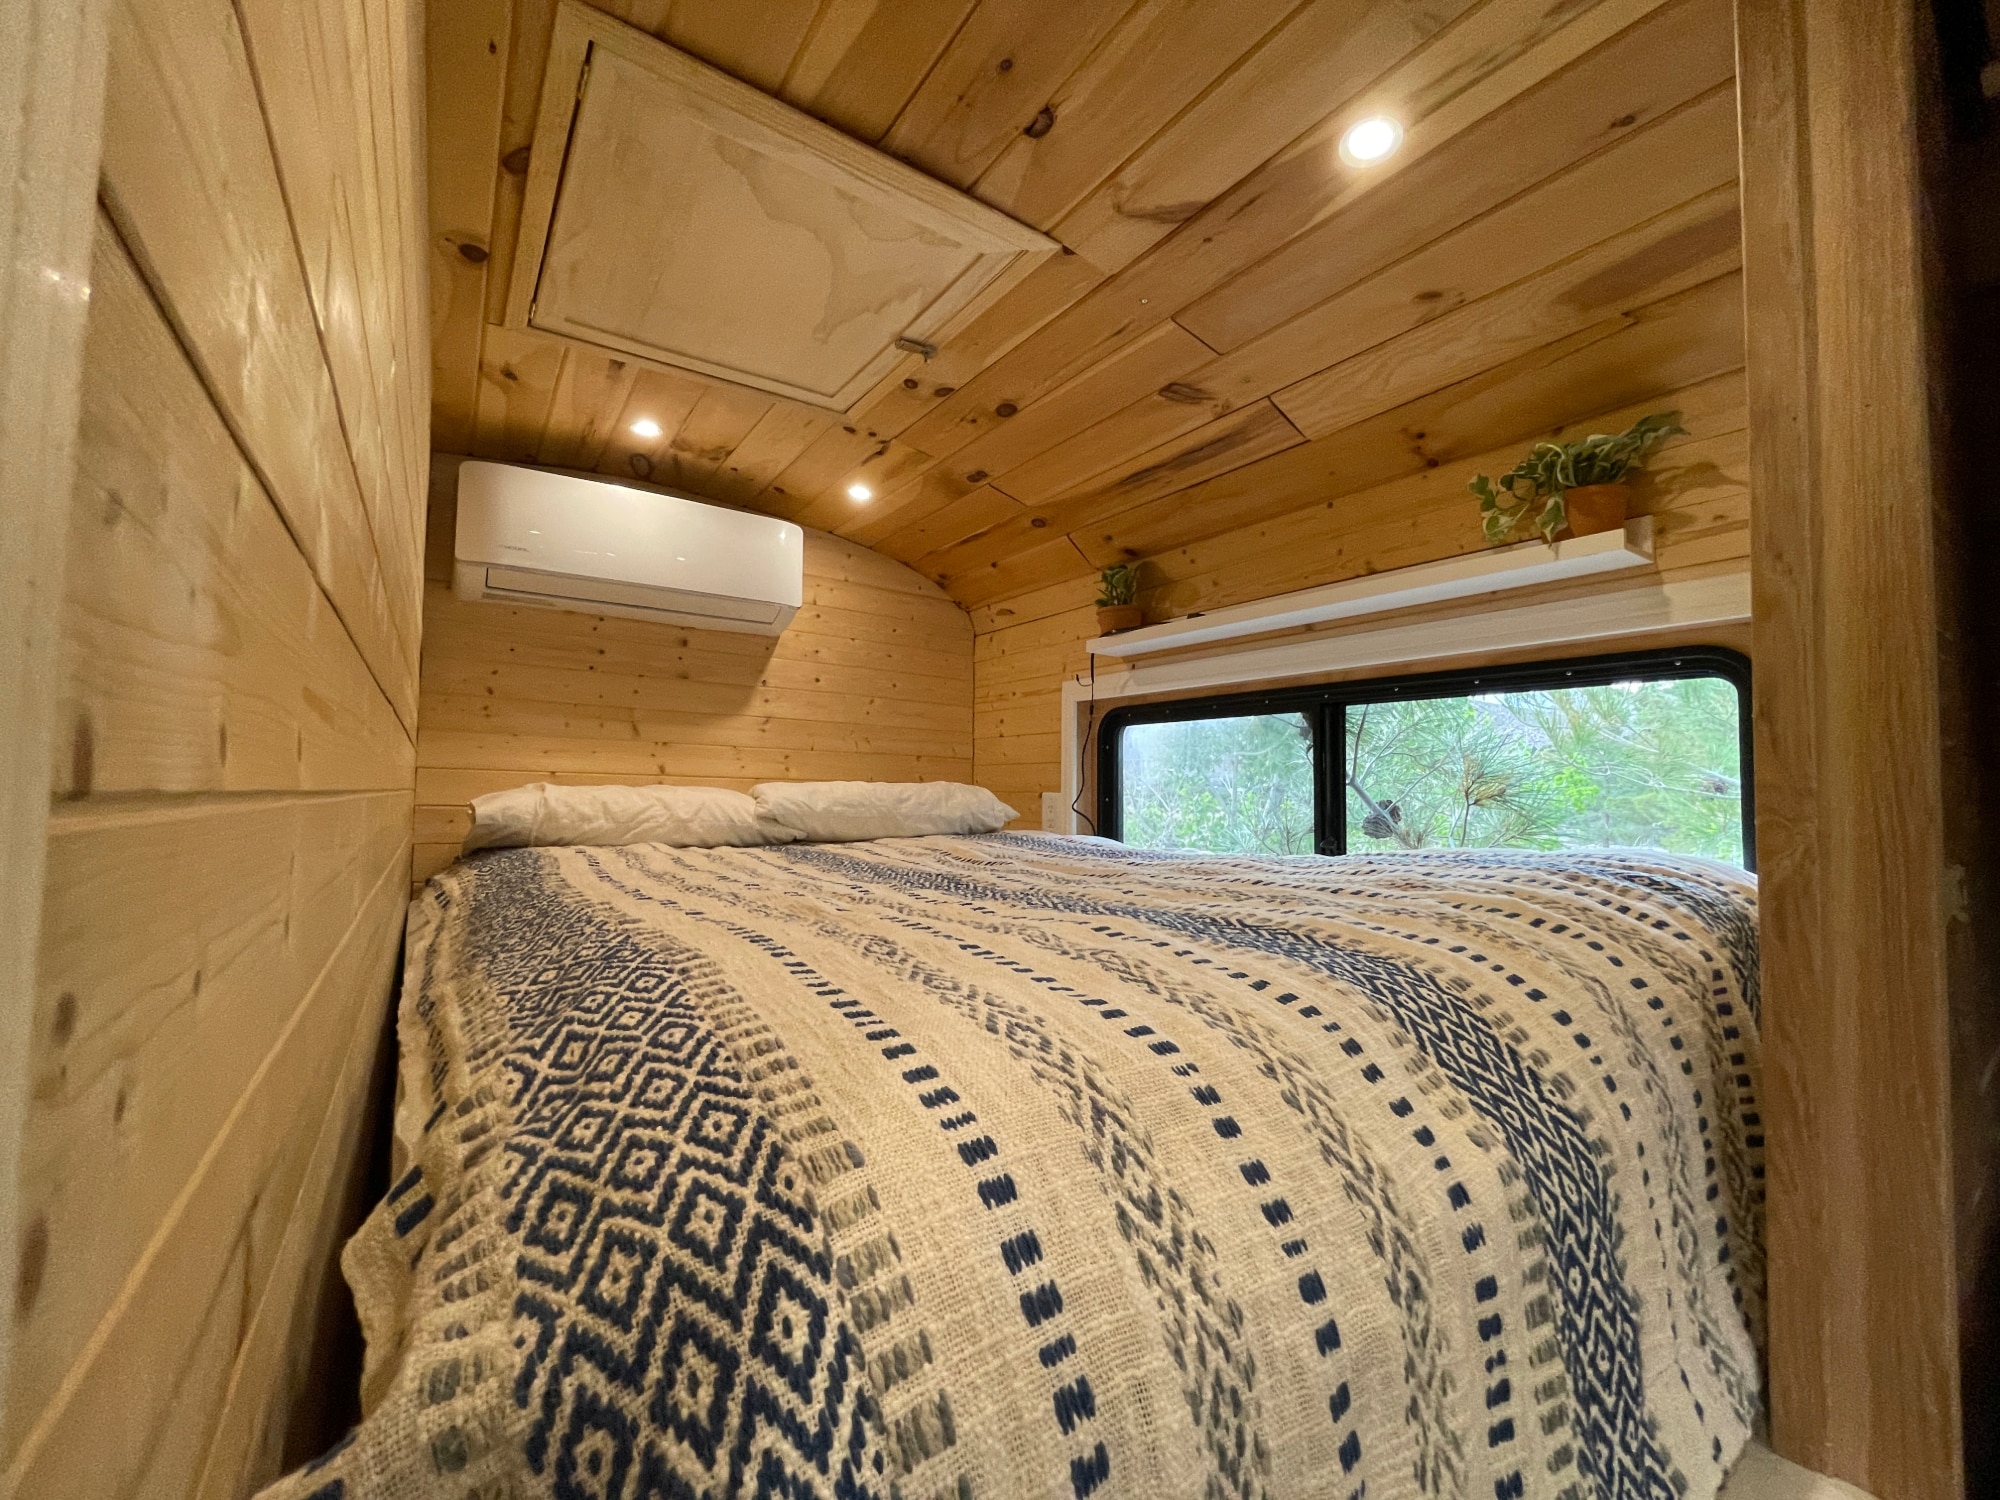
The families that handle this best, from what I’ve seen, are the ones who design for change from day one. Instead of building permanent enclosed bunks, they use a modular framing system. The bunk platforms bolt to the wall ribs and to each other with bolts, not screws. When the kids outgrow the configuration, you reconfigure. Two small bunks become one larger sleeping platform. Three stacked bunks become two with more headroom. Bolts mean disassembly doesn’t mean destruction.
The other approach I keep running into is just building to adult twin size from the start — 38 by 75 inches. Let the smaller kids have extra room. They’re not going to complain about having too much bed. The downside is that adult-size bunks need more wall space, so you might fit two instead of three. But those two will last until the kids are grown, which is worth it in the long run.
“What is your plan for when the littles need larger beds?”
I was in a skoolie group online and a mom posted about her family’s approach, which I thought was really smart. They built the bunk frames with a French cleat system on the walls, so the platforms could slide up or down to adjust the headroom per bunk as the kids grew taller. When their oldest hit a growth spurt, they just slid his bunk down a few inches and raised the one below it. Took about twenty minutes.
Some families just accept that a full rebuild of the sleeping area is coming at the 5-year mark. Kids’ needs change, the family dynamic changes, and what works for toddlers is just not going to work for teenagers. If you build with screws and removable panels, a bunk area rebuild is a weekend project. Not ideal, but realistic. A mom in another thread was pretty blunt about it — she said they planned on the bunks being temporary from the day they built them, and knowing that upfront took all the pressure off trying to build something “forever.” I appreciated that honesty.
“What about ventilation in those enclosed bunk beds?”
This is the one that trips up so many family builds. You see these gorgeous enclosed bunks on Instagram with curtains, reading lights, little shelves, the whole deal. They look amazing in photos. But a kid sleeping in an enclosed bunk is generating moisture from breathing and body heat all night long. Small space, no air exchange, and by morning the walls of that bunk are wet with condensation. Do that every night for a few months and you’ve got mold growing in your kid’s sleeping space.
Every bunk needs airflow, period. At minimum, install a small 12V fan in each bunk. Computer cooling fans work perfectly for this — they’re quiet, they draw almost no power, and they move enough air to prevent that stagnant humidity pocket from forming. Leave the front of the bunk open or use fabric curtains instead of solid doors. If the bunk is against an exterior bus wall, a small adjustable vent to the outside gives you actual fresh air exchange, not just recirculated cabin air.
I found that the best bunk designs were honestly the ones that looked the least polished. Open fronts. Mesh panels on the sides instead of solid wood. A gap at the top where warm moist air can rise and escape into the main cabin. They don’t photograph as well for the Instagram tour, but the kids sleeping in them are actually comfortable and not waking up to damp sheets. That’s the priority, or at least it should be.
One more thing on bunk ventilation — if you’re running a MaxxAir fan on the roof, position it so the airflow pattern pulls air through the bunk area. Some builds put the fan at the opposite end of the bus from the bunks and then wonder why that corner stays humid. Think about the path the air takes through the whole bus, not just the main cabin.
Custom-Built Beds and Solutions
Sometimes nothing off the shelf works and you just have to build something weird. I mean that in the best way possible. Some of the most functional sleeping setups I’ve come across in skoolie builds are things you’d never find in a furniture store.
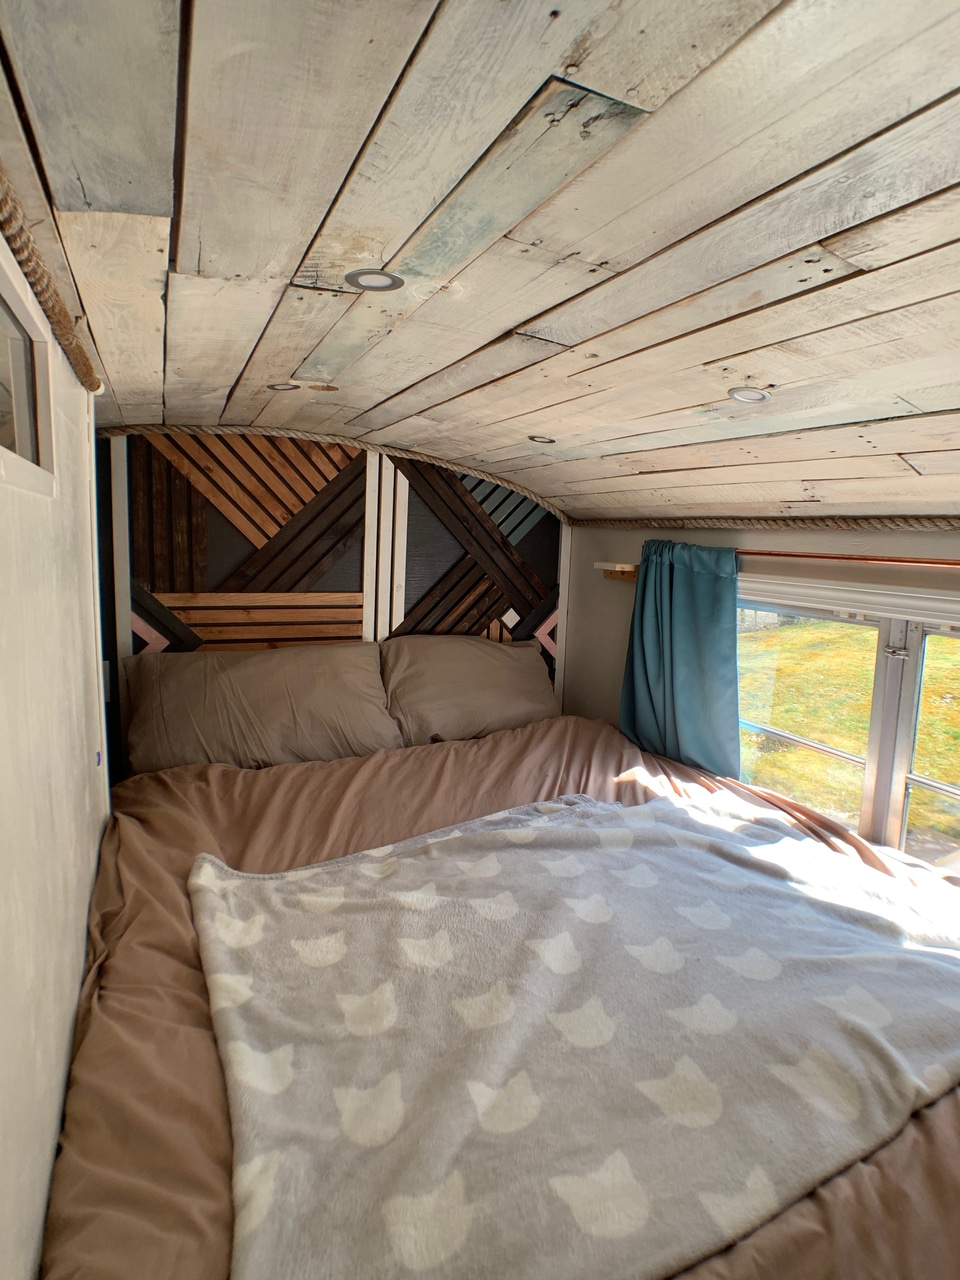
One guy built a bed that ran diagonally across the rear of a short bus because neither the width nor the length could fit a standard mattress in any orientation. Diagonal gave him an extra 8 inches he didn’t have otherwise, and he had a custom foam mattress cut to a trapezoidal shape. Wild looking, but he slept great on it.
I’ve also seen sliding bed platforms that pull out from under a raised living area, kind of like a trundle bed. During the day the platform tucks away and you’ve got a full room. At night you pull it out and it extends into the walkway. Needs a clear floor path to work, but for a solo traveler it’s a clever use of space.
Hammocks keep coming up in bus build forums too, and I’ll be honest, I initially thought it was a joke. But there’s a small group of people who hammock sleep in their buses full-time and swear by it. The hammock takes up zero floor space when it’s not in use, it doesn’t need a frame or platform, and it actually handles bus movement better than a flat bed because it sways instead of transmitting vibration. The catch is that you need solid anchor points on both sides of the bus, and not everyone can sleep comfortably in a hammock long-term. It’s a love-it-or-hate-it thing.
L-shaped beds, beds that fold up against the ceiling, beds built into raised platforms with stairs — people get really creative when they’re working with 80 square feet. The common thread in all the successful custom builds I’ve seen is that the builder measured everything three times before cutting anything. In a bus, an inch of error means the mattress doesn’t fit, the drawer doesn’t open, or the platform doesn’t clear the wheel well. There’s no margin.
Mattress Types for Bus Living
Not every mattress works well in a bus, and I learned this the hard way through other people’s mistakes. The three things that matter most are weight, moisture resistance, and how well it handles vibration.
Traditional innerspring mattresses are mostly a no-go. They’re heavy, which matters when you’re watching your GVWR. They’re tall, which eats into ceiling clearance. And the metal coils don’t love constant vibration. Over a year or two of driving, the springs fatigue faster than they would in a house, you get squeaks, you get soft spots. The coils can also rust if moisture gets to them, and in a bus, moisture gets to everything eventually.
Memory foam is the most popular choice and I understand why. It’s lightweight compared to springs, it conforms to an uneven platform surface without complaining, it doesn’t squeak, and you can get it in any thickness from 4 to 12 inches. For a bus, 6-8 inches of medium-firm memory foam is what most people settle on. Under 6 and you feel the platform through it. Over 8 and you’re sacrificing ceiling height you probably don’t have.
Latex foam is the premium option. More expensive, usually $600-1,200 for a queen, but it breathes better than memory foam, sleeps cooler, and is naturally antimicrobial, which in a bus is a genuine advantage, not just a marketing bullet point. Latex also bounces back faster, so if you hate the sinking feeling of memory foam, latex might be worth the money. I talked to a full-timer in Colorado who switched from memory foam to latex after a year because the memory foam was holding moisture and developing a smell. She said the latex fixed both problems immediately.
Whatever you choose, put a breathable moisture barrier between the mattress and the platform. Not a plastic sheet — that traps moisture just as effectively as no airflow. A breathable mattress protector or a moisture-wicking pad, the kind you can find for $30-50 online, lets air through while keeping liquid moisture off the wood. Pair that with a slatted platform and you’ve handled 90% of the mattress moisture issue.
And I’ll pass along the warning I’ve read from at least three different people now — if you’re buying a mattress that ships compressed in a box, make sure you can get the box through your bus door before you open it. Once those foam mattresses expand, there is no putting them back. One guy opened his on the ground next to the bus and then couldn’t fit the expanded queen through the emergency exit. He cut it down with an electric knife. Don’t be that guy. Measure the box, measure the door, do this before you order. (See our guide on Is a Propane or Electric Stove Better for a Skoolie? for more on this.)
Under-Bed Storage
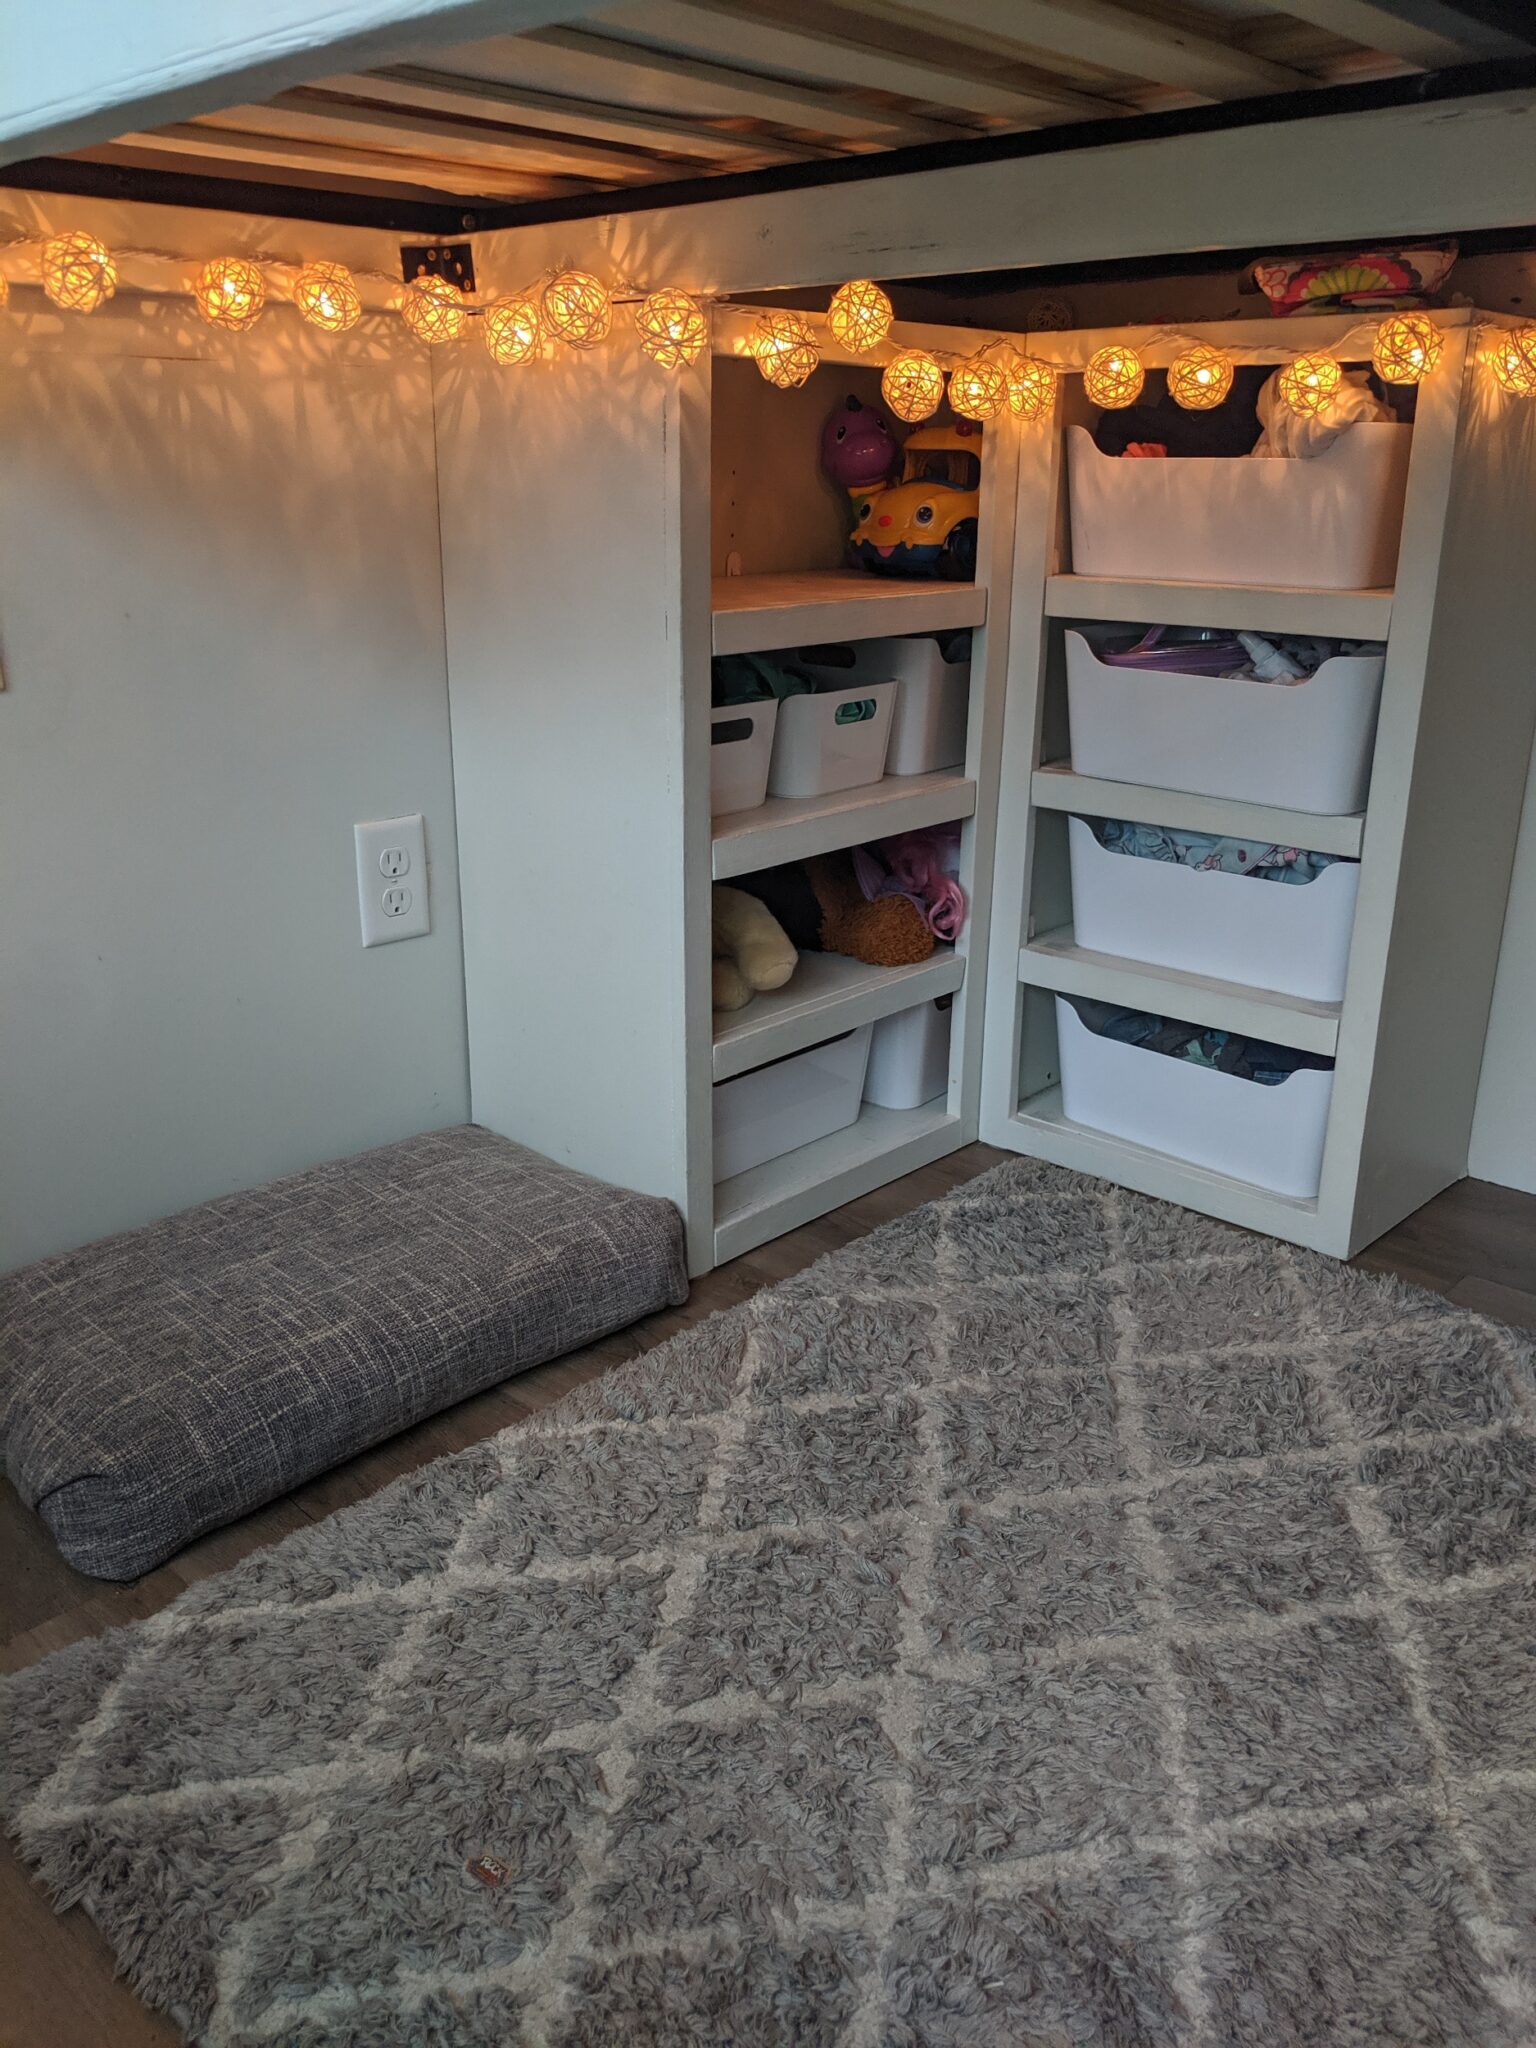
This is where the fixed platform bed really earns its place in a bus. That 18-30 inches of space under the platform is some of the most valuable real estate in the entire build. I’ve seen people store everything from tools and camping gear to spare water containers and even a washer-dryer combo under there.
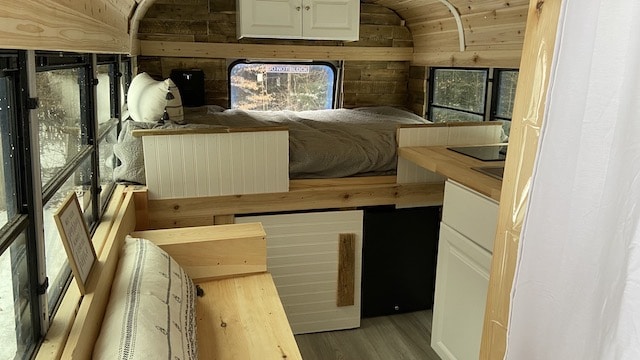
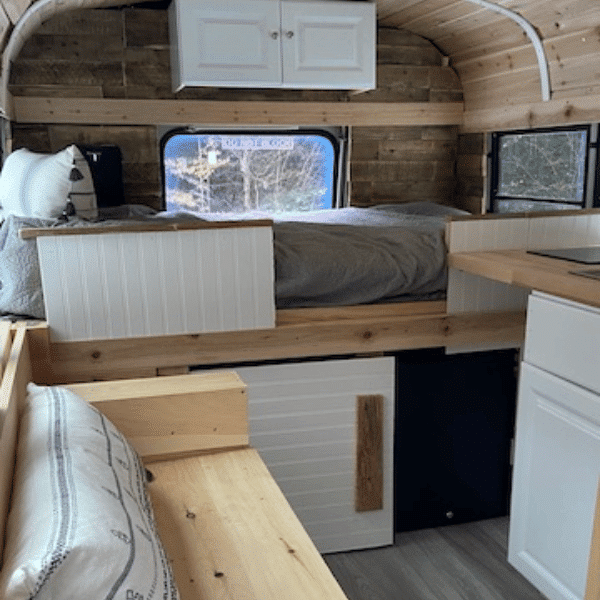
The two main approaches are open garage style and divided compartments. Open garage means the entire area under the bed is one big open space, usually accessed by lifting the mattress and platform panels or through a side opening. It’s flexible — you can throw anything in there — but it gets messy fast and things slide around while driving.
Divided compartments are more work to build but way more functional for daily life. Drawers that pull out from the side of the bed are probably the most popular approach. Heavy-duty drawer slides rated for at least 100 pounds, because you’re going to load these things up. I’ve also seen builds with hinged doors on the side of the bed frame that open to reveal shelved cubbies, almost like a dresser built into the bed.
The thing most people don’t think about until they’re on the road is securing the contents. Everything under that bed needs to stay put while you’re driving. Bungee nets across the top of open storage areas, latching drawers, non-slip shelf liner on every surface. I read about a couple who hit the brakes hard and a cast iron skillet stored under the bed slid forward, punched through the side panel of the bed frame, and ended up in the hallway. Secure your stuff.
If your bed platform has a hinged top that lifts up for access, add gas struts to hold it open. You do not want to be reaching into the storage area with a heavy platform panel balanced on your head. That’s a recipe for getting clocked. Gas struts are like $15 a pair and they turn a sketchy situation into an easy one.
One design I thought was really clever — a builder ran his bed platform all the way to the back door of the bus, then built the platform so the rear section hinged up from the back. He could open the bus’s rear emergency door, swing up that section of the platform, and load heavy gear directly from outside the bus instead of hauling it through the interior. Bikes, generators, coolers, all loaded from the back. That’s the kind of design thinking that makes bus life actually work day to day.
Electrical Near the Bed
“My only question is how it feels sleeping above 3000 watts of power”
This came up on a build video where someone had mounted their battery bank and inverter directly under the bed platform. It’s a common setup because the space under the bed is the biggest open area in most buses, and batteries are heavy so you want them low. But the comment raises a real concern and I think it’s worth addressing head on.
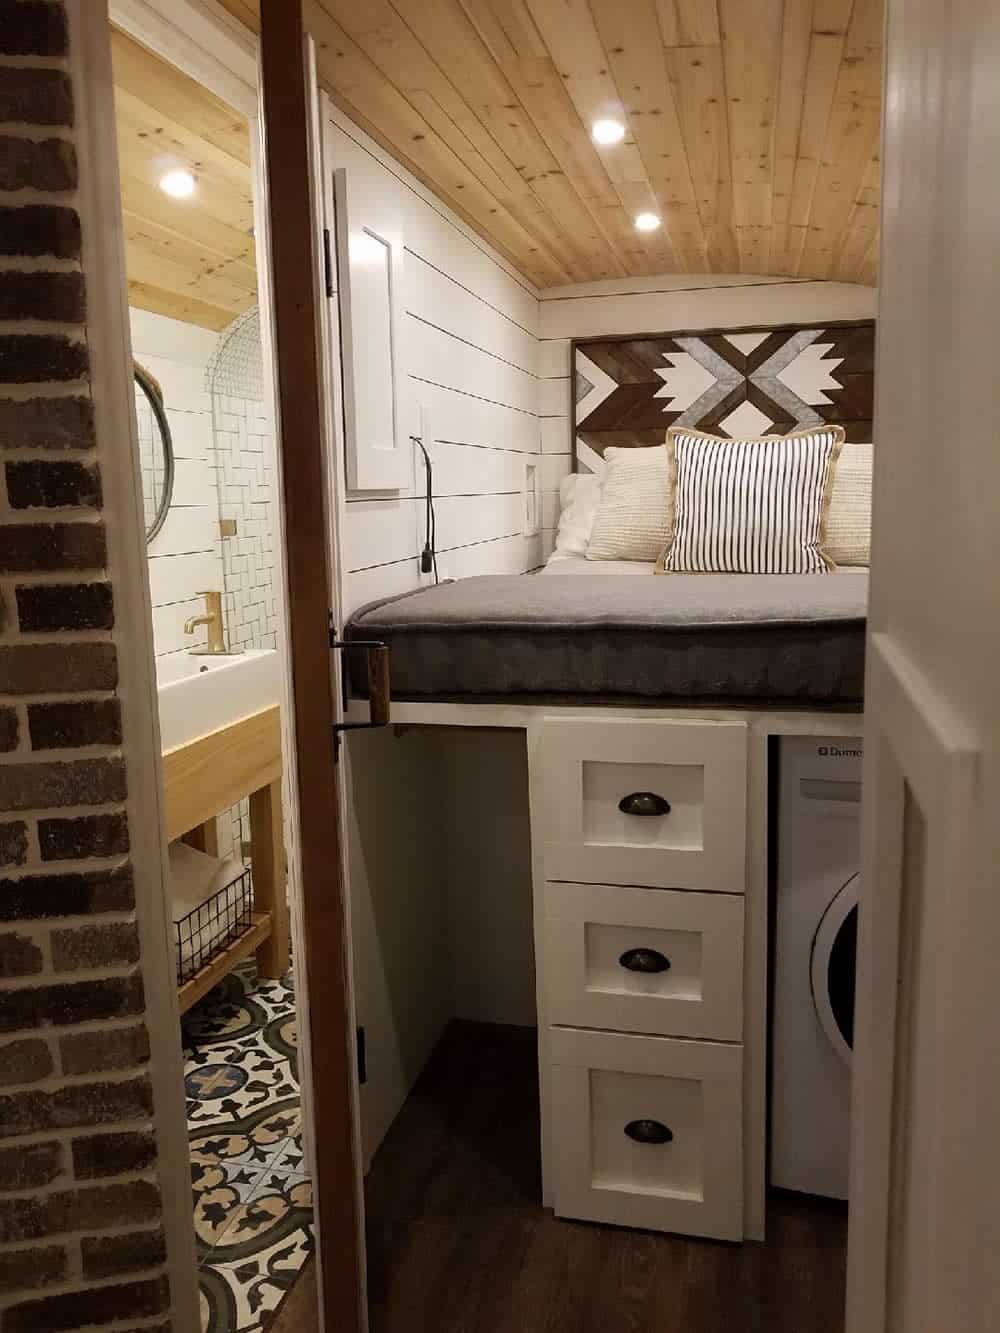
First, the fire risk. Lithium batteries are safe when they’re properly installed with a BMS (battery management system) and fused correctly. The BMS monitors every cell for overcharge, over-discharge, and temperature. If something goes out of range, it shuts down. That said, “properly installed” is doing a lot of work in that sentence. If you’re going to sleep above your battery bank, make sure the wiring is correct, the fuses are rated properly, and the BMS is a quality unit, not the cheapest one on Amazon. I wouldn’t lose sleep over a well-built system. A poorly built one, yeah, that would keep me up.
Beyond batteries, most people want USB outlets and reading lights near the bed. This is such a small thing but it makes a huge difference in daily comfort. Run a 12V line to each side of the bed and install USB charging ports at headboard height. You can get 12V USB sockets that flush-mount into a wall panel for about $8-12 each. I’d put at least two — one per side if it’s a couple’s bed.
For reading lights, 12V LED puck lights or flexible gooseneck lights work great. Wire them to a switch within arm’s reach of the pillow. Nothing fancy. The point is that you shouldn’t have to get out of bed to turn off a light or charge your phone. In a bus where every task involves more steps than it would in a house, these small conveniences add up fast.
If you’re running 120V outlets near the bed for things like a CPAP machine — and I’ve seen this come up multiple times in forums — make sure the wiring is up to code and the outlet is a GFCI if it’s anywhere near a potential moisture source. A CPAP user in one of the groups I follow said this was the single most important detail of his entire build. Without reliable power at the bedside, bus life wasn’t an option for him.
One more thing. If you’ve got wiring running through or near the bed frame, use conduit or at minimum secure the wires with clips so they can’t chafe against metal edges. Vibration moves everything in a bus, slowly, over thousands of miles. A wire that’s resting against a sharp edge of a steel rib today will have worn through its insulation in six months. I’ve read enough electrical fire stories in bus build groups to take this seriously.
Privacy Solutions for the Bedroom
“How do you shade the windows at night for privacy?”
“What do y’all do for privacy?”
Privacy in a bus is a whole different challenge than in a house, because you’ve got windows everywhere and the walls are thin. The bedroom area especially needs some thought because nobody wants to feel like they’re sleeping in a fishbowl.
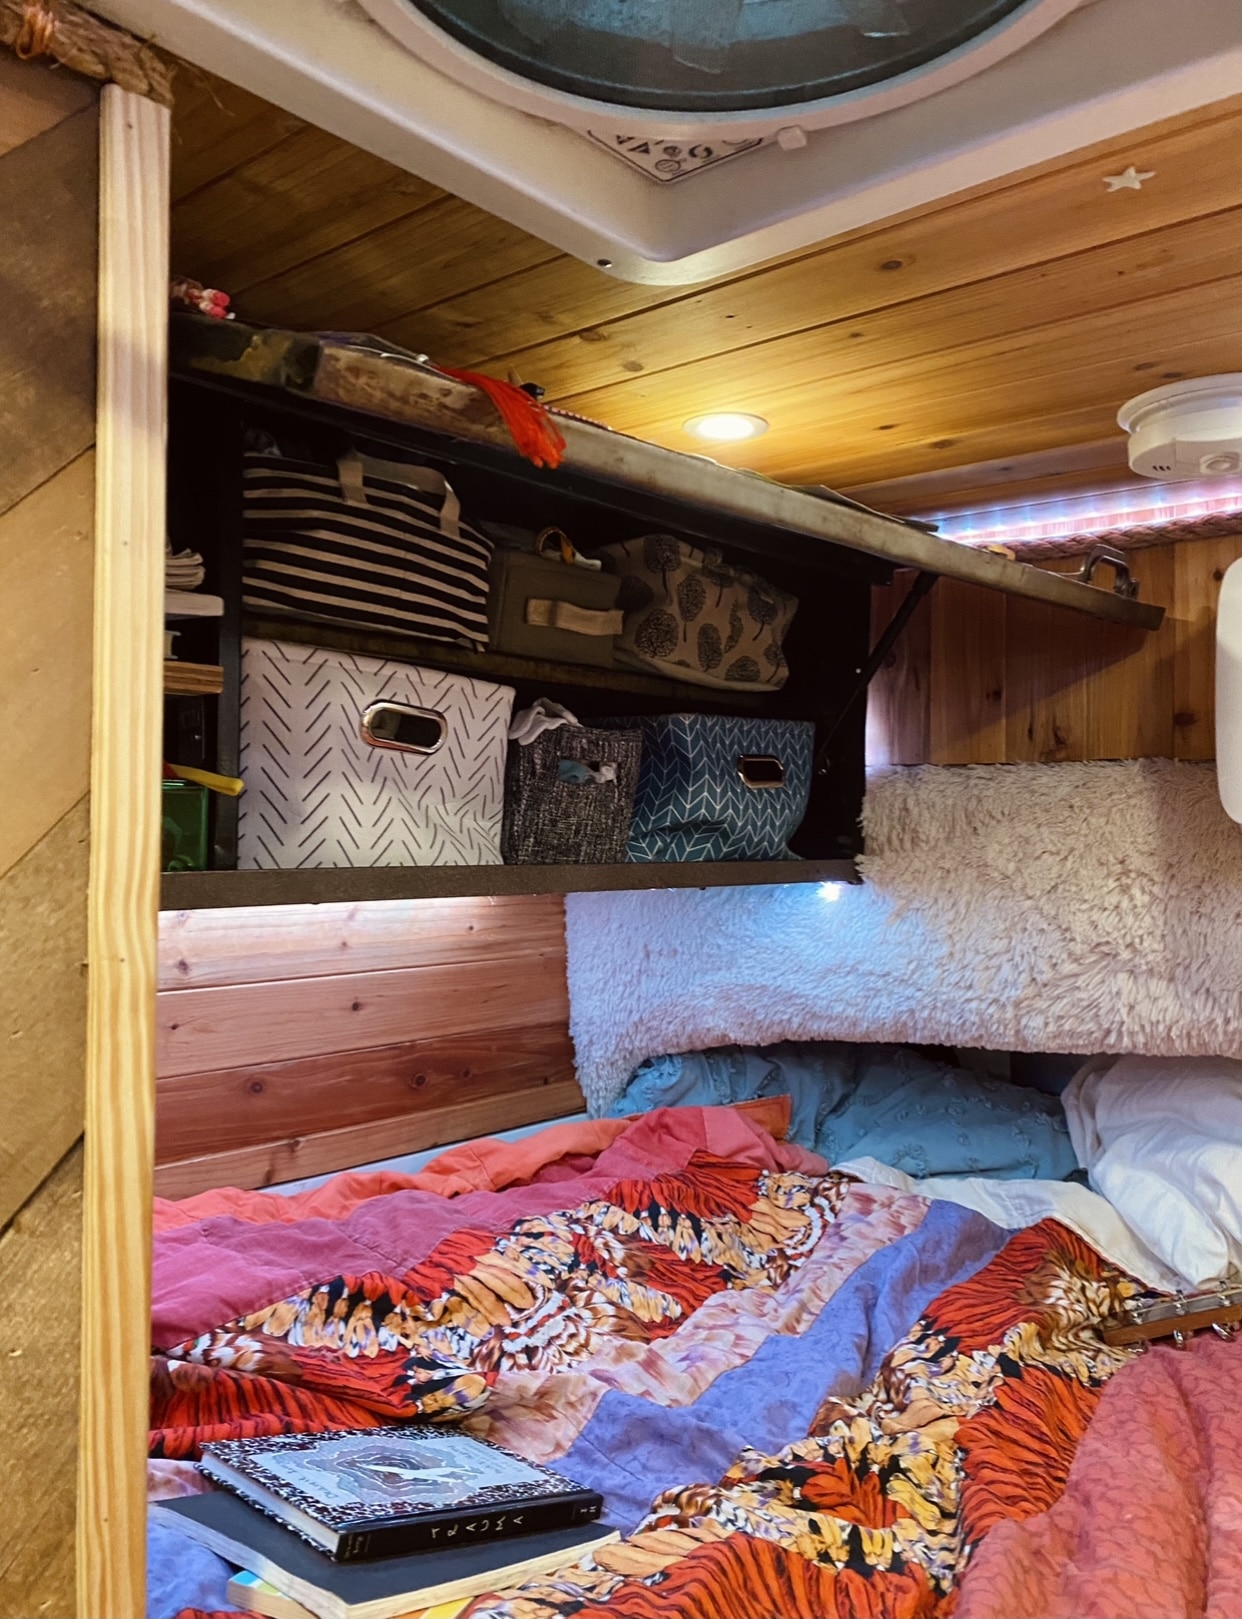
For window coverings, the most popular approaches I’ve seen are blackout curtains on a track, Reflectix panels cut to fit, and custom-made insulated window covers. Curtains on a ceiling-mounted track are probably the cleanest-looking option. You can get hospital-style curtain tracks that bend to follow the curve of the bus ceiling, and heavy blackout fabric blocks light and provides privacy. The nice thing about a track system is you can pull the curtains back during the day and the windows are fully open.
Reflectix is the budget option and honestly it works fine. Cut it to the shape of each window, press it in, done. It blocks light, provides some insulation, and nobody can see in. The downside is it looks like tinfoil from the outside, which screams “someone is living in this vehicle” to anyone walking by. Some people put fabric over the Reflectix to make it look better from both sides.
For actual bedroom privacy — separating the sleeping area from the rest of the bus — a curtain divider is the simplest approach. A ceiling-mounted curtain rod with a heavy curtain gives you a visual and psychological barrier between the bed and the living space. It’s not soundproof, but it creates a sense of “this is the bedroom.” I’ve seen some builds use a sliding barn door on a track, which looks great and provides a more solid separation. Takes up more space and costs more, but if privacy matters to you, it’s worth considering.
The family privacy question is a whole separate thing. Someone in a skoolie group asked pretty directly about “grown up time” in a bus where the kids are sleeping 10 feet away. Most families I’ve talked to about this say the same things — wait until the kids are asleep, be quiet, and have some kind of solid divider between the sleeping areas. A curtain isn’t going to cut it for this. A sliding door or even a well-insulated partition wall makes a real difference. Some builds include a separate enclosed bedroom with an actual door, which is the gold standard but requires enough bus length to dedicate a full section to it.
Ventilation and Moisture Prevention
I’ve touched on this in a few sections already, but it deserves its own section because moisture is the thing that ruins skoolie bedrooms. Not bad mattresses, not poor framing, not ugly curtains. Moisture. It’s the invisible enemy of every bus build and it’s especially aggressive in the bedroom because that’s where you spend 8 hours breathing, sweating, and generating heat in a relatively enclosed space.

Two adults sleeping in a bus produce about a liter of moisture overnight just from breathing. Add in body heat and you’ve got a warm, moist microclimate right around the bed. When that warm moist air contacts a cold surface — the metal bus wall, a single-pane window, the underside of a poorly insulated ceiling panel — it condenses into water. That water soaks into your mattress, your wood frame, your wall panels. Over weeks and months, it becomes mold.
So what do we actually do about this? The first thing is ventilation. A MaxxAir fan or similar roof vent running on low while you sleep pulls the moist air out of the bus before it can condense. I’ve seen some builders who said they eliminated their condensation problem entirely just by running a fan overnight. Two fans are better than one because you get actual cross-ventilation rather than just pulling air from one spot.
Second, slatted platforms. I keep coming back to this because it’s the single easiest thing you can do. Slats instead of solid plywood under the mattress. Air moves, moisture doesn’t build up. If you take one thing from this entire article, it’s this.
Third, insulate the walls behind and around the bed. If the bed is against an exterior wall, that wall is going to be colder than the interior walls, especially at night, especially in winter. Cold wall plus warm moist air from sleeping equals condensation on that wall, running down behind your bed frame where you can’t see it. Proper insulation with a vapor barrier on the warm side prevents this. If you haven’t insulated yet, check out the complete guide to insulating a school bus before you build out the bedroom area.
Fourth, a breathable mattress protector on top and a moisture-wicking barrier between the mattress and the platform. These are cheap, they work, and replacing a $40 protector is a lot easier than replacing a $600 mattress that’s developed mold inside.
And fifth, crack a window if you can. I know it’s cold outside sometimes, and I know it lets bugs in during the summer, but even a half-inch of open window near the sleeping area makes a measurable difference in humidity levels overnight. A small 12V fan blowing across the opening moves enough air to keep things dry without making the bus feel like a wind tunnel.
Something I didn’t expect to find when I was researching this — dehumidifiers. Small 12V Peltier dehumidifiers don’t pull a lot of moisture out of the air compared to a household unit, but in a space as small as a bus, they don’t need to. A couple of people I talked to in the Pacific Northwest run a small dehumidifier near the bed and said it noticeably reduced the dampness they were dealing with. Not a substitute for ventilation, but a decent supplement in humid climates.
“Does the bed stay really hot when traveling since it’s over the engine?”
This one’s specific to rear-engine buses, and yeah, it’s a real thing. The engine compartment throws off a ton of heat, and if your bed platform is directly above it without adequate insulation between, you’re sleeping on a warm surface in summer and getting free heating in winter. Some people see the winter part as a feature, actually.
The fix is the same insulation you’d put anywhere else — rigid foam board or Rockwool between the engine compartment and the bed platform. A couple inches of rigid foam makes a massive difference. One builder I read about also installed a radiant heat barrier, basically reflective material that bounces the engine heat back downward instead of letting it radiate up into the mattress. Between the foam and the radiant barrier, she said the heat issue was completely solved.
Putting It All Together
After going through all of this, here’s where I landed. The bed is the anchor of your entire floor plan, so figure it out early. Don’t design the kitchen and bathroom first and then try to cram a sleeping area into whatever’s left. Start with where you sleep and build outward from there.
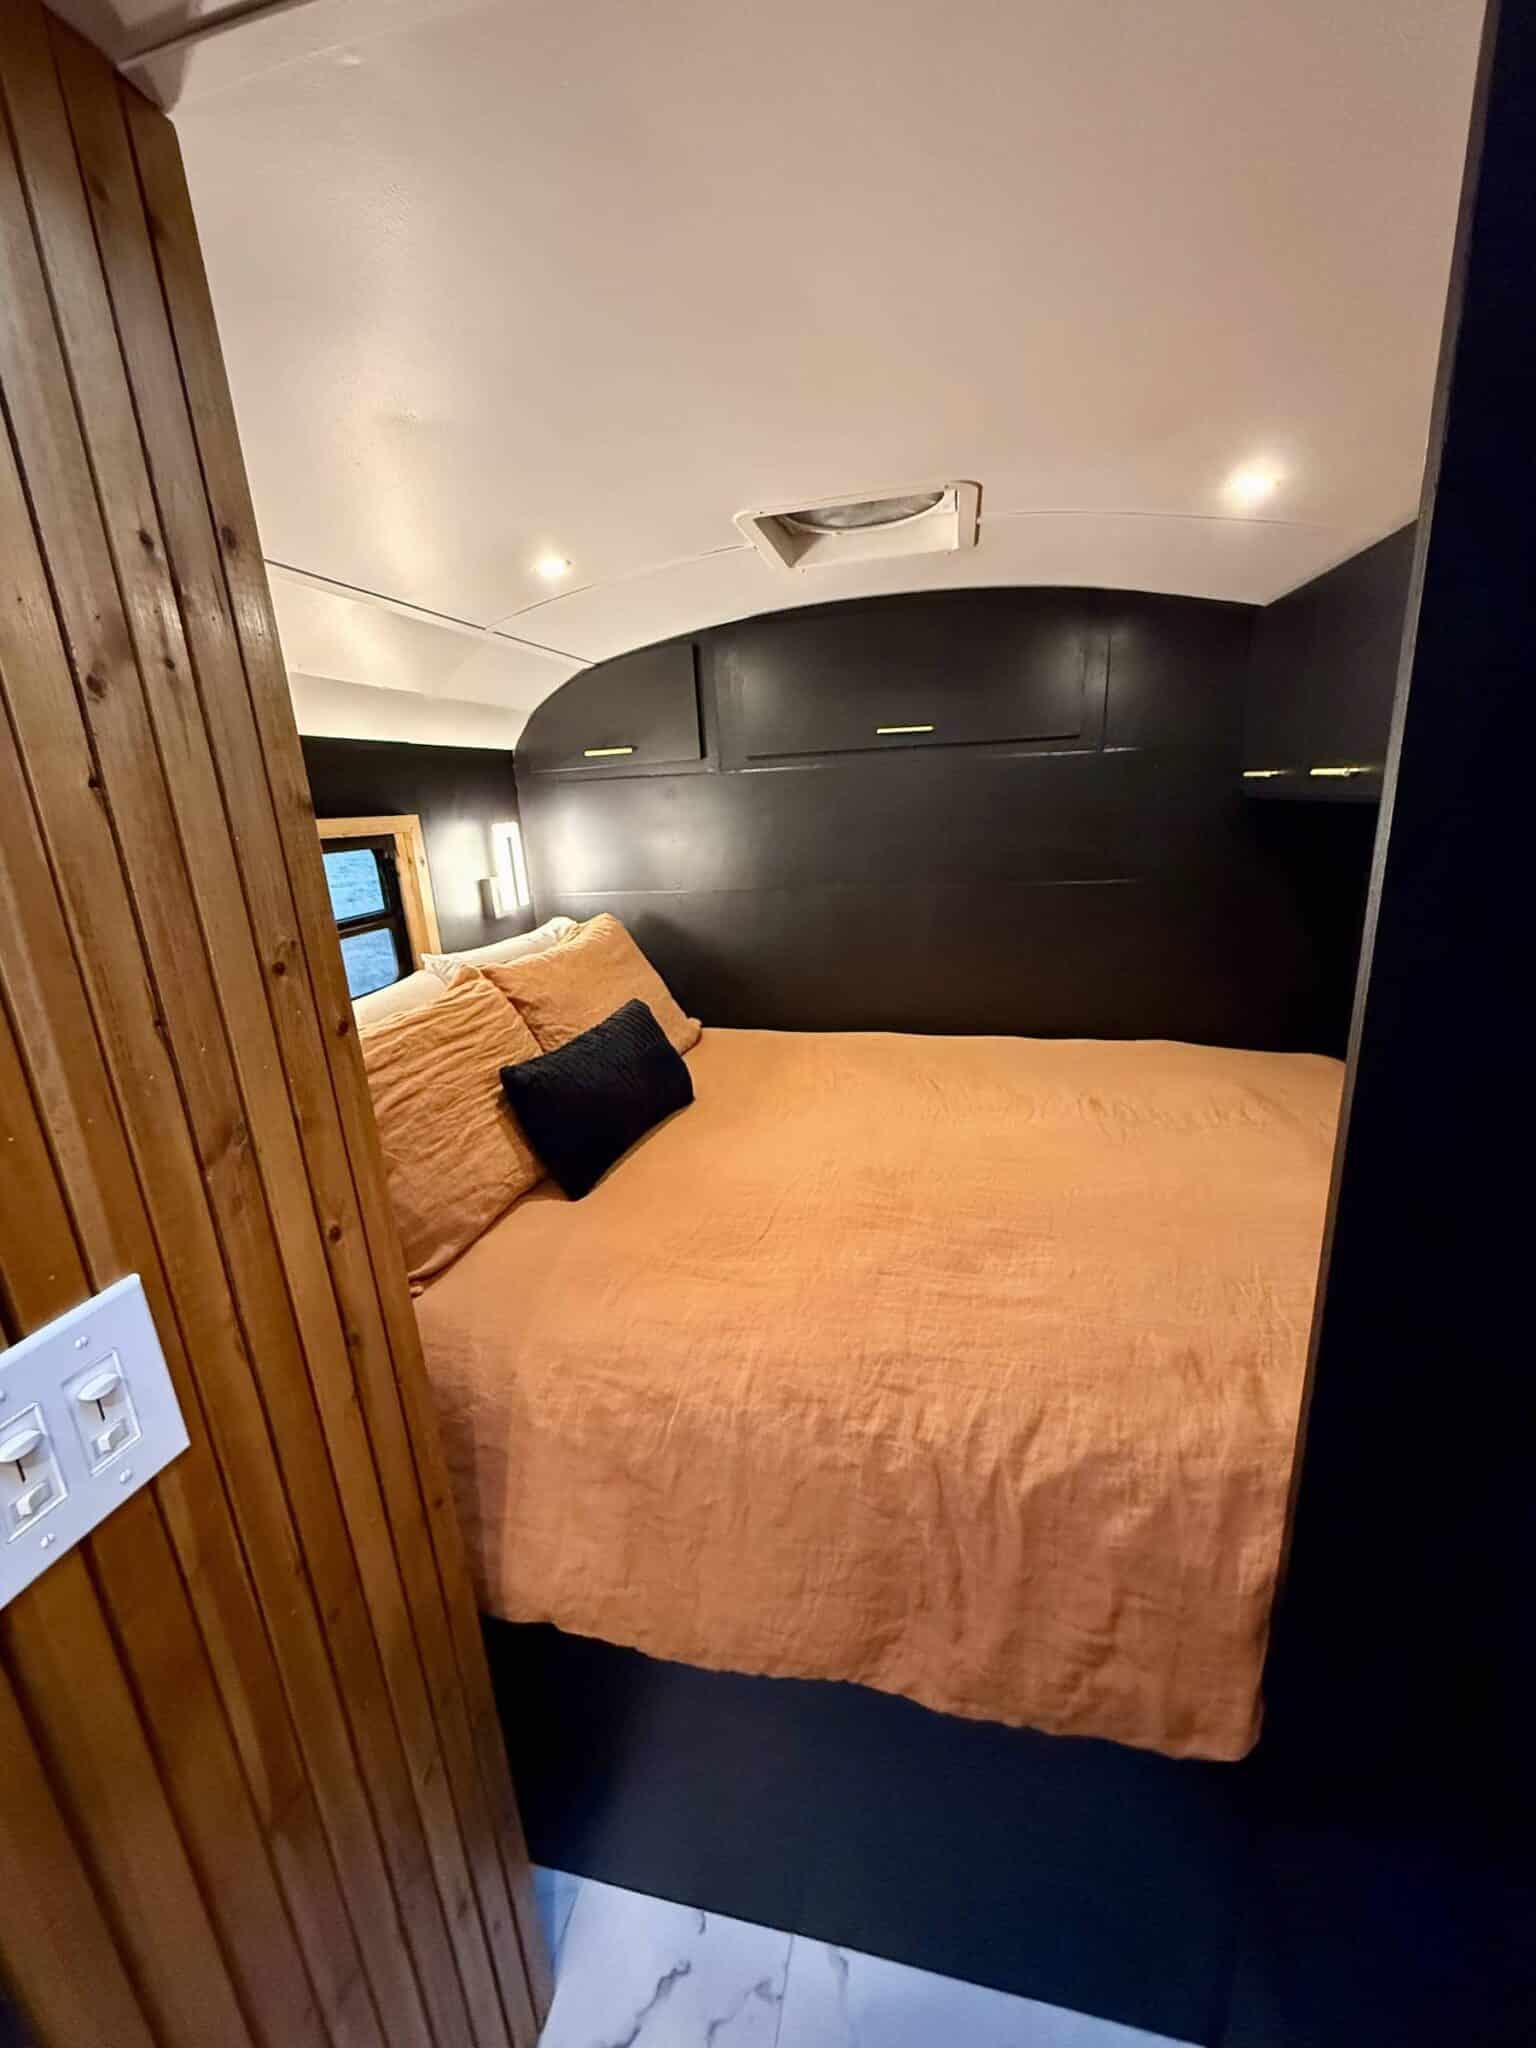
For a full-size bus, a fixed platform bed in the rear with a standard queen mattress is the simplest, most reliable setup. Build it on slats, raise it high enough for serious under-bed storage, and make sure you’ve got ventilation covered. For a short or medium bus, a Murphy bed gives you the best of both worlds, but take the mold prevention seriously and use slats or ventilated backing. If you’ve got kids, build bunks with growth in mind and don’t skimp on the airflow, even if it means the bunks don’t look as polished as the ones on Instagram.
Go with foam or latex for the mattress, keep it 6-8 inches thick, and always, always use a moisture barrier underneath. Run your electrical to the bedside early in the build so you’re not fishing wires behind finished walls later. And think about privacy before you need it, not after — it’s a lot easier to install a curtain track or sliding door during the build than to retrofit one when you’re already living in the bus.
I know this is a lot of information. Bedrooms in a bus involve more decisions than you’d think for something that’s basically “pick a spot and put a mattress there.” But the people who take the time to get this right are the ones who are still happily living in their buses three years later. The ones who rush it are the ones posting regret threads online six months in. Take your time with it, measure everything twice, and build something you’ll actually want to sleep in.