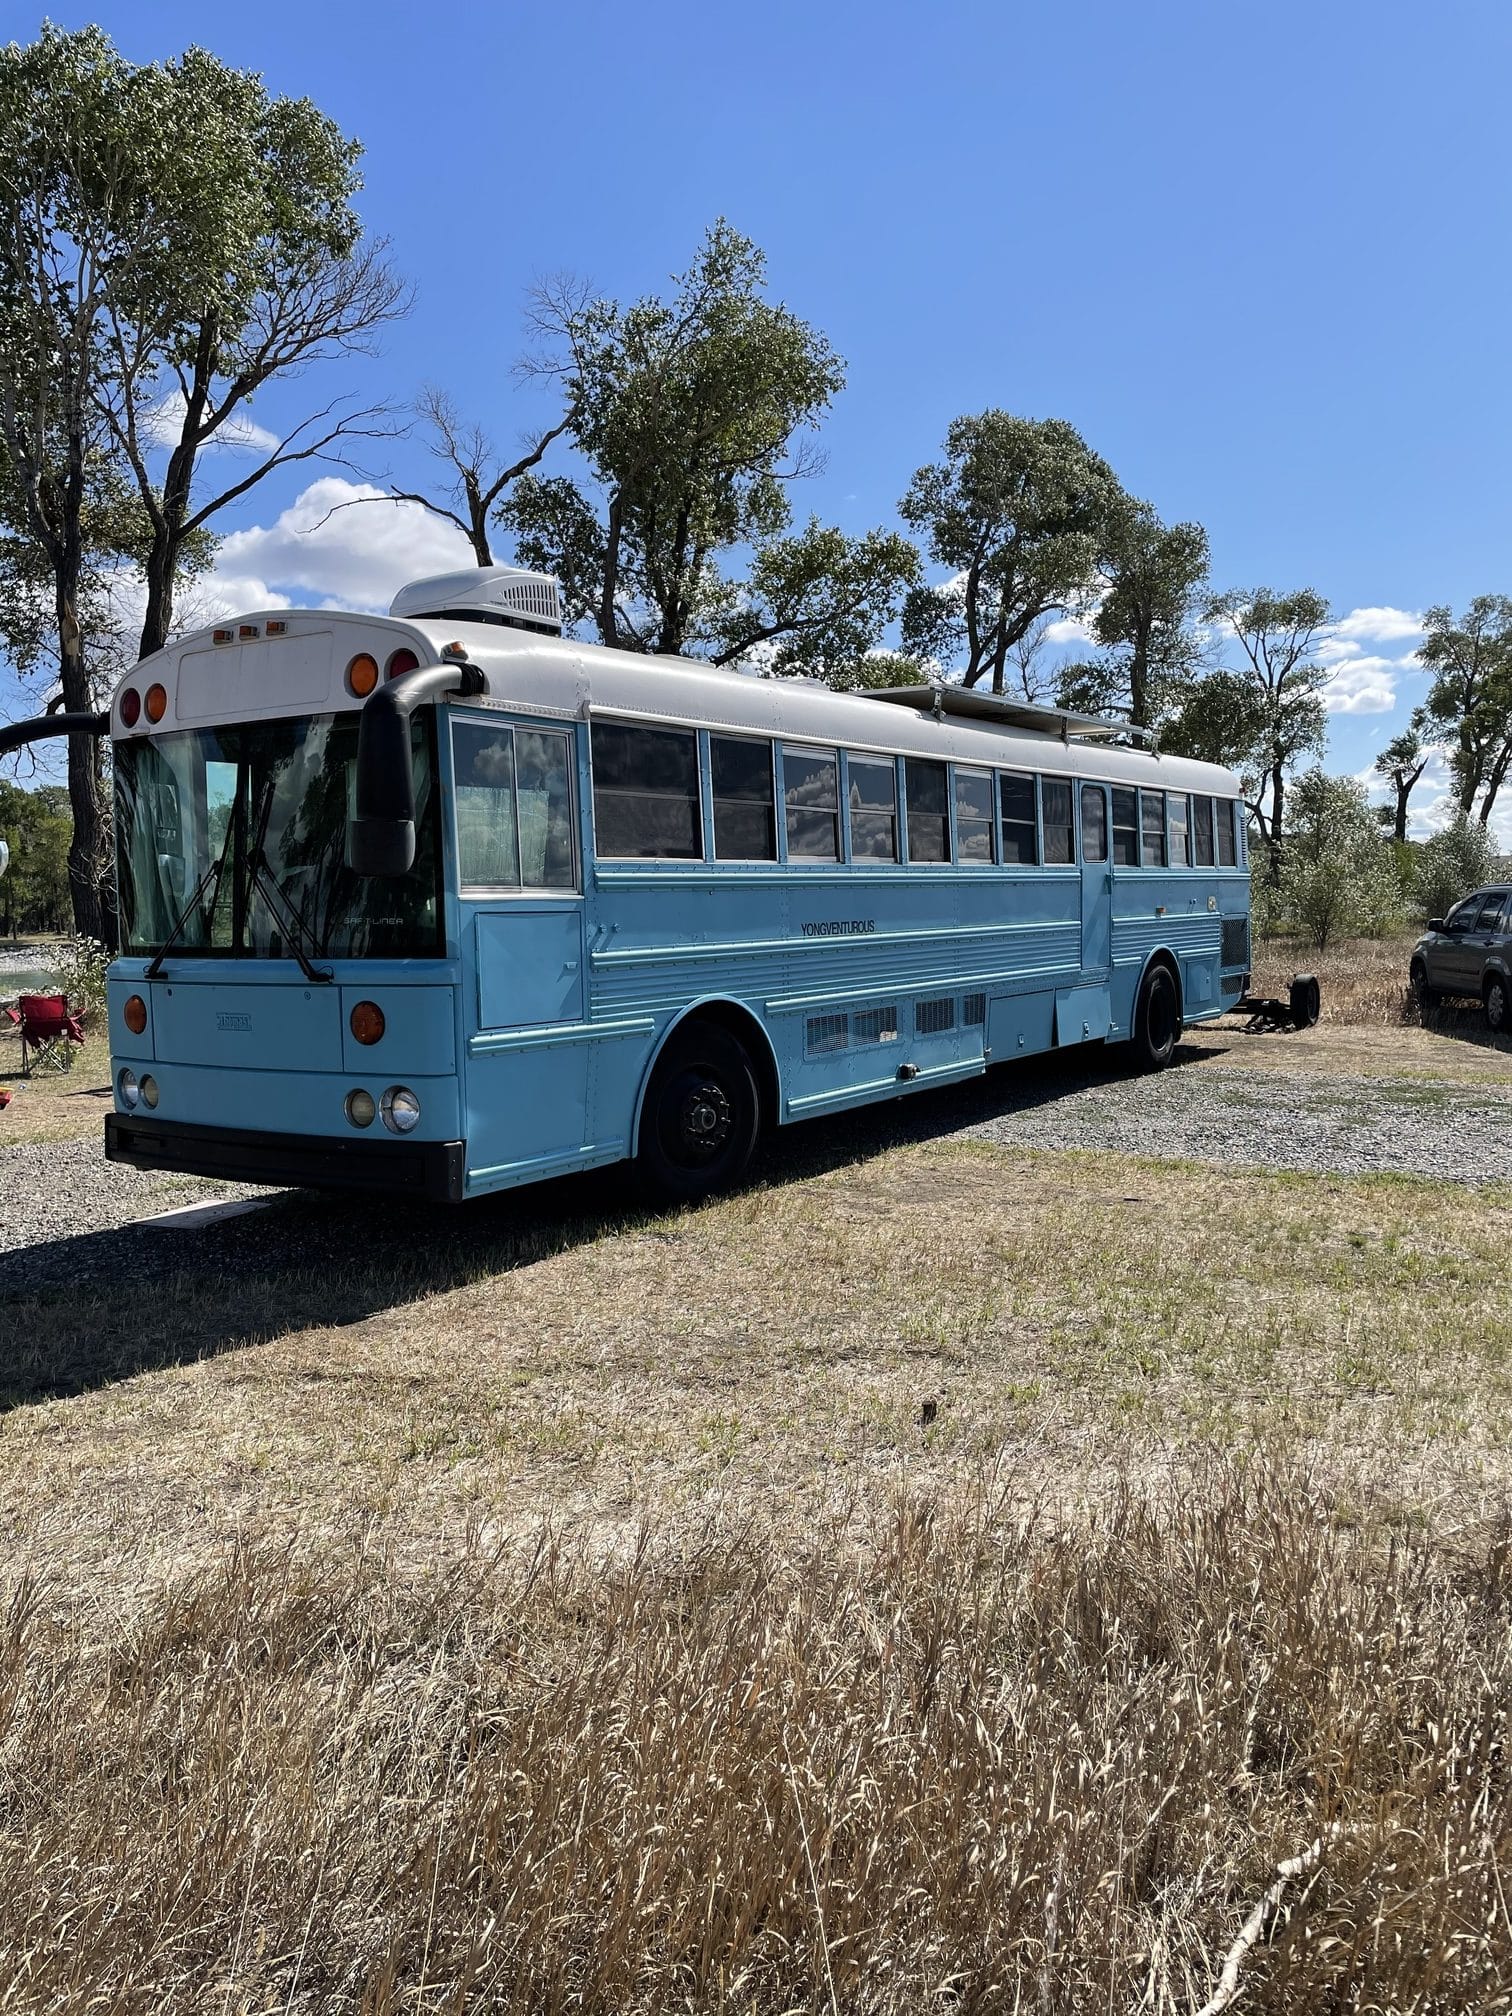
This is probably the most common question I see in comments on skoolie tour videos. Someone shows off their beautiful shelves or their mounted TV and within five comments somebody asks, “Yeah but what happens when you actually drive that thing?” (See our guide on What Happens If Your Skoolie Breaks Down? for more on this.)
The short answer is that most things stay put just fine if you’re intentional about how you secure them. Your bus weighs tens of thousands of pounds, so the ride is smoother than people expect, but you still need real solutions for anything fragile, heavy, or sitting on an open shelf. Velcro strips, bungee rails, lip edges on shelves, proper TV mounts, and good old common sense go a long way. The bus isn’t a roller coaster — it’s more like a slow-moving apartment that occasionally hits a pothole.
How do you secure the tv/computer screen when you are driving?
This one’s pretty straightforward once you know what people are actually doing. I looked into a bunch of different setups and the most common approach is a full-motion articulating TV mount — the kind you’d use in an RV or even in a house — bolted through the wall into real structure behind it. Not just screwed into paneling. Through-bolted into framing, steel ribs, or a plywood backer that’s been properly attached to the bus skeleton.
A 32 to 43 inch TV on a quality articulating mount isn’t going anywhere during normal driving. The mount absorbs vibration and the weight of the bus keeps the actual motion pretty gentle. I talked to one guy who’d driven his build from Oregon to Florida and back with a 40-inch TV mounted on a swing arm. Never had an issue. He said the only time it even wobbled noticeably was when he hit a massive pothole in Louisiana at speed, and even then it just swayed a little on the arm. (See our guide on Is It Safe to Live in a Bus During a Storm? for more on this.)
For computer monitors it’s even easier because they’re lighter. A VESA mount on a solid arm works great. Some people mount their monitors to a desk surface with a clamp-style arm, which has the added benefit of being adjustable when you’re parked and actually using it. The trick with any screen is making sure the mount has a locking mechanism so it doesn’t swing freely while you’re driving. Most articulating mounts have a tension adjustment or a locking knob. Tighten it down before you roll out, loosen it when you park. Takes about two seconds.
One thing I noticed is that people who mount TVs flat against the wall with a fixed low-profile mount actually have fewer problems than the ones using swing arms. Less movement potential. If you’re not planning to angle your TV around when parked, a fixed mount into solid backing is the simplest and most secure option.
How do you keep your Knick knacks on the shelves when the bus is moving?
So here’s where it gets more interesting, because knick-knacks are the kind of thing that really does slide around. They’re light, they’re oddly shaped, they don’t stack neatly, and they’re usually on open shelving because the whole point is seeing them.
The number one solution I kept finding was museum putty. It’s this waxy, tacky stuff — you can get it at any craft store or on Amazon for a few bucks — and you press a little ball of it under a figurine or a vase or whatever, and it holds the thing in place through vibration and gentle movement. It peels off clean, doesn’t damage surfaces, and it’s what actual museums use to keep displays from shifting during minor earthquakes. I thought that was kind of genius when I first heard about it. A product designed to protect priceless artifacts works just as well for your ceramic owl from the thrift store. (See our guide on How Do You Keep Kids Safe While Driving a Skoolie? for more on this.)
For anything heavier than a couple pounds, people get more creative. I saw one build where they’d routed a shallow channel into the shelf surface so items could sit down in a groove, almost like puzzle pieces. That’s more work than most people want to do, but it looked incredible and nothing was going anywhere. More commonly though, folks just use a small lip on the front of the shelf — maybe three-quarters of an inch of wood trim along the edge. Enough to keep things from walking forward during braking but not so tall that it ruins the look.
And honestly some people just accept that certain items get packed away before driving. You keep your favorite stuff displayed when you’re parked, and before you pull out you spend five minutes putting fragile things into a padded bin. It’s not glamorous but it works, and it’s what a lot of full-timers actually do even if it doesn’t make it into the YouTube tours.
Does all that stuff stay in place when you are rumbling down the backroads
This is where reality sets it, because highway driving and backroad driving are two completely different animals. I’ll be honest, most of the “everything stays fine” advice assumes you’re on decent pavement at reasonable speeds. Backroads change the equation.
When you’re on a gravel road or a washboard dirt road, the vibration frequency is way different than highway driving. It’s faster, choppier, and more sustained. Things that sit perfectly still at 60 mph on an interstate will absolutely rattle and walk across a shelf on a rough forest service road. I was reading a thread where a couple had driven their skoolie into a national forest campsite on about four miles of rough gravel, and when they got there their spice rack had emptied itself onto the counter and a picture frame had come off the wall. Everything that was properly secured stayed put. Everything that was just sitting there, didn’t.
So the real answer to this one is no, not everything stays in place on rough roads, and you need to plan for that. The people who do a lot of boondocking and backroad travel tend to have fewer loose decorative items and more built-in storage solutions. Drawers with latches. Cabinets with positive-latch doors, not magnetic catches. Shelves with actual rails. If you’re someone who mostly stays at RV parks and travels on highways, you can get away with looser arrangements. But if rough roads are part of your life, you design around that from the start.
The weight of the bus actually helps here more than you’d think though. That 25,000 to 33,000 pound vehicle has a lot of inertia, so even on bumpy roads the actual chassis movement is dampened compared to what a van or truck would experience on the same road. The suspension does real work. It’s just that the interior items don’t get the benefit of that mass — a coffee cup on a shelf weighs the same whether it’s in a bus or a sedan.
How do you keep the books secured while you’re moving?
I found this one fascinating because bus lifers tend to be readers, and books are heavy and awkward. A shelf full of paperbacks is basically a row of dominoes waiting for the right bump.
The most popular solution is dead simple. A bungee cord or a piece of shock cord stretched across the front of the bookshelf. You hook it on one side, stretch it across the book spines, and hook it on the other. It holds everything in place, it’s easy to remove when you want to grab a book, and it costs almost nothing. I saw one build where the guy had used leather straps with brass snaps instead of bungees, which looked really sharp. Same principle though.
Other people go with the lip-edge approach — a piece of trim across the front of the shelf about two inches high. Books lean against it and can’t fall forward. This works well for shelves where the books are packed in tight, because a full shelf of books wedged together doesn’t really shift much anyway. It’s half-empty shelves where things get loose.
Then there’s the camp where people have just switched entirely to e-readers and don’t carry physical books at all. I get it. I love real books but if you’re optimizing for weight and space in a bus conversion, a Kindle weighing eight ounces versus 40 pounds of paperbacks is a real consideration. Most people I found who’ve been on the road more than a year end up somewhere in the middle — they keep maybe a dozen favorites on a secured shelf and read everything else digitally. (See our guide on School Bus Conversion Cost Breakdown (Real Numbers) for more on this.)
One thing that surprised me when I was looking into this was how many people use their books as insulation, basically packing them tight into a recessed shelf that’s built into the wall. The books fill the space completely so there’s nowhere for them to go, and as a bonus they provide a tiny bit of thermal mass. Not the main reason to do it but kind of a nice side benefit.
Related: Skoolie Safety and Security: The Complete Guide
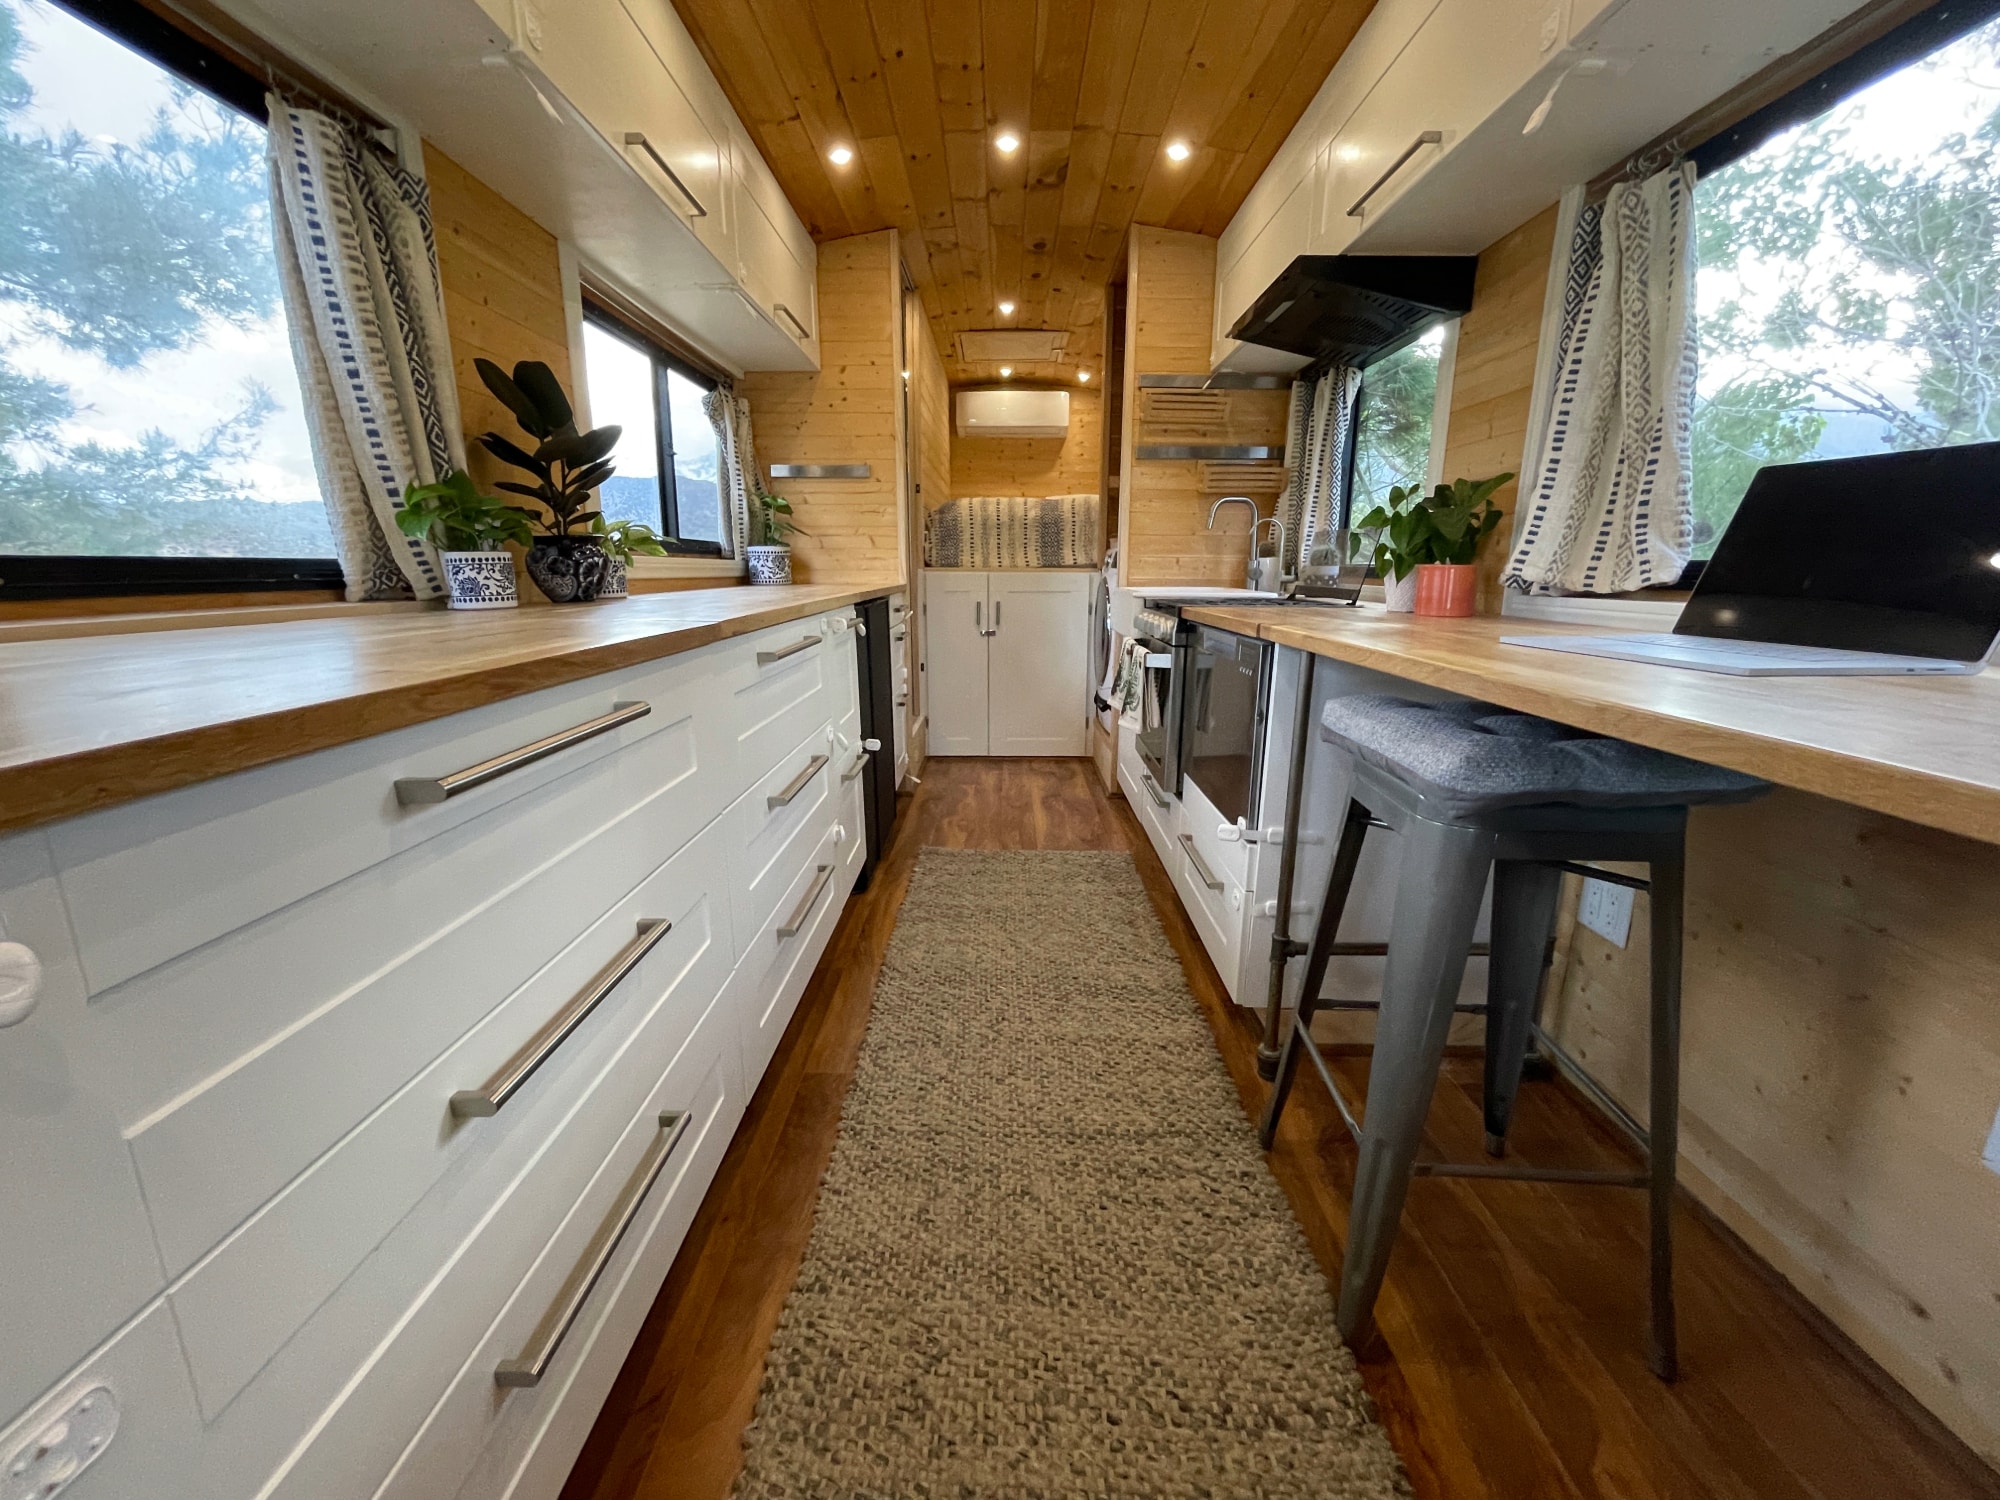
How does that open shelf work when the bus is moving?
This is the one that really gets people because open shelving looks so good in tour videos and it seems like it would be a disaster on the road. And I remember watching a tour where a woman had open shelving in her kitchen with plates, bowls, glasses, all of it just sitting there, and I was convinced it was all for show and she packed it away before driving.
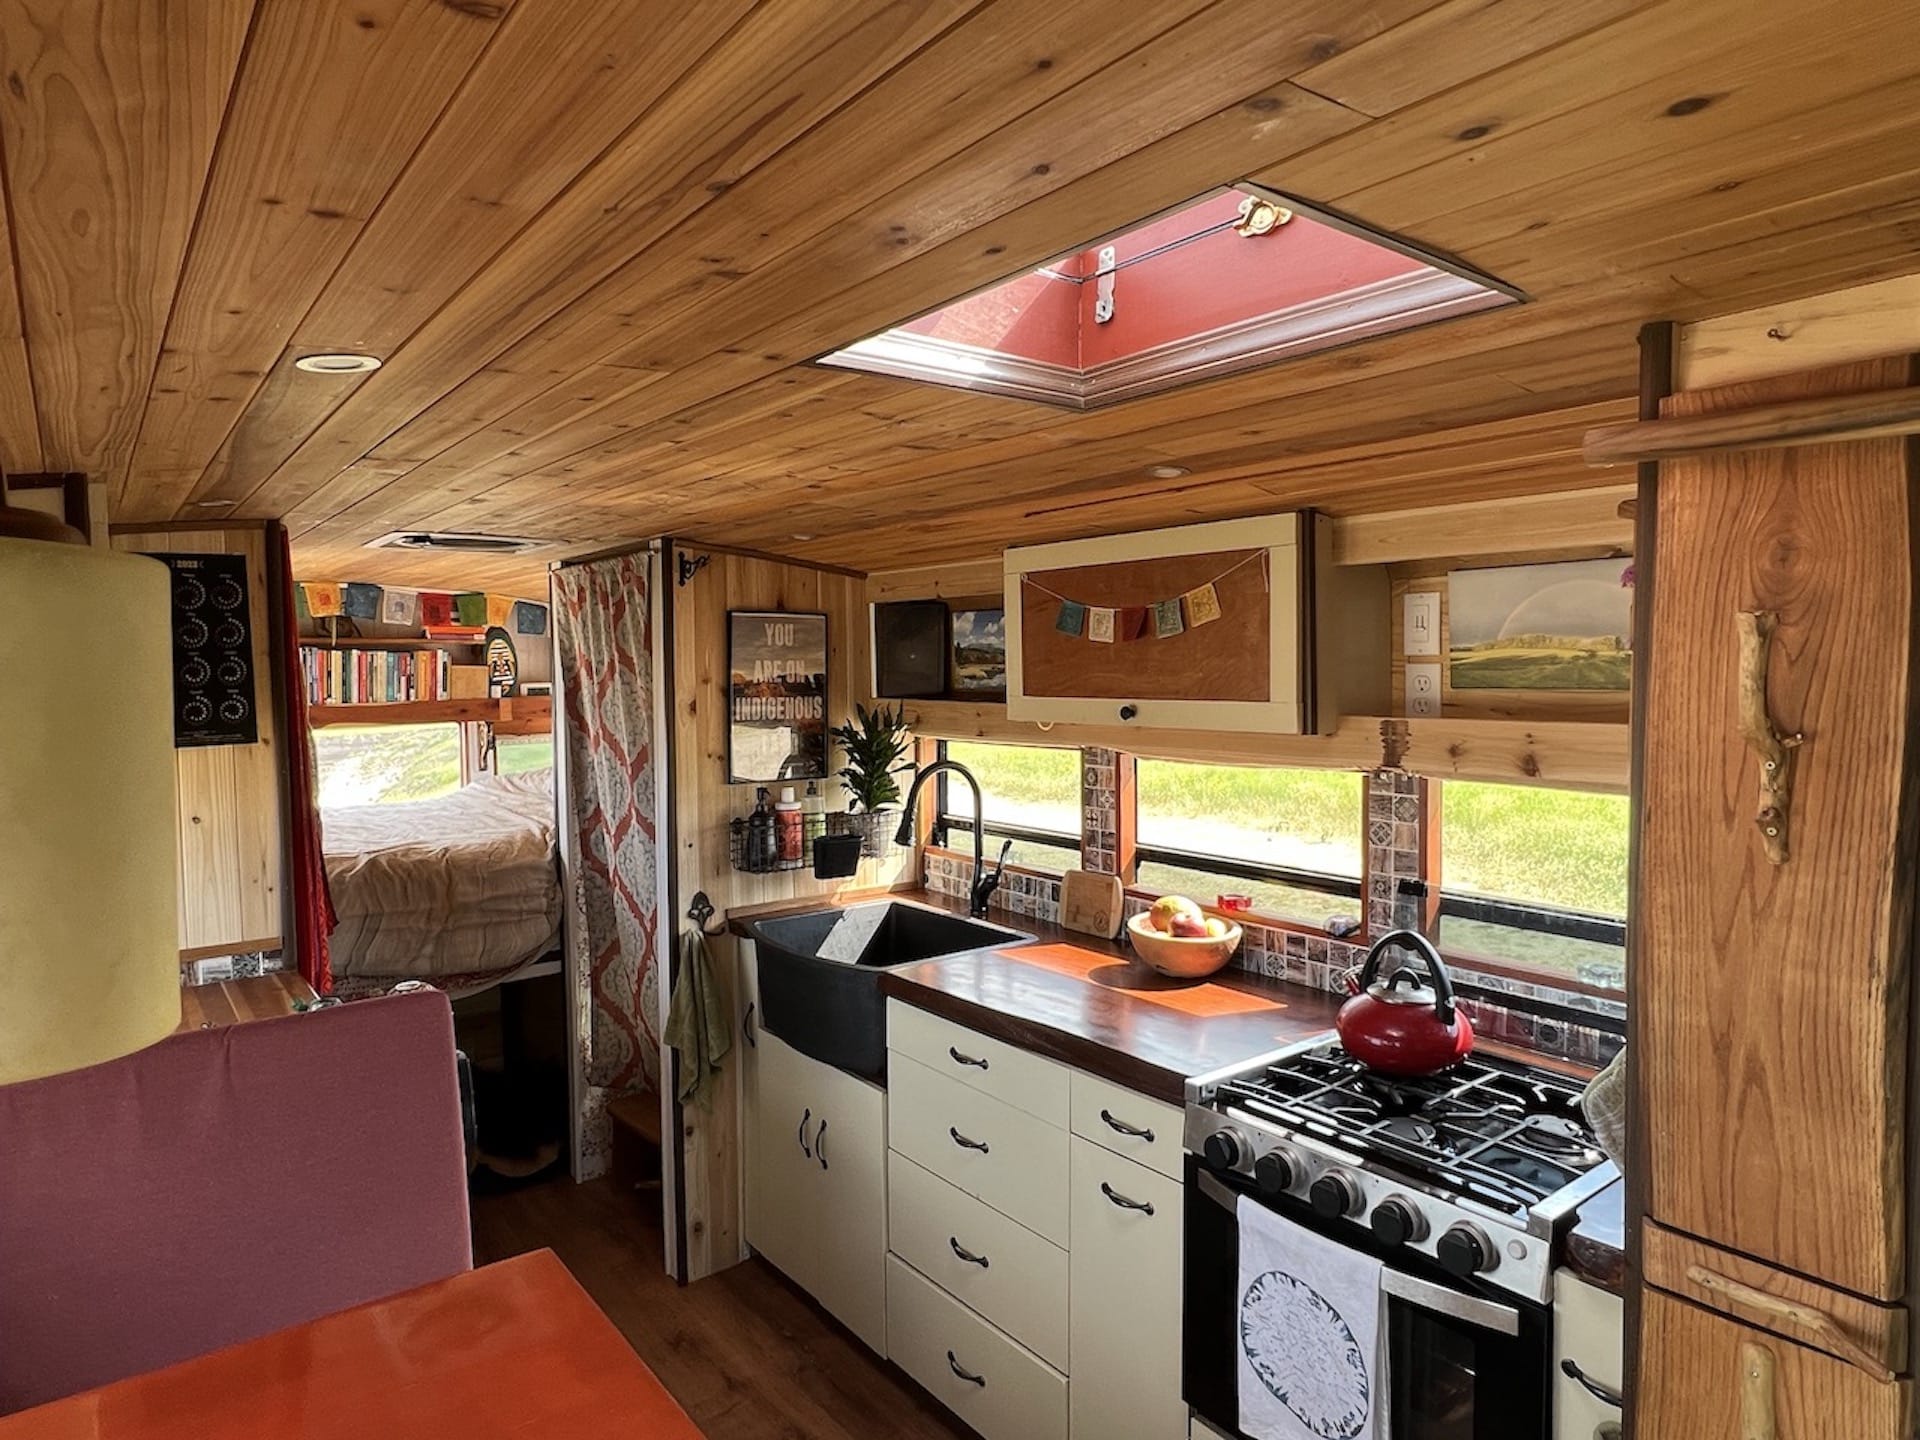
Turns out, not necessarily. The way most open kitchen shelving works in a bus is that things are nested. Plates stack on plates. Bowls nest into bowls. The stack sits on a shelf liner — that rubbery, grippy mesh stuff you put under rugs or in drawers — and the stack as a unit doesn’t really move. The shelf liner material is the unsung hero of bus life honestly. I found it mentioned in probably 80% of the builds I looked at. It’s cheap, you cut it to size, and it adds enough friction that things don’t slide during normal driving.
Now, open shelving for decorative stuff is a different calculation. Kitchen items are usually dense and stackable. Decorative items are oddly shaped and standalone. The solutions I mentioned earlier — museum putty, shelf lips, bungee rails — all come into play here. Some people use small dowel rods across the front of open shelves, almost like a ballet barre in miniature. Others use clear acrylic strips that are nearly invisible but keep items from walking off the edge.
The bigger design principle I picked up from looking at dozens of builds is that the best open shelving in buses is recessed into the wall rather than floating. When a shelf is in an alcove or between two walls, items can only go forward. They can’t go sideways. Add a small lip on the front edge and now they can’t go anywhere at all. Compare that to a floating shelf on an open wall where things can slide in every direction — same concept, way more risk.
I think the thing that clicked for me after looking at all of this is that open shelving in a bus isn’t the same thing as open shelving in a house. In a house you just set stuff on a shelf and forget about it. In a bus, every item on every shelf is a small design decision. Where does it sit. What’s holding it there. What happens if you brake hard. People who’ve been doing this for a while just think about it automatically, like how you’d think about which pocket your phone goes in. It becomes second nature, but it’s intentional from day one.
—
After looking into all of this, here’s where I landed. Securing stuff in a bus isn’t some engineering puzzle that requires exotic solutions. It’s mostly just common sense combined with a few cheap products — shelf liner, museum putty, bungee cords, proper mounting hardware, cabinet latches — and a mindset shift. You stop thinking of your space as a house and start thinking of it as a house that occasionally moves. Everything gets a spot, everything gets secured at that spot, and you spend a few minutes before each drive making sure loose items are put away. The people who struggle with stuff falling everywhere are usually the ones who haven’t committed to that routine yet. The people who’ve been on the road for a while barely even think about it anymore.