
You can fall in love with a bus in about thirty seconds flat. Great price, decent paint, the seller says it runs great. But “runs great” doesn’t mean anything if you haven’t personally verified what’s going on under the hood, under the floor, and inside every system that keeps a 15-ton vehicle safe on the road. I learned this the hard way when I started researching what it actually takes to evaluate a used school bus, and the sheer number of things that can be wrong while the bus still “runs” is honestly kind of scary.
This guide covers every mechanical system you need to inspect before buying a used school bus — engine, transmission, brakes, cooling, electrical, tires, suspension, frame, and fluids. I’ll walk you through what to look for, what to listen for, what to smell, and what the actual danger signs are for each system. Whether you’re crawling under the bus yourself or hiring a mobile mechanic, this is the checklist that separates a solid buy from a money pit. Skip any of these and you’re rolling the dice on a vehicle that weighs as much as a small house and needs to stop on command going downhill.
“I’ve always wondered how much work the bus itself needs on one of these”
This is probably the most honest question I’ve come across in all my research. People see these incredible skoolie builds on YouTube — gorgeous kitchens, tile showers, hardwood floors — and the unspoken question hanging over all of it is: yeah but what about the actual bus underneath all that?
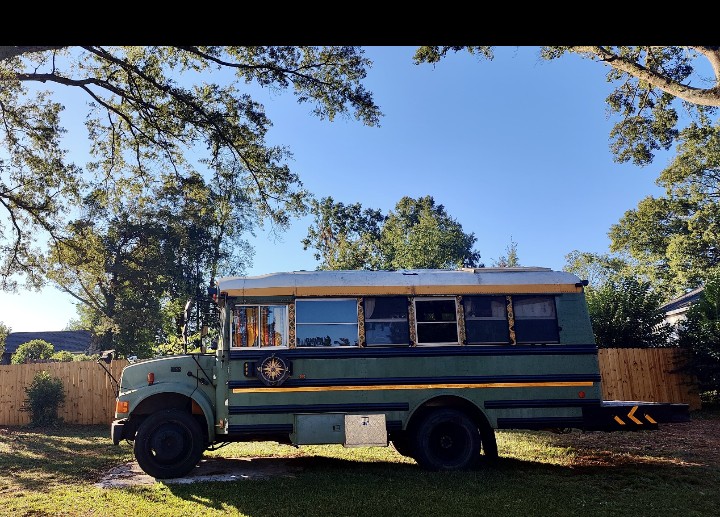
The answer varies wildly. I’ve seen people buy buses that needed nothing more than an oil change and new tires. I’ve also seen people buy buses that looked great, drove fine for the test drive, and then needed $6,000 in engine work before they even started the conversion. The difference between those two outcomes almost always comes down to whether someone did a proper pre-buy inspection.
Here’s the thing that really hit me when I was digging into this. School buses are commercial vehicles that were maintained on a district schedule for their entire working life. Some districts are incredible — oil changes on time, brake inspections twice a year, everything by the book. Others? I talked to a guy who used to work for a school district in the south, and he told me their maintenance budget got cut three years in a row. By the end, they were basically running buses until something broke and then fixing only what was absolutely necessary to keep them on the road. Both of those buses look identical in a Craigslist photo.
A pre-buy inspection isn’t just looking things over. It’s a systematic evaluation of every system that matters. You’re not checking if the bus starts and moves — you’re checking if it’s going to KEEP starting and moving six months from now when you’ve already poured $15,000 into a build.
And the math is simple. A proper inspection, even if you hire a mobile diesel mechanic, costs $200-$400. A blown engine costs $5,000-$8,000. A frame rusted beyond repair means the entire bus is scrap. Bad air brakes mean you literally cannot safely drive the vehicle. The inspection isn’t an expense. It’s the cheapest insurance you’ll ever buy.
“What should I look for when buying a used school bus?”
Short answer — everything. But I know that’s not helpful, so here’s how I’d prioritize it after spending way too many hours reading forum posts from people who got burned. (See our guide on How Many Miles Is Too Many When Buying a School Bus? for more on this.)
The big five, in order of “how expensive is this if I miss it”:
- Frame and structural rust — If the frame is gone, the bus is gone. No fix.
- Engine health — Compression test, oil analysis, blow-by check. A bad engine is a $5,000-$8,000 problem.
- Transmission condition — A rebuild runs $2,500-$4,500. You want to know before you buy.
- Brake system — Safety first. Air brake problems can literally kill you.
- Cooling system — An overheating diesel cracks heads. That’s engine-replacement territory.
After those five, you’re looking at tires, electrical, suspension, steering, and body condition. All important. All potentially expensive. But none of them are in the “this bus is a total loss” category the way the first five can be.
I’m going to go through each of these systems in detail. Some sections are longer than others because some systems have more ways to fail. That’s just how it is.
Engine Inspection — What to Look, Listen, and Smell For
“What condition is the motor in?”
This is the single most important question you can ask a seller, and the single most important thing to verify with your own eyes. Every experienced bus person I came across during my research said the same thing — start with the engine. If the engine is bad, nothing else matters because you’re either walking away or negotiating a completely different price.

First, check the engine cold. Get there before the seller has started it. I can’t stress this enough. Some sellers will warm up the bus before you arrive to mask cold-start problems, and if you show up and the engine is already at operating temperature, that should make you suspicious right away. A healthy diesel on a cold start is going to crank a bit, maybe puff some white smoke for a minute or two as it warms up, and then settle into a steady idle. That’s normal. What’s NOT normal is excessive white smoke that doesn’t clear up, blue smoke at any point (that’s burning oil), or black smoke at idle (overfueling or injector problems). (See our guide on Should You Buy a Gas or Diesel School Bus? for more on this.)
Pull the dipstick before starting. Black oil on a diesel is normal — diesels turn oil black fast. Milky, chocolate-milk looking oil is NOT normal. That’s coolant mixing with oil, and it usually means head gasket failure or a cracked head. Either way you’re looking at a major repair.
Pop the oil fill cap and look at the underside. If there’s a thick mayo-like buildup under there, same problem — coolant contamination. Some moisture buildup in cold climates can cause a light film, but there’s a real difference between a light film and a thick sludge. You’ll know it when you see it.
Listen to the engine running. A healthy diesel has a rhythmic, steady knock. That’s just how diesels sound and it doesn’t mean anything’s wrong. What you’re listening for is anything that breaks that rhythm — a ticking that follows RPM (possible injector issue), a deep knocking (rod bearing, and that’s catastrophic), or a high-pitched squeal (belt or tensioner). I remember reading a post from a diesel mechanic who said he could diagnose about 70% of engine problems just by listening, without any tools at all. Your ears are better diagnostic equipment than you think.
Smell matters too. The exhaust should smell like diesel exhaust — not great, but normal. A sweet smell means coolant is getting into the combustion chamber. A heavy, acrid burning smell could be oil getting past the rings. And if you smell raw fuel, the injectors are likely dumping too much diesel into the cylinders. (See our guide on for more on this.)
Compression Test
If everything looks, sounds, and smells okay, the next step is a compression test. This is where you get hard numbers instead of guesses.
A compression test measures the sealing ability of each cylinder. On a DT466, you want to see at least 350 PSI per cylinder with no more than about 10% variation between cylinders. On a Cummins 5.9, similar numbers. If one cylinder is way low compared to the others, that cylinder has a problem — could be rings, could be valves, could be a head gasket. Budget $100-$200 for a compression test from a diesel mechanic. Worth every penny.
I found that the variation between cylinders matters almost as much as the absolute numbers. A bus with all cylinders at 320 PSI might be better than one with five at 380 and one at 240. That one weak cylinder is telling you something.
Oil Analysis
This one surprised me when I first learned about it. You can send a sample of the engine oil to a lab and they’ll tell you exactly what’s going on inside the engine. Companies like Blackstone Labs do this for about $30-$40 per sample.
They test for metal content (iron, copper, lead, aluminum — each one points to specific components wearing), coolant contamination, fuel dilution, and overall oil condition. The results come back with a plain-English analysis that basically says “this engine is fine” or “this engine has elevated copper which suggests bearing wear.” (See our guide on Skoolie Fuel Economy and Travel Costs: The Complete Guide for more on this.)
Now, here’s the practical problem. You’re not going to mail off an oil sample and wait a week for results while the seller holds the bus for you. That’s not realistic. But if the seller has previous oil analysis reports — some districts and fleet operations do this routinely — those are gold. Ask for them. They tell you more about the engine’s history than anything else short of a teardown.
What I started doing was bringing a small clean container with me. Take a sample, mark it, and if you’re seriously considering the bus, send it off. If the results come back bad, you haven’t closed the deal yet and you can walk away.
Blow-By Test
Blow-by is what happens when combustion gases sneak past the piston rings and end up in the crankcase. Some blow-by is normal on any diesel. Excessive blow-by means the rings are worn or the cylinder walls are scored, and that engine is living on borrowed time.
The quick field test is simple. Pull the oil fill cap off with the engine running at idle. Hold your hand over the opening (not touching, just near it). You should feel a light pulsing of air. That’s normal. If there’s a strong, steady stream of air pushing out — or if the engine blows the cap right off the valve cover — that’s excessive blow-by. One guy I read about said he holds a latex glove over the opening. On a healthy engine, the glove will puff up slightly and flutter. On an engine with bad blow-by, the glove inflates like a balloon.
There are actual blow-by gauges that measure this in inches of water column, but for a pre-buy inspection, the glove trick or the hand-over-the-opening test tells you what you need to know. If there’s heavy blow-by, factor in $3,000-$5,000 for a ring job or more if the cylinder walls need work. (See our guide on Do You Need a CDL to Drive a Skoolie? for more on this.)
For more on which engines to look for and which to avoid, check out our guide on the best engines in school buses.
Transmission Check
“What about what to look out for mechanically like which is the best engine, transmission and drive train. Also, which are the danger signs?”
I love this question because it gets right to the heart of it. People obsess over engine brands but totally ignore the transmission, and then they’re shocked when a $3,000 transmission rebuild wipes out their build budget.
Most full-size school buses have an Allison automatic transmission. The Allison AT545 and MT643 are the older ones, the Allison 2000 and 3000 series are the newer ones. These are genuinely good transmissions — designed for stop-and-go commercial use, and they’re tough. But “tough” doesn’t mean “immortal.”
Start by checking the transmission fluid. There’s usually a dipstick on the side of the transmission case. The fluid should be clean red or pinkish. Brown means it’s been overheated or neglected. Black and smells burnt? That transmission has been cooked. Dark fluid with metallic flakes? Walk away. That’s clutch pack material and metal shavings from gears grinding themselves apart.
When you test drive, pay attention to how it shifts. Smooth and confident is what you want. A 1-2 second delay between shifts is normal on an older automatic. A 3-4 second delay where the engine revs up before the next gear catches? That’s slipping. Slipping gets worse fast.
The danger signs are honestly pretty straightforward once you know them. Hard shifts, delayed engagement when you put it in drive, any grinding noise, fluid leaking from the pan or cooler lines, and the transmission “hunting” between two gears at highway speed. That last one — where it keeps shifting back and forth — can be a governor issue on older transmissions or a solenoid problem on the electronic ones. Not always catastrophic but definitely something that needs diagnosis.
One thing a lot of people don’t realize — the Allison has a filter inside it, just like your engine oil filter. If the maintenance records show the transmission was never serviced, that’s a red flag. These transmissions are supposed to get fluid and filter changes every 25,000-50,000 miles depending on the model. A bus with 150,000 miles and no transmission service record isn’t necessarily doomed, but I’d be cautious.
Also check underneath for leaks. Transmission fluid dripping from the pan gasket, the cooler lines, or the output shaft seal. Small seeps happen on older equipment. Active drips mean the fluid level is dropping, and a transmission low on fluid is a transmission that’s overheating.
Brake System — Air Brakes vs Hydraulic
“Did you put new brakes in it?”
I see this question a LOT in the skoolie community, and it tells me people know brakes matter but don’t always know what to actually check. “Did you put new brakes in it?” is a good question to ask a seller, but it’s not enough. Because “new brakes” could mean they slapped on new shoes and ignored the drums, chambers, slack adjusters, and the air system that makes the whole thing work.

Most full-size school buses (Type C and Type D) have air brakes. Short buses and mini buses on van or truck chassis usually have hydraulic brakes. The inspection is different for each, so know which one your bus has before you start.
For air brakes, start the bus and let the system build pressure. Watch the gauges. The compressor should bring the system up to about 120-130 PSI. If it takes more than a few minutes, the compressor is weak or there’s a leak in the system. Once pressure is up, shut the engine off and watch the gauges. A well-sealed system holds pressure with minimal drop — no more than 2-3 PSI per minute. Faster than that, you’ve got air leaks.
Here’s where it gets interesting and where I spent a lot of time learning. The air brake system has a built-in safety feature — when pressure drops below a certain point (usually around 60 PSI), spring brakes automatically engage. That means if your air system fails while driving, the brakes lock up and stop you. Great safety feature. But it also means a bus with chronic air leaks can randomly lock up its brakes. I read about a guy who bought a bus and was driving it home on the highway when the spring brakes popped because of a slow leak. Nearly caused a pileup. That is not something you want to discover after handing over your money.
Get under the bus and look at the brake chambers, slack adjusters, and pushrods. The brake shoes should have at least 1/4 inch of material left. Drums shouldn’t be cracked or heavily scored. The slack adjusters should be properly adjusted — when you pull the pushrod by hand, it shouldn’t move more than about an inch on automatic slack adjusters.
For hydraulic brakes on short buses, the process is more like inspecting a car. Check brake fluid level and color in the master cylinder, look at brake lines for corrosion or leaks, and visually inspect the pads or shoes through the wheels if possible. Soft or spongy pedal feel means air in the lines or worn components. A pedal that slowly sinks to the floor while you’re holding it at a stop means the master cylinder is leaking internally.
Either way, budget $500-$1,500 for brake work on any used school bus. It’s one of those things that nearly always needs some attention.
“How do you check for rust on a school bus?”
Frame and Underbody
Get under the bus. Full stop. I know it’s not glamorous. You need a flashlight and you need to be willing to get dirty. But the frame is what holds everything together — literally — and if it’s rotted out, your beautiful kitchen is sitting on a structure that’s failing.
Start with the frame rails. Those are the two long steel beams running the full length of the bus. Every used bus is going to have some surface rust. That’s just what happens to steel exposed to road spray. You’re not worried about surface rust. You’re worried about scaling rust (where layers are flaking off and the metal is getting thinner), pitting (deep holes or craters), and perforation (you can poke through it).
Bring a screwdriver or an awl and tap along the frame. Solid steel sounds like tapping on solid steel. Rusted-out steel sounds hollow and may actually crumble. I saw photos where someone pulled up the plywood floor on a bus they’d bought and found crossmembers they could literally bend by hand. That’s a bus that needed to be walked away from at the inspection stage, not discovered mid-build.
Check the crossmembers — the lateral bars connecting the frame rails that support the floor. Check where components mount to the frame — engine mounts, transmission mount, spring hangers, shock mounts, body mounts. These are high-stress areas, and if the frame is weakened here, the component isn’t properly supported. A spring hanger that tears out of a rusted frame rail is about as dangerous as anything I can think of on a vehicle.
Geography Matters More Than Mileage
This is something I didn’t fully appreciate until I dug into it. A bus from Arizona, Texas, or New Mexico might have a pristine frame at 250,000 miles. A bus from Ohio, Pennsylvania, Michigan, or anywhere they dump salt on roads every winter could be rusted through at 120,000. This is one of the big reasons people drive thousands of miles to buy buses from the south or southwest. The cost of a plane ticket and a one-way drive home is nothing compared to dealing with a rotted frame.
The Uncomfortable Truth About Frame Rust
Serious frame rust is usually not repairable in any practical sense. You can weld patches, you can treat and encapsulate, but if the frame is structurally compromised, it’s structural. Frame rails on a school bus are designed to carry 15,000-30,000 pounds. You can’t replicate that with a patch weld. If the frame is bad, the bus is bad. Period. That’s why I put this so high on the priority list. Everything else on a bus can be fixed. A rusted frame mostly can’t.
Body Rust
The body is different from the frame. Body rust is cosmetic or weather-related, not usually structural in the same way. Look for rust around the wheel wells, along the bottom edges of the body panels, around windows (especially along the drip rail), and at the rear where road spray hits hardest.
Bubbling paint means rust is forming underneath. Holes in the body panels let water into the bus, which causes interior damage and makes insulation useless. None of this is a deal-breaker the way frame rust is, but it’s all work you’ll need to do. Factor it into your budget and your timeline.
The floor is worth special attention. Pull up any rubber flooring mats and look at the sheet metal floor panels. Tap around with that screwdriver again. Floor rust is extremely common, especially toward the rear of the bus and around the wheel wells. Small areas of floor rust can be patched with new sheet metal. Large areas mean you’re basically replacing the entire floor before you even start your build.
Cooling System
A diesel engine that overheats cracks heads, warps blocks, and costs you thousands. The cooling system isn’t complicated, but the consequences of failure are enormous.
Start at the radiator. Look for bent fins, debris packed between the fins (super common on front engine buses), and impact damage. A radiator with a bunch of bent-over fins isn’t cooling efficiently. Look at the hoses — upper, lower, and heater hoses. Squeeze them. Firm but flexible is good. Rock hard, soft and spongy, cracked, or swollen means they’re due for replacement. A hose that blows on the highway dumps all your coolant in about sixty seconds.
Pop the radiator cap (engine cold, always cold) and look at the coolant. Should be clean and the correct color — green, orange, or pink depending on the type. Rusty brown coolant means the system has been neglected and there’s corrosion inside the block and heater core. Oil floating on top of the coolant is just as bad as coolant in the oil — breach somewhere between oil and coolant passages.
Check the water pump weep hole. There’s a small hole on the bottom of the pump housing designed to leak when the internal seal starts to fail. Dry is good. Wet means the pump is on its way out.
One thing I didn’t think about until a diesel mechanic pointed it out — school buses sit. A lot. Between routes, during summer break, sometimes for years before being auctioned off. Sitting is brutal on cooling systems because the coolant just sits in the block and corrodes from the inside. A bus that was driven regularly for 15 years is often in better shape than one that sat for the last three years with stagnant coolant in it.
Also check the fan clutch on front-engine buses. The fan should spin freely when the engine is cold and engage (get noticeably louder) as the engine warms up. If the fan is always engaged or never engages, the fan clutch is stuck. Stuck-on wastes fuel and power. Stuck-off means the engine can overheat any time you’re sitting still or moving slow.
Electrical System
School bus electrical systems are, well, they’re interesting. The bus was wired for a specific purpose — running flashers, stop signs, interior lights, a PA system, maybe a heater. You’re going to rip most of that out during conversion. But the BASE electrical system that keeps the engine running and the lights legal needs to be solid before you buy.
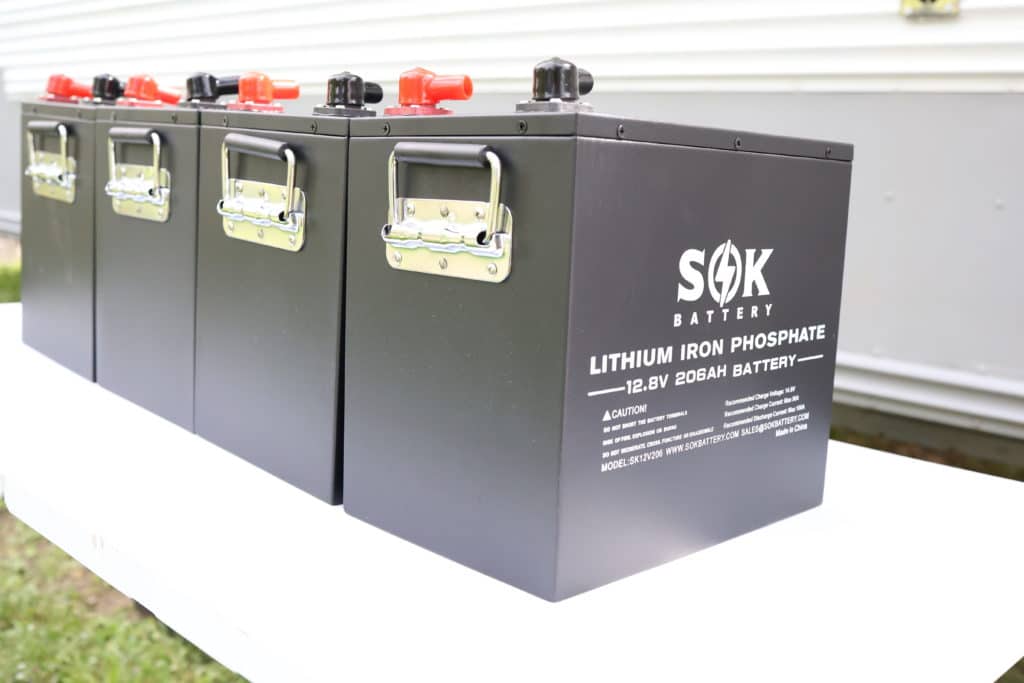
Start with the batteries. Most diesel buses run dual batteries in a 12-volt parallel setup. Check terminals for corrosion (white or green fuzzy buildup), make sure cables are tight, and look at the batteries themselves for cracking or bulging. Old batteries can test fine when warm but fail in cold weather. If they’re more than 3-4 years old, plan on replacing them. About $150-$300 for a pair.
Turn on everything. Headlights, turn signals, brake lights, reverse lights, hazards, interior lights, windshield wipers. I know it sounds basic, but you’d be amazed how many people buy a bus without checking the turn signals and then find out the switch is shot or the wiring to the rear has been chewed through by mice. Those seem like small things until you fail a state inspection.
Check the alternator output. A healthy alternator should put out 13.8-14.4 volts with the engine running. Below 13.5 means it’s not fully charging the batteries. Over 15 means the voltage regulator is bad and it’s overcharging, which kills batteries and can fry components. A cheap multimeter from the auto parts store tells you everything you need to know.
The starter is another big one. A healthy diesel starter cranks the engine with authority. A starter that groans, turns slowly, or clicks without engaging is either failing or the batteries are weak. Starters on big diesel buses run $300-$600 plus labor.
And look at the wiring. Open the electrical panels, look behind the dash if you can. School bus wiring goes through a lot over the years — vibration, heat cycling, water intrusion. Brittle wires, corroded connectors, electrical tape everywhere — those are signs of band-aid repairs that might leave you stranded.
Tires, Wheels, and Suspension
I’ve covered tires in the things to check before buying a school bus article, but in a full mechanical inspection context there’s more to look at.

Start with age. Every tire has a DOT code on the sidewall — the last four digits tell you the week and year of manufacture. “2419” means the 24th week of 2019. Any tire older than 7 years should be replaced regardless of tread depth. Old rubber dries out, develops micro-cracks, and loses structural integrity. I didn’t realize how serious this was until I read about a blowout on a bus doing 60 on the interstate. The tire had plenty of tread but was 11 years old. It just came apart.
Check tread depth and wear patterns. Even wear means good alignment. Wear on inside or outside edges means alignment issues. Cupped or scalloped wear (high and low spots around the tire) means worn shocks or suspension. Front tires showing different wear patterns from each other means something bent or loose in the front end.
Look at the wheels. Steel wheels on buses can crack, especially around bolt holes and rim edges. Run your hand around the rim and look for cracks or deformation. Check lug nuts — all present, tight, not stripped.
For suspension, you’re checking leaf springs, shock absorbers, U-bolts, and spring hangers. Broken leaves are visible if you get under there with a flashlight. Leaves that are cracked or separated mean the spring is failing. Shocks should be dry — if they’re wet with oil, the seals have failed.
Check king pins on the front axle if it’s a solid front axle setup (most full-size buses). Grab the top and bottom of a front tire and try to rock it. Any significant play means the king pins are worn. Common on high-mileage buses. Affects steering and tire wear. Budget $400-$800 per side for king pin work.
Steering
Steering doesn’t get its own section in most inspection guides I found, which is kind of nuts when you think about it. You’re driving a 30,000-pound vehicle. Being able to point it where you want it to go seems pretty important.

Start the engine and turn the wheel lock to lock in both directions while sitting still. It should move smoothly without binding, catching, or popping. If you feel notchy spots or hear grinding, the steering gear has internal problems.
With the engine off, check for play in the steering wheel. There’s always some play in a bus steering system — it’s not a sports car. But more than about two inches of free play before the front tires start to respond means wear in the steering gear, drag link, tie rod ends, or a combination.
Get someone to slowly turn the steering wheel back and forth while you watch the front suspension from underneath. You’re looking at the tie rod ends, drag link, and pitman arm. Any visible looseness or play in these joints means they need replacement. Loose steering components are both a safety issue and a cause of weird tire wear.
Power steering fluid should be checked too. Low fluid with no visible leak means it’s leaking somewhere you can’t see, probably the steering gear itself. Power steering on a school bus isn’t optional equipment — trying to steer one without it is a workout you absolutely do not want.
“How heavy is this bus with everything in it?”
Weight Concerns for Pre-Buy
I keep seeing this question come up, and it actually matters for the pre-buy inspection more than people think. You’re not just buying a bus as-is. You’re buying a platform that’s about to gain a LOT of weight.
A stripped-out full-size school bus (seats removed, no conversion weight) typically weighs 16,000-20,000 pounds depending on length and model. A finished skoolie build adds 3,000-6,000 pounds of wood, insulation, water tanks, appliances, batteries, personal belongings, and everything else. That puts a lot of finished builds right at or near their GVWR (Gross Vehicle Weight Rating).
So when you’re doing your pre-buy inspection, you need to think about this. Is the suspension already sagging? Are the leaf springs flat or starting to invert? Are the tires rated for the GVWR or were they downgraded to cheaper ones? Is the front axle rated differently from the rear?
I talked to one couple who bought a bus, did a full build with tile floors, granite countertops, and a cast iron wood stove. Beautiful rig. Except they were 4,000 pounds over GVWR and couldn’t legally drive it in most states. They had to strip out the tile and granite and redo the floors and counters with lighter materials. That’s not a fun conversation to have after you’ve already done all that work.
Check the data plate on the bus — it’ll list the GVWR and the GAWR (Gross Axle Weight Rating) for front and rear. Write those numbers down. You’ll need them when planning your build. For the full breakdown on weight management, check our guide on how to calculate and stay under GVWR.
Fluids — The Five-Minute Diagnostic
I’ve touched on engine oil, coolant, and transmission fluid already, but fluids deserve their own section because they’re the fastest diagnostic tool you’ve got.
Think of it this way. Fluids are a snapshot. They can’t tell you everything, but they can tell you a lot in under five minutes. I made a habit of checking fluids first on every bus I looked at, because if the fluids were garbage, I already knew maintenance had been neglected and could decide right there whether I wanted to keep going.
Engine oil — Pull the dipstick. Check level, color (black normal on diesel, milky means coolant contamination), and look for metal particles or glitter (internal engine wear). Wipe the dipstick on a white paper towel for the clearest view.
Coolant — Radiator cap off, engine cold. Clean, proper color, no oil film, no rust. You can get coolant test strips for a couple bucks that show pH and additive levels. Low additive levels mean the coolant is acidic and eating engine components from the inside.
Transmission fluid — Dipstick or check plug. Clean red or pink is good. Brown is aged. Black and burnt-smelling is trouble. Metallic flakes or chunks mean internal damage.
Differential fluid — This is the one everybody forgets. Pull the fill plug on the rear differential and stick your finger in. The fluid should be gear oil — thick, honeylike. Milky means water got in through a bad seal or a submerged axle vent. Burnt smell means the gears have been overheated. No fluid at all means the differential has been running dry and the gears are probably toast.
Power steering fluid — Check the reservoir. Low fluid with no visible leak means there’s a hidden leak, probably the steering gear.
Brake fluid (hydraulic brake buses only) — Clear to light amber in the master cylinder reservoir. Dark brown or black fluid has absorbed too much moisture and needs flushing. Moisture in brake fluid lowers the boiling point and can cause brake fade going down a long grade.
Five minutes. Check them all. Fastest way to read how well someone treated this bus.
The Test Drive
This is where everything you’ve inspected statically gets tested dynamically. A bus can look perfect sitting still and reveal problems the second you hit the road. I covered some test drive basics in the things to check before buying article, but here’s the full version.
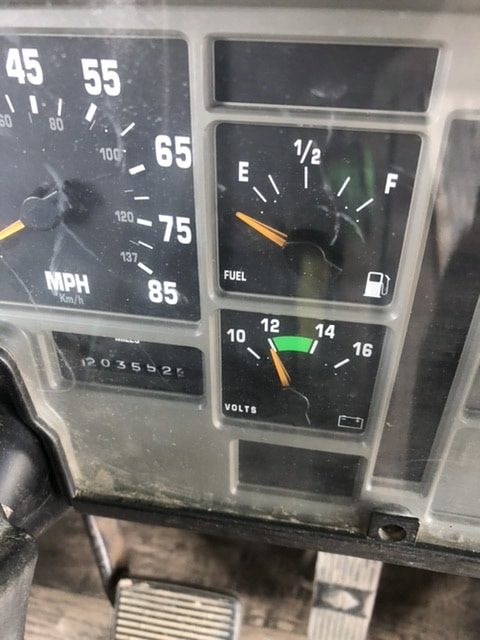
Before moving, check the basics from the driver’s seat. Does it start easily? Idle smoothly? Do all the gauges work — oil pressure, coolant temp, air pressure, voltage? Is the steering wheel centered when the front wheels are straight? Does the turn signal cancel properly?
Start moving. Go slow first. Listen for clunks or pops when you put it in drive — that’s U-joints, driveline slack, or motor mount issues. Turn the wheel lock to lock in both directions at low speed. Should turn smoothly without binding or popping.
Get to highway speed — 55-60 mph. A healthy bus at highway speed feels solid and stable. If it sounds like it’s revving too high at 55, the bus probably has low-ratio mountain gears. Fine for hills, worse for fuel economy on flat highway. Check our mountain gears vs highway gears article for the full breakdown.
Feel for vibrations. Shimmy in the steering wheel usually means an out-of-balance tire or bad wheel bearing. Vibration in the seat or floor is often U-joints or driveline. Rhythmic thudding that gets faster with speed could be a flat spot on a tire or a brake drum out of round.
Test the brakes from highway speed. Find a safe straight stretch and do a moderate stop from 50 mph. The bus should stop straight without pulling. Pulling means one side’s brakes are weaker. Pulsation through the pedal means warped drums or rotors.
And test it on a hill if you can. Going up tells you about the engine and transmission under load. Going down tells you about the brakes. A bus that overheats going up a moderate grade has cooling problems. A bus where the brakes fade going down has brake problems. Better to know now.
Honestly, pay attention to your gut too. After 30 minutes of driving a vehicle, you have a sense of whether it feels right or whether something is off. Don’t talk yourself out of that feeling just because you drove four hours to look at the bus.
What to Bring to the Inspection
This section is short but I wish someone had given me this list before I went to look at my first bus. I had to piece it together from about a dozen different forum posts.
The essentials:
- Flashlight (a good one, not your phone light — you’re going under the bus)
- Mechanic’s creeper or old blanket to lie on
- Multimeter (for electrical checks)
- Tire pressure gauge
- Tire tread depth gauge or a penny
- Small mirror on a stick (for seeing behind things)
- White paper towels (for checking fluid colors)
- Small clean container (for oil sample if you want to send for analysis)
- Screwdriver or awl (for tapping the frame)
- Notepad and pen (old school, but writing things down beats trying to remember)
- Camera (take photos of EVERYTHING, especially underneath)
Nice to have:
- OBD scanner if the bus is 1996 or newer (check for stored codes)
- Infrared thermometer (check for cold cylinders, overheating components)
- Blow-by tester or a latex glove
- Coolant test strips
Most of this fits in a five-gallon bucket. Just toss it all in there, throw it in the car, and you’re set.
What to Ask the Seller
I found that the questions you ask tell you almost as much as the answers you get. Not just the information, but how the seller responds. Are they upfront and detailed, or vague and evasive?
Here’s what I’d ask:
- Why are you selling it?
- How long have you owned it?
- Do you have maintenance records? (This is the big one. Records are worth more than the seller’s word.)
- When was the last oil change? Transmission service? Coolant flush?
- Has it ever overheated?
- Are there any known issues? (Watch their face when you ask this.)
- Has it been in any accidents or had body work done?
- Where was this bus in service? (Geography tells you about salt exposure.)
- How long has it been sitting? (Sitting buses develop their own set of problems.)
- Can I bring a mechanic to inspect it? (A “no” to this is an immediate red flag.)
- Can I start it cold? (If they won’t let you, ask yourself why.)
A seller who hands you a folder of maintenance records, lets you bring a mechanic, and is upfront about the bus’s issues? That’s someone you can probably trust. A seller who says “it runs great, don’t need no mechanic” and has zero paperwork? That’s someone trying to move a problem.
I had a conversation with a guy who sells buses out of a small lot in the midwest. He told me the number one thing he sees is sellers who deliberately warm the bus up before the buyer arrives. “If the engine’s already warm when you get there,” he said, “turn around and come back tomorrow. Show up early.” That stuck with me.
Red Flags and Deal-Breakers
Not everything wrong with a bus is a deal-breaker. But some things are. After going through all of this, here’s how I’d sort them.

Walk Away, No Negotiation
- Frame rust you can poke a screwdriver through
- Milky oil (coolant in oil — head gasket or cracked head)
- Compression test with one or more cylinders 20%+ below the others
- Air brake system that won’t hold pressure (more than 3 PSI drop per minute)
- Transmission fluid that’s black with metal flakes
- Seller won’t let you inspect or bring a mechanic
- Cracked frame rails
- Major structural welds on the frame (means it’s been repaired, and you don’t know what else is hiding)
Negotiate Hard, Budget for Repairs
- High blow-by (ring wear — eventual engine work)
- Transmission that slips or shifts hard (rebuild territory)
- All tires need replacement (budget $1,500-$3,000 for new rubber)
- Brake system needs work (budget $500-$1,500)
- Weak alternator or old batteries (budget $300-$600)
- King pins worn (budget $800-$1,600 both sides)
- Cooling system needs hoses, thermostat, water pump ($300-$800)
- Surface rust on frame that hasn’t penetrated (treatable but needs attention)
Not Ideal But Manageable
- Body rust (patchable, cosmetic)
- Floor rust in small areas (weldable)
- Minor oil leaks (seals and gaskets — common on older diesels)
- Worn interior (you’re ripping it out anyway)
- Non-functional school bus equipment (flashers, stop arm, PA system)
- Cosmetic paint issues
The key is knowing which category each problem falls into before you’re standing in front of a bus with your wallet out. Excitement makes you justify things. “Oh the frame’s a little rusty but it’ll be fine.” No. It won’t. Set your deal-breakers before you go and don’t negotiate with yourself when you get there.
Hiring a Mobile Mechanic
Not everyone is comfortable crawling under a bus with a flashlight and checking differentials. You don’t have to be. What you DO have to do is make sure SOMEONE qualified does it before you hand over money.
A mobile diesel mechanic who does pre-purchase inspections is worth their weight in gold. They’ll come to wherever the bus is, go through every system I’ve described here (and more), and give you a written report. Usually $200-$400, and that often includes a compression test.
We’ve got a whole article on how to find a mechanic for a converted school bus. Short version: call diesel shops or truck repair shops in the area where the bus is and ask if they do mobile pre-purchase inspections. Most will say yes or know someone who does.
Make sure the inspection covers:
- Compression test on all cylinders
- Air brake system leak-down test
- Fluid analysis (or at minimum, visual fluid checks)
- Full underbody inspection for rust and structural integrity
- Tire age and condition
- Electrical system basics (alternator, batteries, all lights)
- Test drive evaluation
- Known issues specific to that engine/transmission combo
Some mobile mechanics specialize in commercial vehicles and they’ll know the common failure points for whatever engine the bus has. A guy who’s worked on DT466s all his life knows exactly where to look for problems in a way a general mechanic might not.
One more thing. I talked to a mobile mechanic once who told me about a third of the buses he inspects for pre-purchase, he recommends walking away from. A third. That means without an inspection, you’ve got roughly a one-in-three chance of buying a bus with a serious hidden problem. Those odds aren’t great when you’re about to invest months of work and thousands of dollars.
The best $300 you’ll spend in this entire process is the one that tells you not to buy the wrong bus.
So Here’s Where I Ended Up After All This
After going through every system, talking to mechanics, reading hundreds of forum posts from people who got it right and people who got burned — it comes down to this. A pre-buy inspection isn’t one big thing. It’s a bunch of small things that add up to a complete picture. Engine, transmission, brakes, cooling, electrical, tires, suspension, frame, steering, fluids, and a real test drive. None of these are optional.
If you can only remember a few things from this whole guide, remember these. Check the oil for coolant contamination — that’s an engine killer. Get under the bus and check the frame — that’s the one thing you can’t fix if it’s bad. Test the air brake system for leaks — that’s a safety issue that can literally kill you. And drive it on the highway, because that’s where problems show themselves.
I know it seems like a lot. It is a lot. But every one of these checks exists because somebody skipped it, bought a bus with that specific problem, and then shared their expensive lesson with the rest of us. You get to benefit from all those mistakes for free. Take your time, bring a mechanic if you’re not confident doing it yourself, and don’t let excitement override your judgment. The right bus is out there. Your job is just to tell the difference between the right bus and a really convincing wrong one.
If you’re still in the early stages of figuring out what bus to buy in the first place, start with our guide on how to choose the right school bus. And once you’ve got your bus home, check out our things to check before buying a school bus for the condensed checklist version of everything in this guide.