

The kitchen is the one part of a skoolie build where almost every decision connects to something else — your layout affects your plumbing, your cooktop choice affects your power system, your counter material affects your weight budget. I spent way too long going back and forth on kitchen details when I was planning, and honestly, most of that time was wasted on stuff that didn’t matter as much as I thought it did. (See our guide on How to Build a Skoolie Bathroom (Shower, Toilet, and Plumbing) for more on this.)
A functional skoolie kitchen comes down to six things: a layout that fits your bus length and cooking style, countertops that won’t crack or warp from road vibration, a cooktop that matches your power system, a fridge that doesn’t drain your batteries overnight, a sink with reliable water pressure, and storage that stays put when you’re driving down a mountain road at 55 mph. Get those six right and you’ll actually enjoy cooking in your bus. Get them wrong and you’ll be eating gas station food within a month.
Choosing Your Layout (Galley, L-Shape, or Island)
When I was researching kitchen layouts, I noticed something kind of funny. Almost every skoolie build video I watched had the kitchen running along one wall. Like, maybe 80% of them. And I kept wondering if that was actually the best option or if people were just copying each other. (See our guide on 6 Best Flooring Options for a School Bus Conversion for more on this.)

Turns out there’s a real reason for it. A galley layout — kitchen along one wall of the bus — keeps all your plumbing on one side. That means one water supply line, one drain line, everything drops straight down to your gray tank. It also gives you the longest possible stretch of counter space, which in a bus where every inch counts, is a big deal. On a 40-foot bus you can get 6-8 feet of continuous counter. On a short bus you’re looking at maybe 3-4 feet, but it still works.
The L-shape is the second most common. You run the main counter along one wall and then wrap it around the back or front of the bus. This gives you more counter space total, but you lose some floor area and the plumbing gets a little more complicated since you’re running lines in two directions. I talked to a builder at a meetup who had an L-shape kitchen in his 35-footer, and he said the extra corner counter space was worth the additional plumbing work. He used that corner specifically for a drying rack and coffee station. Smart. (See our guide on 7 Skoolie Floor Plan Ideas for Every Bus Size for more on this.)
Island kitchens are rare in skoolies, and for good reason. A standard school bus interior is about 90 inches wide. An island needs walking space on both sides, so you’re talking a 24-inch island with 18 inches of clearance on each side. Most people who try it in a bus shorter than 35 feet end up ripping it out because it chokes the walkway.
Here’s the thing nobody really talks about though — your layout choice should start with where your gray tank sits. If your tanks are on the driver’s side, put your kitchen on the driver’s side. Start with the plumbing, then figure out the counter arrangement around it.
Countertops That Can Handle the Road
This is one of those areas where I went deep into a rabbit hole and came out the other side realizing the answer was simpler than I’d made it. People ask “where did you buy the countertops?” on almost every build tour, and the answers are all over the place — IKEA, Home Depot, a local lumber yard, sometimes just a sheet of plywood with edge banding.

Butcher block is the most popular countertop material in skoolie builds, and it’s popular for the right reasons. It’s relatively light, it looks great, it absorbs vibration instead of cracking from it, and you can cut it to any shape with basic tools. A 6-foot butcher block countertop from IKEA or Home Depot runs $80-200 depending on the wood species. Birch is the budget option. Acacia and walnut look nicer but cost more. You seal it with mineral oil or butcher block conditioner, and you re-oil it every few months. That’s it.
Granite and quartz are heavy. We’re talking 12-15 pounds per square foot for granite, and when your bus has a weight budget, that adds up fast. A 6-foot section of granite weighs around 100 pounds. That same length in butcher block weighs 30-40 pounds. Concrete countertops are even heavier and can crack from highway vibration if they’re not poured with fiber reinforcement. I’m not saying stone can’t work, but you really need to account for the weight.
There’s also the budget option — regular 3/4-inch plywood, sanded smooth, stained, and sealed with marine-grade polyurethane. I’ve seen builds where the plywood countertop looked genuinely beautiful, and the total material cost was like $40. If you’re building on a budget, don’t overlook it. One thing I’d avoid though is laminate with a particleboard core. Particleboard swells when it gets wet, and in a bus kitchen with a sink and condensation, water finds those edges eventually.
Propane vs Induction Cooktops
I wrote a whole separate article on this topic because it’s one of the most asked questions in the skoolie community. But here’s the short version for the context of building your kitchen.

Propane is what most people go with. A two-burner cooktop costs $150-300, runs off a standard 20-pound tank, and doesn’t touch your electrical system at all. You can cook while your batteries are charging, while your solar is offline, middle of the night, doesn’t matter. Propane just works. You do need ventilation and proper gas lines with LP-rated fittings. (See our guide on Is a Propane or Electric Stove Better for a Skoolie? for more on this.)
Induction is the electric alternative, and it’s gotten a lot more popular in the last couple years. A portable two-burner induction cooktop costs $60-100 and weighs almost nothing. No gas lines, no ventilation for combustion byproducts, no open flame. The catch is power. An induction cooktop pulls 1,500-1,800 watts, which is a big draw on a solar-and-battery system. If you’ve got a serious setup — 600+ watts of solar, 400Ah of lithium, a 3,000-watt inverter — induction works great. If your power system is modest, you’ll be watching your battery monitor the whole time you’re trying to make dinner.
I remember reading a comment from a guy who said he’d tried induction for six months and switched back to propane. His exact words were something like “I got tired of doing math every time I wanted to scramble eggs.” That stuck with me because it captures the real problem. Propane lets you just cook. Induction makes you think about cooking in the context of your entire power budget.
For the kitchen build itself, propane requires more planning up front. Gas line from your external tank to the cooktop, either rigid copper or CSST rated for LP gas, a shutoff valve near the cooktop, and a CO detector. Not optional. Induction just plugs in — run a 20-amp circuit from your inverter and you’re done. Physically building the kitchen around induction is simpler. The question is whether your power system can handle it.
Refrigerator Options (12V, Propane, or Residential)
Alright, so this is where things get interesting because there are genuinely three different philosophies here, and people get weirdly passionate about which one is right.
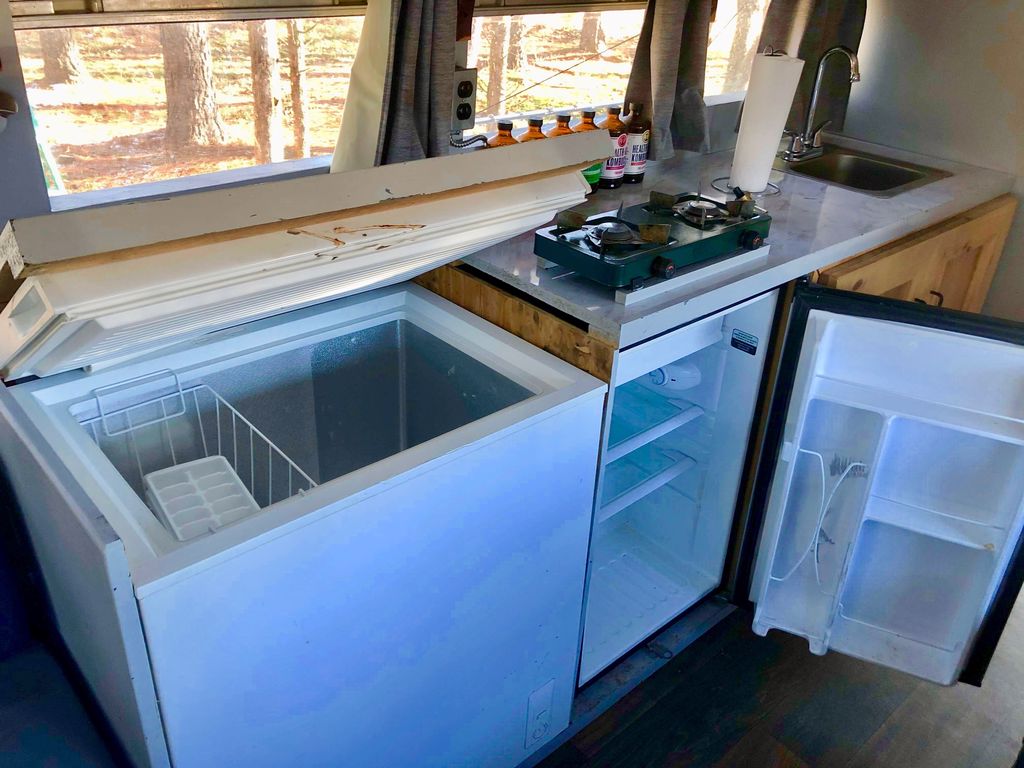
12V compressor fridges are what most skoolie builders end up with. They run directly off your house battery bank without needing an inverter, they’re efficient, and they’re built for mobile use. Dometic, Engel, and Isotherm are the big names. A decent 12V fridge with 4-5 cubic feet runs $600-1,200. Not cheap, but they handle vibration, handle being tilted on uneven ground, and draw around 3-5 amps at 12V, which on a 200Ah battery bank is manageable.
Propane fridges are the old-school RV solution. They barely touch your battery, which is the appeal. The downside is absorption-style cooling — slower to get cold, less efficient, and they really don’t like being off-level. Park on a slope without leveling and a propane fridge can struggle or get damaged. A new one runs $800-1,500 for mid-size.
And then there’s the residential fridge crowd. I’ll be honest, when I first saw people putting regular household refrigerators in their skoolies, I thought they were crazy. A full-size residential fridge is heavy, it’s not designed for vibration, and it pulls a lot of power through your inverter. But the people who do it swear by it. Why? Because a residential fridge costs $400-600 for a decent one, gives you way more space than any 12V option, and they’re available at every appliance store in the country.
That last point matters more than you’d think, and it connects to a question I kept seeing — “what happens if the fridge needs replacement or repair?” With a 12V fridge, you’re looking at specialty parts, maybe waiting for a shipment, and finding a tech who knows marine/RV refrigeration. With a residential fridge, you walk into any Home Depot or Lowe’s and buy a new one that afternoon. The tradeoff is power consumption. A residential fridge pulls 100-400 watts through your inverter, which is significant if your solar system is small.
Whatever you choose, measure your fridge space carefully and add an extra inch on each side for ventilation. I’ve seen builds where someone jammed a fridge into a tight cabinet and wondered why it overheated constantly. Give it room to breathe. And bolt it down or build a frame around it — a fridge that shifts during braking is a serious safety hazard.
Sink and Water Setup
The sink is the most straightforward part of the kitchen build, which is maybe why people don’t talk about it as much. But there are still decisions that affect your daily life more than you’d expect.

Most skoolie kitchens use a single-basin stainless steel bar sink, roughly 15×15 or 15×20 inches. You can get these at any home improvement store for $30-80. Go with a deeper basin — 8-10 inches — for actually washing pots and pans. Shallow sinks look nice in photos but they’re annoying when you’re scrubbing a skillet and water is splashing everywhere.
For the faucet, get a single-handle with a pull-down sprayer. I was surprised at how many builds used a standard fixed faucet and then complained about not being able to rinse things. A pull-down faucet costs $30-50 at the budget end and it makes a huge difference in a small sink.
Water pressure comes from a 12V pump — something like a Shurflo or Flojet. These are small, cheap ($50-80), and they give you real pressure on demand. Mount the pump between your fresh tank and faucet, same system as every RV on the road. For the drain, your sink connects to a P-trap and runs to your gray water tank underneath. Keep drain runs short with a downward slope the whole way. Water that pools in a flat line smells terrible after a few days.
One tip I picked up from a plumber who’d worked on bus builds — use PEX crimp fittings for your supply lines, not hose clamps on vinyl tubing. Those hose clamp connections vibrate loose over time. PEX costs maybe $20-30 more for the whole system and it’s worth it to not have a leak six months down the road.
Related: Can You Put a Bathroom in a School Bus?
Storage That Actually Stays Put
This is probably the section I have the most to say about because storage in a skoolie kitchen is one of those things that sounds simple until you’re driving 60 mph on a highway and your spice jars are doing backflips. The question I saw over and over was some version of “how can open shelving in the kitchen work? When on the road, everything will fall from shelves, right?”
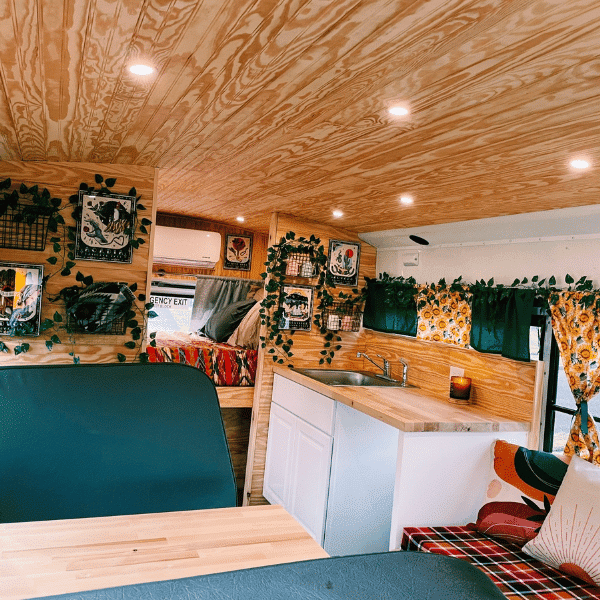
The short answer is that open shelving absolutely works, but you can’t treat it like a house shelf. In a house, shelves just hold stuff. In a bus, shelves need to hold stuff that’s actively trying to move.
The most common solution is adding a rail or lip to the front edge of every open shelf. You’re talking about a 1-inch to 2-inch strip of wood or a thin dowel rod across the front. This keeps plates, bowls, cups, and bottles from sliding off during normal driving. For spices specifically, I saw one build that used a narrow shelf with holes drilled to hold each spice jar individually, kind of like a test tube rack. Clever, and nothing moved.
Bungee cords across shelf openings are the quick and dirty solution. They work, they don’t look amazing, but you can unhook them in two seconds when you’re parked. Some people use curtain tension rods for the same purpose.
For cabinets with doors — and honestly most of your kitchen storage should be behind cabinet doors — use positive-latch hardware. Regular magnetic catches aren’t strong enough. A good pothole will pop a magnetic catch open and then everything inside cascades out. You want either roller catches, push-to-open latches, or actual locking handles. Marine cabinet hardware is designed for exactly this. It costs more than residential hardware, and I know nobody wants to hear that, but the difference between a $2 magnetic catch and a $8 marine roller catch is the difference between your dishes staying in the cabinet and your dishes on the floor.
Inside the cabinets, use rubberized non-slip shelf liners, not the decorative contact paper. Rubber liner keeps plates and glasses from sliding around every time you brake.
I got curious about this and started looking at what people who’d been living in their buses for years actually did versus what new builders were doing. The experienced folks had almost all moved away from open shelving for anything heavy or breakable. Open shelves for lightweight stuff — towels, plastic containers, sealed dry goods. Everything else behind latching doors. The new builds looked prettier on Instagram, but most of those people ended up adding rails or switching to cabinets within the first few months.
And drawers — don’t forget drawers. In a bus kitchen, drawers are better than deep cabinets for basically everything. You pull them out and see what’s in there immediately. Use full-extension slides rated for at least 50 pounds, and make sure they lock in the closed position. Regular residential slides don’t lock, and your drawers will slide open on every hill.
—
After digging into all of this, here’s where I landed. The skoolie kitchen that actually works isn’t the prettiest one on Instagram. It’s the one where someone thought about how cooking actually happens in a moving vehicle. Galley layout because plumbing is simpler. Butcher block because it handles vibration. Propane unless your power system is massive. A 12V fridge if budget allows, residential if you want cheap and replaceable. Deep sink, pull-down faucet, and storage that latches shut. That’s what I found works. Start with function and add pretty later.