
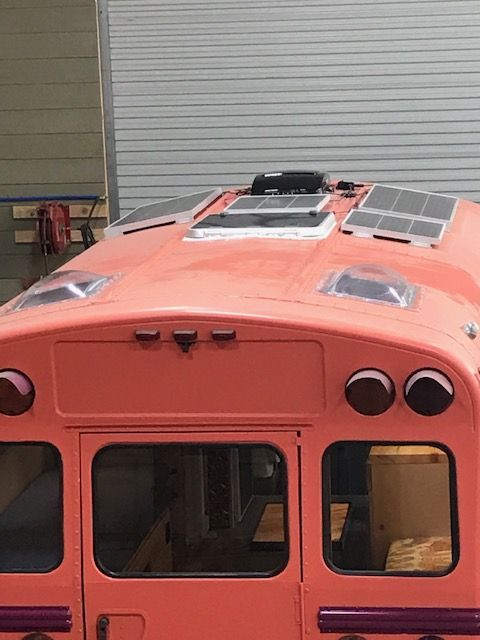
I spent an embarrassing amount of time in YouTube comment sections before I ever wrote a word about bus conversions. Not watching the builds — reading the comments underneath them. Hundreds of them. And the same handful of questions kept showing up, phrased slightly differently every time. “How much does this cost?” “How long did it take?” “Can a family actually live in this thing?” And my personal favorite, asked in about fifty different ways: “I have zero experience. Can I actually do this?”
The answer to that last one is yes. But the real answer takes about 5,000 words and covers fourteen stages of construction, so let’s get into it.
This is the complete, step-by-step guide to converting a school bus into a livable home — the main hub page for the entire builds section of this site. I’ll walk through every phase from buying the bus through the final finishing touches: gutting, rust treatment, insulation, subfloor, framing, electrical, plumbing, walls, flooring, furniture, systems, exterior paint, and registration. Each section includes realistic budget ranges, timeline estimates, tools needed, and the mistakes I kept seeing people make. Whether you’re a single person turning a short bus into a weekend camper or a family of five trying to figure out if full-time bus life is even realistic, start here and branch out from here.
“How much does it cost to convert a bus into a home?”
This is always the first question. Always. I covered it in a full cost breakdown article, but I’ll give you the summary here because I know nobody’s moving forward without a number in their head.
A basic livable conversion on a short bus runs $10,000-$20,000 in materials. A full-size bus with a real bathroom, functional kitchen, and solar power lands most people at $30,000-$50,000 total including the bus itself. High-end builds with lithium batteries, custom cabinetry, and a professional paint job can hit $80,000-$150,000+.
The number nobody wants to hear: whatever you budget, add 30%. I found this advice so consistently across builder forums that I started treating it as law. The electrical system that was supposed to be $3,000 becomes $5,000 once you realize you need a bigger inverter. The flooring you wanted goes on sale the week after you bought something else. One builder told me he tracked every single dollar and came in 42% over his original budget. He wasn’t mad about it — he just wished he’d planned for it.
Here’s a stage-by-stage breakdown for a mid-range full-size build:
- The bus itself: $3,000-$8,000
- Mechanical work (before you build anything): $500-$3,000
- Demo and gutting: $0-$200
- Rust treatment: $100-$500
- Insulation and subfloor: $500-$1,500
- Framing: $200-$600
- Electrical rough-in and solar system: $3,000-$8,000
- Plumbing: $1,000-$3,000
- Walls and ceiling finish: $500-$2,000
- Flooring: $500-$1,500
- Kitchen build: $2,000-$5,000
- Bathroom build: $1,000-$3,000
- Bedroom and other furniture: $500-$2,000
- Exterior paint: $200-$1,000
- Windows and ventilation: $500-$2,000
- Miscellaneous (sealant, hardware, things you forgot): $2,000-$4,000
Total: roughly $15,000-$45,000 in materials plus the bus. The range is enormous because every decision you make compounds. Luxury vinyl plank costs $2/sqft. Hardwood costs $8. Lithium batteries run three times the price of AGM. A composting toilet is $900. A five-gallon bucket is $3. The bus you build depends entirely on the bus you can afford.
“How long does a bus conversion take?”
This one depends on so many factors that giving a single answer feels dishonest. But here goes.
Working weekends and some evenings, most people finish a livable full-size build in 6-12 months. Going at it full-time, some people knock it out in 3-4 months. I’ve also seen builds that stretched past two years when life got in the way or when the builder decided to tear something out and start over because they weren’t happy with it.
The stages that eat the most time are usually electrical, plumbing, and furniture building. Demo takes a weekend. Rust treatment takes a few days. But running wires through every wall cavity before you close them up, getting your plumbing pressure-tested without leaks, building a kitchen from scratch in a space where nothing is square — those are weeks each.
I talked to a guy who finished his 40-foot Blue Bird in 11 weeks working on it full-time. I asked how he did it that fast. He said he’d spent six months planning before he ever picked up a tool. Every material was pre-ordered. Every cut was sketched. He called it “building the bus twice — once on paper, once in real life.” That stuck with me because the people who seem to finish fastest aren’t the most skilled. They’re the ones who made their decisions ahead of time and stopped second-guessing.
“What tools do you need for a bus conversion?”
You don’t need as many as you think to start. The list grows as the build progresses, and that’s fine. Don’t go buy everything before day one.
The starter kit (gets you through demo and into framing)
- Cordless drill/driver (the single most-used tool in any bus conversion)
- Circular saw
- Angle grinder with cutting and grinding discs
- Socket set (metric and SAE — you’ll need both)
- Tape measure, speed square, level
- Safety gear: respirator, safety glasses, hearing protection, gloves
- Pry bar
- Shop vacuum
Cost for decent quality: $300-$600 starting from zero. Hit Harbor Freight for the angle grinder and socket set. Get a mid-range DeWalt or Milwaukee drill. Don’t buy the cheapest circular saw you can find — you’ll use it for months and the cheap ones show it fast.
Tools you’ll add as the build progresses
- Jigsaw (curved cuts, notching around wheel wells)
- Reciprocating saw (demo work, cutting metal)
- Orbital sander
- Wire strippers and crimping tools (electrical phase)
- PEX crimp or expansion tool (plumbing phase)
- Caulk gun — you’ll go through an absurd amount of caulk
- Brad nailer or finish nailer (paneling and trim)
- Rivet gun (metal work)
- Multimeter (electrical testing — don’t skip this)
- Table saw (not required but makes furniture building dramatically faster)
Additional cost: $400-$800 spread over the build.
Something worth mentioning. I found a lot of builders who bought tools they only used once. A plumber’s torch for soldering copper fittings when they could’ve just used PEX with crimp rings. A welder for one small rust patch that a riveted plate and seam sealer would’ve handled fine. Before you buy a $300 tool for one task, ask whether there’s a simpler method.
“Can you inform how a family of 5 can do a realistic build?”
I got deep into this question because it comes up constantly and most guides kind of wave their hands at it. A couple in a 40-foot bus has space to spare. Three kids change the equation significantly.
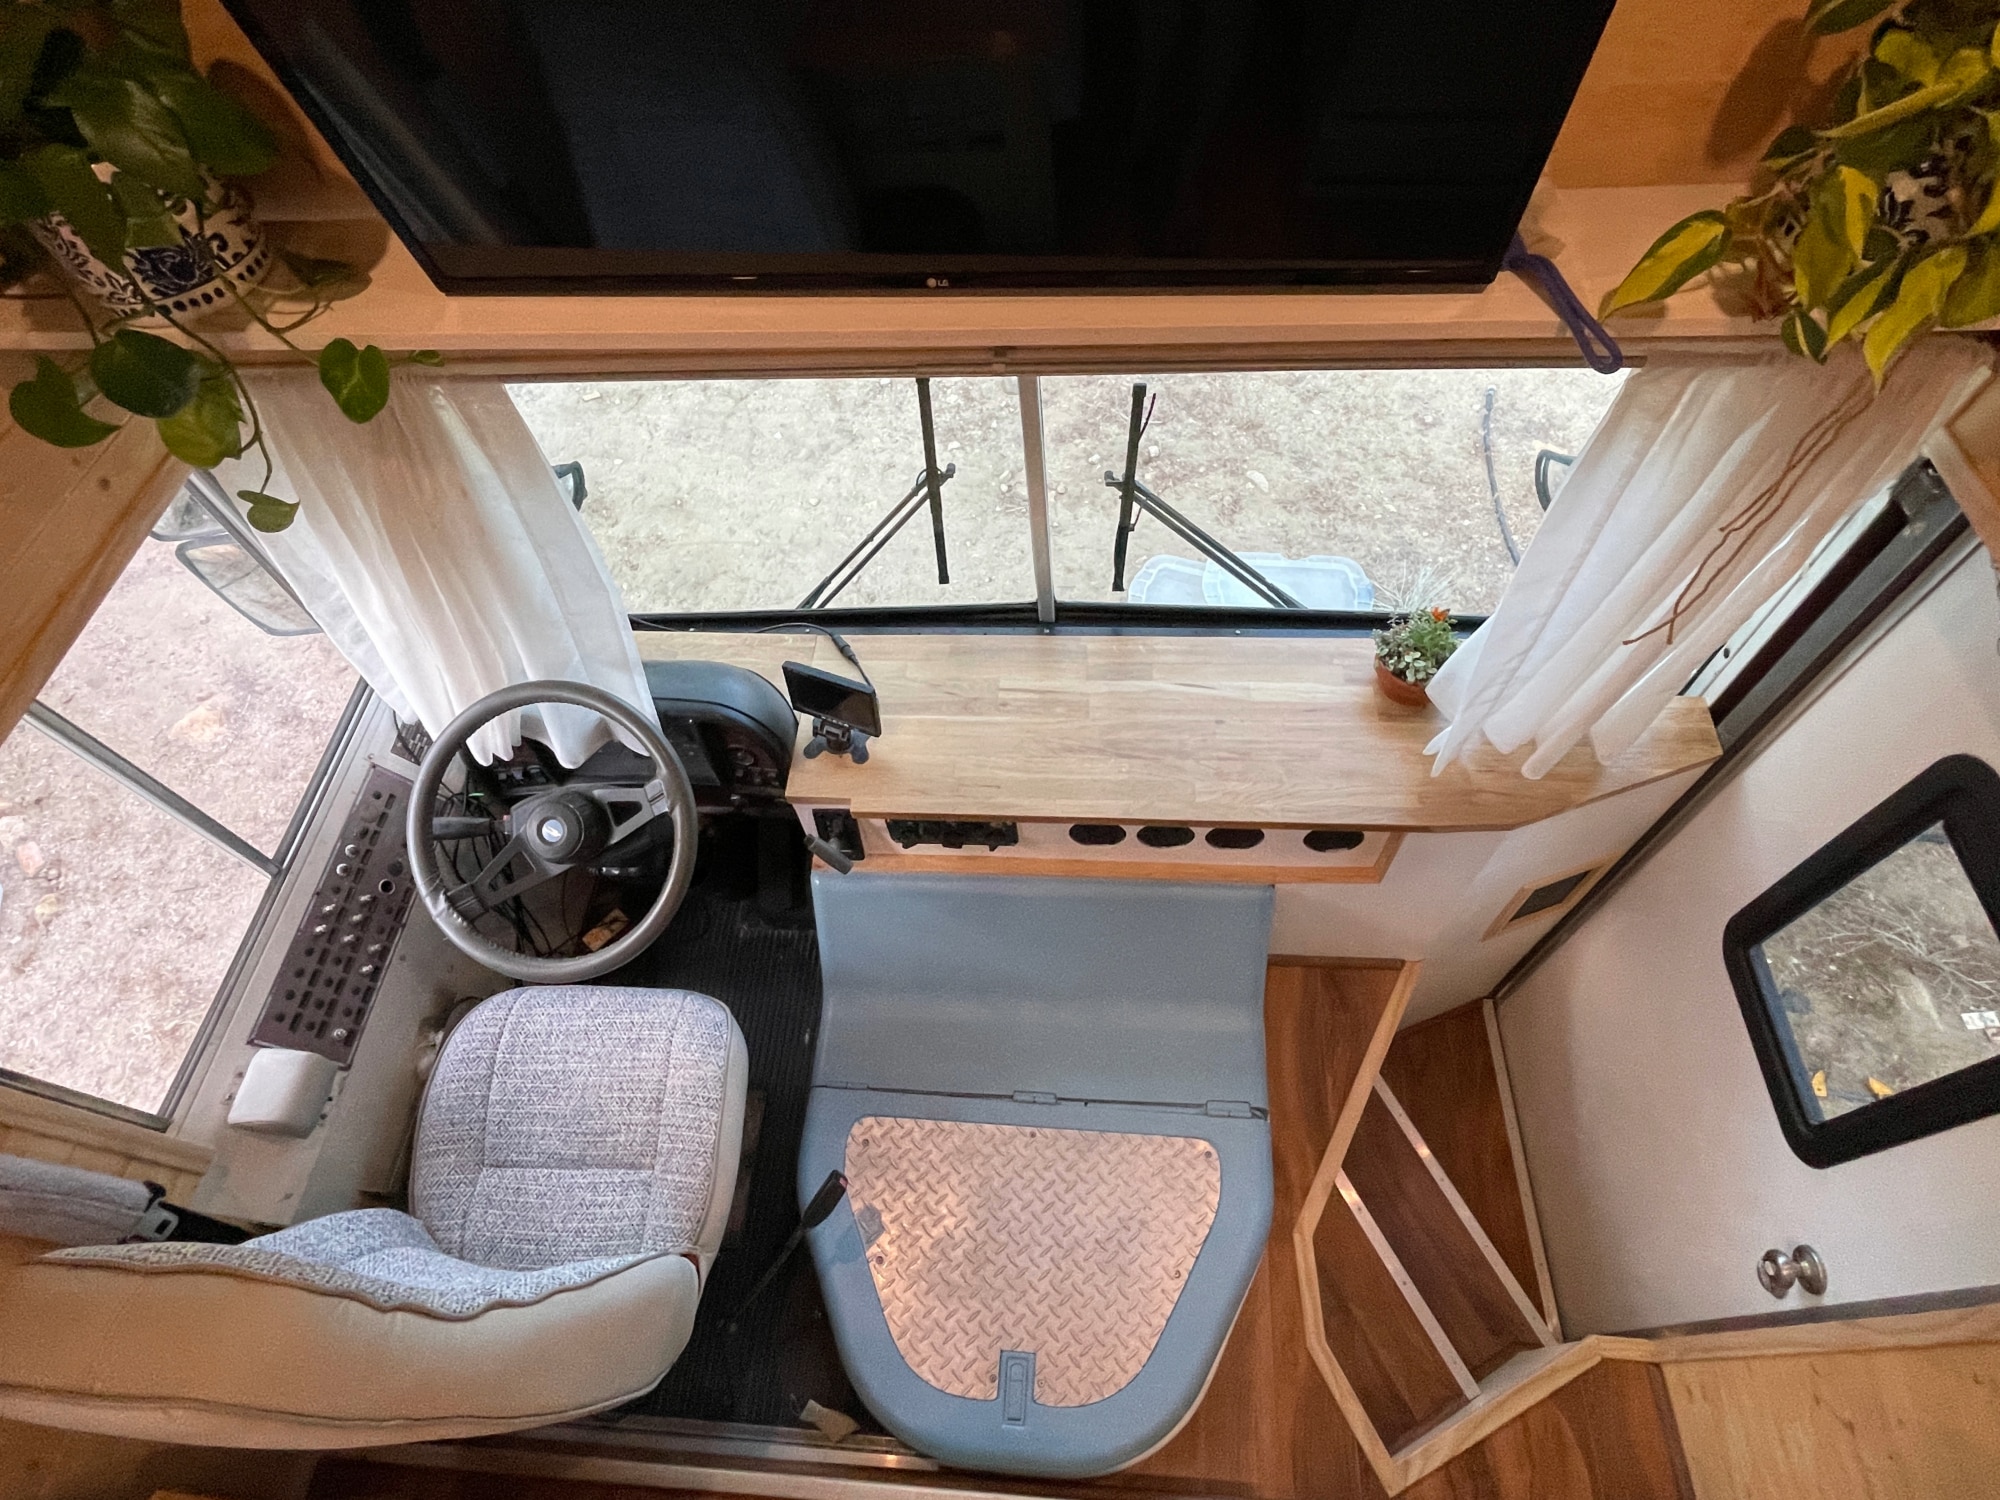
The space math
A 40-foot bus gives you roughly 245-260 square feet of usable floor space after accounting for the driver’s area. For a family of five you need:
- A master sleeping area (queen bed minimum)
- Kids’ sleeping — bunks are the standard answer. Three bunks stacked vertically, or two bunks plus a convertible dinette
- A full bathroom. A composting toilet and outdoor shower might work for two adults, but not with kids. You need a real wet bath or dry bath setup
- A kitchen big enough to cook actual meals for five people, not just reheat things
- Storage. So much storage. You can declutter all you want, but three children still need clothes, school materials, toys, shoes, rain gear, and whatever they’re currently obsessed with collecting
- Seatbelts for everyone while the bus is moving. This is non-negotiable
I found a family of six on Instagram — two parents, four kids ages 3-12 — living in a 40-foot Thomas. Their layout had the master bed at the back, triple bunks along one wall in the middle, the bathroom between bedroom and living area, and the kitchen up front behind the driver’s seat. The mom said the biggest challenge wasn’t the space. It was the weight. All that furniture, all those water tanks sized for six people, all those humans — they were within 500 lbs of their GVWR before they finished building. She said if she did it again she’d have used lighter materials everywhere.
Budget reality for a family
Family builds cost more. You need a bigger freshwater tank (65-100 gallons minimum), a bigger electrical system to power more devices, a full wet bathroom that can handle five people’s showers, and a kitchen that’s more than a camp stove and a cooler. Budget $35,000-$60,000 for a full-size family build, plus $5,000-$8,000 for the bus.
The timeline extends too. You’re probably doing this around a job, around getting kids to school, around life. A year to 18 months is realistic for a family build done on weekends and evenings.
There’s a whole article on bus life with big families if this is your situation.
“As a single person, that bus is more than spacious as a camper. How does one get into converting a school bus into a home with no experience?”
This question — or some version of it — showed up in the comments of nearly every build video I watched. It’s the right question to ask because the honest truth is that most people who build a skoolie had never built anything before they started.
The beginner’s guide goes deep on this, but the short version: a bus conversion is not one giant intimidating project. It’s about 200 small projects lined up in a row, and you learn each one as you go. The person who confidently wires a 400-watt solar system in month six had never stripped a wire in month one.
For a solo builder specifically, the advantages are real. You make every decision without compromise. A short bus for one person gives you a bedroom, a small kitchen, a basic bathroom, and still has room for a work area or lounge. You can build lighter, which means a smaller electrical system, less water, better fuel economy, and fewer worries about weight limits.
The disadvantages are also real. Some tasks genuinely need two people. Holding a sheet of plywood against the ceiling while you screw it in is miserable alone. Lifting a water tank into its frame. Moving the bus if the battery dies. Solo builders I talked to said they got creative with temporary braces, clamps, and asking a neighbor to hold something for ten minutes. Harder alone, but not impossible.
Where to start: YouTube build process videos. Not the glamorous finished tours — the actual step-by-step construction videos. Watch someone install insulation. Watch someone wire a light. You’ll realize it’s not magic. It’s just steps. The solo bus life guide covers the lifestyle side of doing this alone.
Step 1: Buying the Right Bus
Everything starts here. The mistakes you make at this step follow you through the entire build.
Types of buses
Full-size school bus (35-42 feet): The classic skoolie. Room for families, couples who want space, anyone who wants a real home on wheels. Blue Bird All American, Thomas Saf-T-Liner, IC Bus CE and RE series. Diesel engines. Expect 7-10 MPG loaded.
Short bus (20-25 feet): Perfect for solo builders or couples. Usually a van chassis (Ford E-450, Chevy/GMC 4500) with a gas engine. Easier to drive, easier to park, cheaper to buy, cheaper to convert. Around 80-120 square feet of usable space.
Mid-size / activity bus (25-35 feet): The middle ground. More interior than a short bus without the full commitment of a 40-footer.
There’s a complete guide to school bus types that breaks down every option in detail.
Where to find them
Government auctions (GovPlanet, PublicSurplus, GovDeals) are where most serious buyers shop. School district surplus sales — call your local districts directly, some sell without going through auction. Facebook Marketplace and Craigslist for private sellers. The complete buying guide and best websites list cover all the sources.
What to look for
Engine condition is everything. A clean bus with a dying engine is a money pit. Get a pre-purchase inspection from a diesel mechanic. $200-$400. Best money you’ll spend.
Miles matter less than maintenance. A bus with 180,000 well-maintained miles on a Cummins is a better buy than one with 90,000 miles that sat in a field for five years. Ask for maintenance records.
Check the floor. If you can, pull up a corner of the rubber mat and look at the steel underneath. Floor rust is the #1 hidden problem. Surface oxidation is fine. Structural rust — thin metal, holes, daylight coming through — means real repair work.
Avoid: Caterpillar 3126 engines (known injector problems), anything with visible frame rust, buses that sat unused for years without starting, and deals that seem too good to be explained.
Budget: $3,000-$8,000 for the bus, $200-$400 for inspection, $500-$3,000 for immediate mechanical needs.
Step 2: Demo and Gutting
Demo day is the most satisfying day of the entire build. You’re ripping stuff out and seeing immediate progress.
Seat removal
Every seat bolts to the floor with four to six bolts. Grab a 9/16″ or 1/2″ socket, a breaker bar, and a can of PB Blaster. An angle grinder handles the bolts that won’t budge. A full-size bus takes most people a solid day.
Here’s what nobody mentions in the quick videos: each seat weighs 30-50 lbs. A full-size bus has 20-26 rows. That’s easily 1,000-1,500 lbs of steel and vinyl you need to get out the door and off your property. Have a truck ready. Scrap yards take them. People buy them on Craigslist for $10-25 each. One builder I read about donated his to a welding class at a community college and got a tax write-off.
Floor and everything else
Pull up the rubber mat. It’s usually glued down with industrial adhesive that’s been curing for two decades. A floor scraper and a lot of swearing. Under that mat is where you discover the truth about your bus.
Then strip out the overhead luggage racks, ceiling panels, the old heater system, emergency exit mechanisms on windows you’re deleting, interior lights, and any wiring you won’t use. Take everything that isn’t staying. It’s easier to add back later than to work around it now.
Budget: $0-$200 (WD-40, cutting discs, maybe a pry bar).
Timeline: One long weekend.
Common mistakes: Not wearing a respirator while grinding bolts, throwing away the rubber floor mat before deciding if you want it as a moisture barrier, and not checking very old buses (pre-1990) for asbestos in ceiling materials.
Step 3: Rust Treatment and Prevention
If you skip this step or do it half-heartedly, you’ll regret it. I can’t say this strongly enough.
Once the floor is bare steel, you’re going to find rust. Every bus has it to some degree. I read a thread from a guy who pulled up his rubber mat and could see the ground through three separate holes. He almost walked away from the whole project. Instead he cut out those sections, welded in new 14-gauge steel, treated everything, and his bus is fine three years later. But it cost him two extra weeks and $400 he hadn’t planned for.
The process
- Grind the rust. Flap disc on your angle grinder. Get down to clean or stable metal. Respirator on. You’ll make a horrible mess.
- Apply rust converter. Ospho or Rust-Oleum Rust Reformer. Follow the bottle directions. These products chemically convert iron oxide to a stable surface you can paint over.
- Prime with rust-inhibiting primer. Rustoleum Rusty Metal Primer. Two coats minimum.
- Structural repairs. For holes or paper-thin areas, cut out the bad metal and weld in new steel. If you can’t weld, a metal patch riveted and sealed with 3M Panel Bond works for smaller spots. For anything bigger than your fist, find a welder.
Don’t forget underneath. Get under the bus and check the frame, cross members, and the bottom of the floor. Surface rust on the frame is normal and fine — treat it with a wire wheel and Fluid Film or rubberized undercoating. Scaling, flaking frame rust is a problem. Heavy frame rust is a reason to walk away from a bus before you buy it.
Budget: $100-$500 depending on severity.
Timeline: 2-5 days.
Step 4: Subfloor and Insulation
This step is the foundation for literally everything else. Get the insulation wrong and you’ll be freezing in winter and cooking in summer.
Floor insulation and subfloor
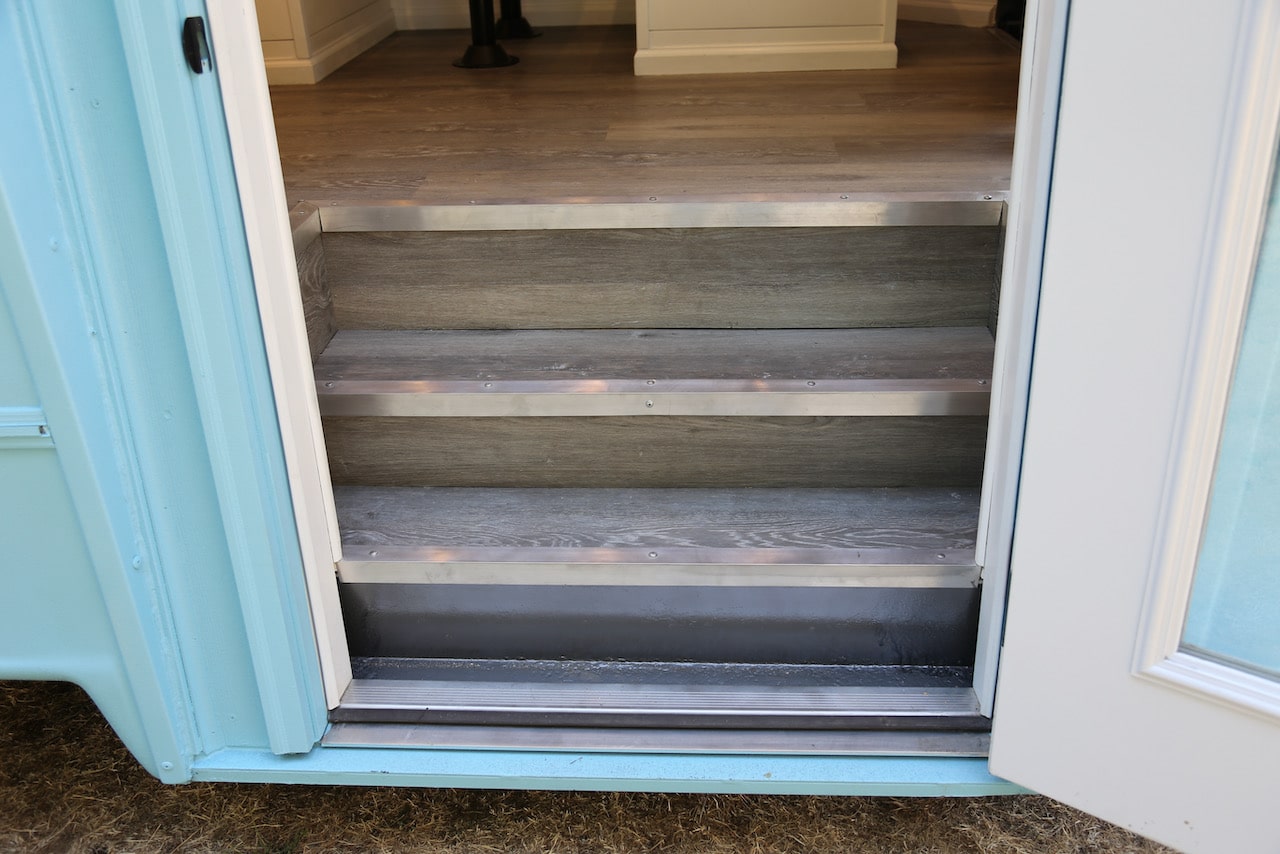
Most builders lay rigid foam board (XPS or polyiso, 1-1.5″ thick) between furring strips on the treated steel floor. The furring strips bridge the low spots and ribs, creating a flat surface. Then 3/4″ plywood goes on top as the subfloor. Some people use construction adhesive between layers to prevent squeaking, then self-tapping screws through the plywood into the steel ribs.
The debate about whether to screw through the bus floor or use adhesive only has strong opinions on both sides. The screw-through camp says it’s more secure. The adhesive camp says every hole is a future leak and rust point. Both methods work as long as you seal whatever you do.
Wall and ceiling insulation
The complete insulation guide goes deep on materials. Quick summary of options:
- Rigid foam board (XPS/polyiso): Cut to fit between bus ribs. Good R-value, moisture resistant, easy to work with. Most common choice. $0.50-$1 per sqft.
- Closed-cell spray foam: Excellent coverage, fills every gap, creates its own vapor barrier. More expensive and messy. $600-$1,500 DIY, $1,500-$3,000 professional.
- Wool insulation (Havelock, recycled denim): Natural, breathable, handles moisture well. Popular in the community but pricier.
- Fiberglass batts: Cheap and everywhere, but not recommended for buses. Absorbs moisture. In a metal box that condensates, you’re growing mold.
The vapor barrier question matters and I saw it argued endlessly online. Metal buses condensate — warm air inside hits cold metal outside and makes water. Cold climate builders I talked to were emphatic about using a vapor barrier between insulation and interior walls. Dry climate builders shrugged it off. If there’s any chance you’ll be in cold weather, don’t skip it.
Budget: $500-$1,500 total.
Timeline: 1-2 weeks.
Common mistake: Skimping on ceiling insulation. Heat rises, and in summer your roof is a solar panel cooking you from above. In winter your heat escapes through it faster than through the walls.
Step 5: Framing Walls and Ceiling
Framing gives you attachment points for wall paneling and creates cavities for wiring and plumbing.

Furring strips on bus ribs is the simplest and most common approach. Screw 1×2 or 1×3 strips horizontally across the ribs. Paneling attaches to these. Lightweight, shallow cavity for wires.
Stud walls (2×2 or 2×4) for partition walls — bathroom divider, bedroom wall, kitchen cabinet backing. These eat into your interior space but give you structure where you need it.
“It sure seems like all the 2×4 framing would add a lot of weight to the chassis springs.”
Valid concern. I saw this in the comments and it’s worth addressing. A full 2×4-framed build can add 500-800 lbs just in lumber. That’s real weight when you’re tracking your GVWR. The general advice: use furring strips on exterior walls and ceiling, reserve proper stud framing only for structural partition walls where you need it.
A few builders mentioned using lightweight metal studs to save weight. It works, but most skoolie builders are more comfortable working with wood, and the vibration of a moving bus can loosen metal stud connections faster.
Budget: $200-$600.
Timeline: 3-7 days.
Step 6: Electrical Rough-In
This is the step that scares people the most. For good reason — electricity can kill you if you get it wrong. But it’s also extremely learnable, and the skoolie community has produced genuinely excellent educational content on 12V and 120V systems.
The complete electrical and solar guide covers everything. Here’s the framework.
System sizing
Before you run a single wire, list every device, light, outlet, and appliance you plan to power. Add up the wattage. This determines everything else.
- Minimal (lights, fans, phone charging, water pump): 200W solar, 100Ah lithium, small inverter. $1,500-$2,500.
- Mid-range (add fridge, laptop, occasional appliance): 400-600W solar, 200-300Ah lithium, 2000W inverter. $3,000-$5,000.
- Full-house (add AC, microwave, induction cooktop, washer): 800-1200W+ solar, 400-600Ah+ lithium, 3000W+ inverter. $5,000-$10,000+.
The rough-in
Run all wiring before walls go up. This means:
- 12V DC circuits for lights, water pump, fans, USB outlets
- 120V AC circuits for standard outlets and appliances
- Shore power inlet (30-amp or 50-amp, on the bus exterior) for campground hookups
- Solar panel wiring from roof to charge controller to battery location
- Battery-to-inverter cables (thick — 2/0 or 4/0 gauge)
- Breaker panel or fuse box
Label everything. Photograph everything before walls close up. I read about a builder who had a wiring problem six months in and had to tear out wall paneling because he’d labeled nothing. Take the photos. You’ll thank yourself.
Shore power, solar, and generators
Most builds combine all three. Solar for daily off-grid use, shore power when you’re plugged in at an RV park, and a generator as backup. Design the system to accept and charge from all three sources.
Budget: $3,000-$8,000 for the complete system.
Timeline: 1-3 weeks for rough-in. Final system installation happens later but the wires need to be in the walls now.
Common mistakes: Undersized wire gauge (fire hazard), unfused circuits, battery bank in an unventilated space, and not running spare wires while the walls are open. Run extras now even if you don’t need them yet.
Step 7: Plumbing Rough-In
Bus plumbing is simpler than house plumbing. Way simpler. You’ve got a freshwater tank, a pump, hot and cold lines, some drains, and a gray water tank. The complete plumbing guide covers all of it.
The components
- Freshwater tank: 30-60 gallons for a couple, 65-100 for a family. Inside the bus or underneath (underneath saves space but needs freeze protection in cold weather).
- 12V water pump: Shurflo or Flojet. $50-$100. Creates system pressure.
- PEX water lines: Red for hot, blue for cold. Flexible, freeze-resistant, handles bus vibration far better than rigid pipe. Crimp or push-fit connections.
- Water heater: Tankless propane (Camplux, Eccotemp) is the most popular — hot water on demand, compact, $150-$300. Small tank-style (6-gallon RV) also works for $200-$400.
- Gray water tank: 20-40 gallons under the bus, collects from sinks and shower. Drain valve for dump stations.
- Drain lines: 1.5″ PVC or ABS from fixtures to gray tank.
The rough-in
Run PEX from the pump location to every hot and cold connection point before walls close. Mark your fixture locations. Leave slack for final connections.
For drains, you need gravity. 1/4″ drop per foot of horizontal run is the standard. In a bus with wheel wells and frame rails to work around, getting proper drain slope takes creative routing. Keep your wet areas (kitchen and bathroom) close together, with the gray tank mounted underneath them.
Budget: $1,000-$3,000.
Timeline: 3-7 days.
Common mistake: Mounting the gray tank too far from drain points. Long, nearly-level horizontal runs don’t drain.
Step 8: Wall Paneling and Ceiling Finish
This is where the bus starts looking like a home.
Wall options
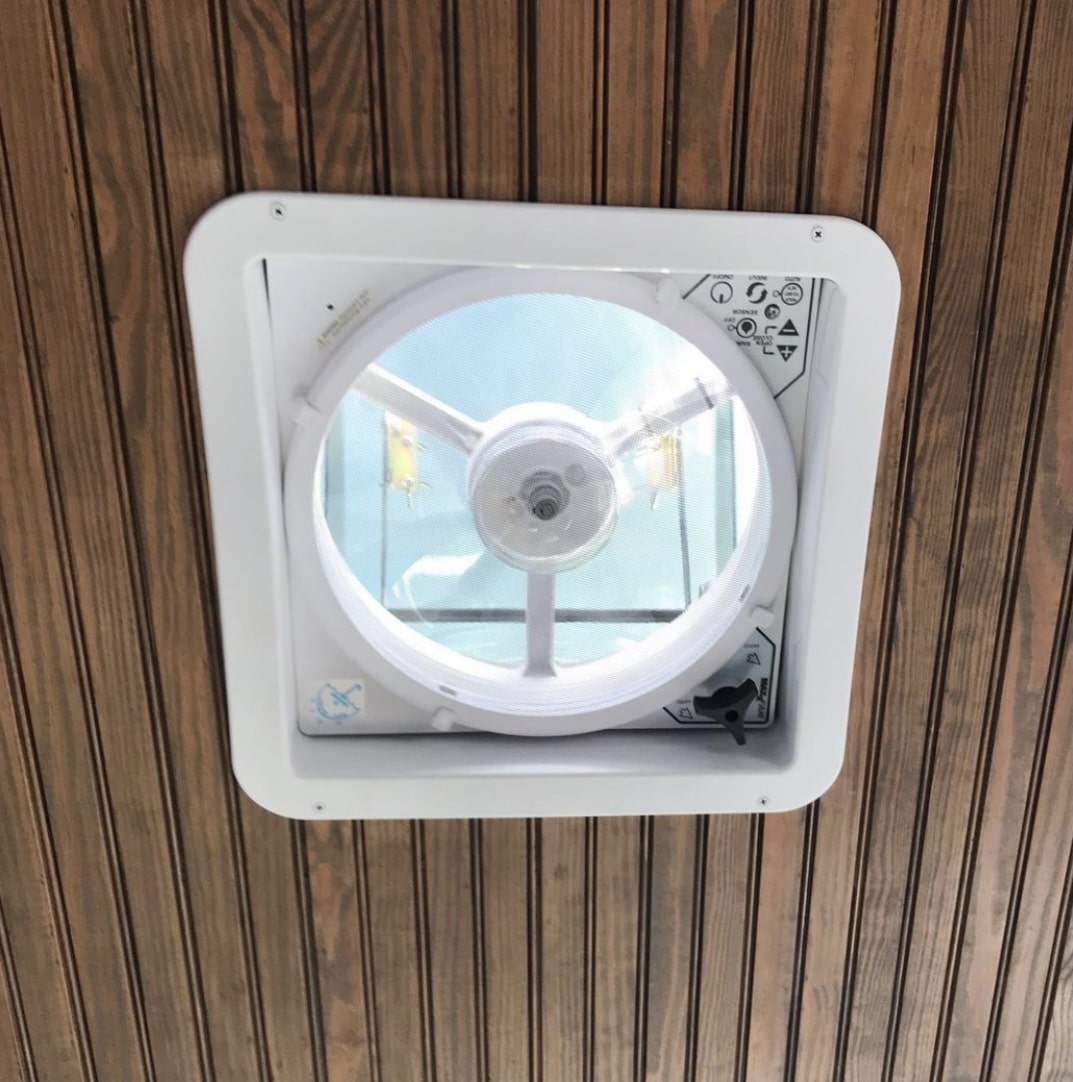
- Tongue-and-groove wood (pine, cedar, poplar): The most popular choice. Lightweight, beautiful, creates that cabin feel. $1-$3 per sqft. The framing and walls guide goes into installation details.
- Luan plywood panels: Cheap, thin, light. Good base for painted walls. $0.50-$1 per sqft.
- Shiplap: Hugely popular. Buy it or make your own from 1×6 boards with a table saw.
- Drywall: I wouldn’t. Heavy, cracks with bus flex, doesn’t handle moisture cycling. More cautionary tales than successes. Full article on this here.
Ceiling
Same materials work but weight matters more overhead. Thin tongue-and-groove (1/4″) is the classic. Some builders leave the original metal ceiling and just paint it — lightest option by far.
I saw one builder online who painted her original metal ceiling white and added decorative 1×4 wood beams at intervals. Looked custom and expensive. Weighed almost nothing. I thought that was brilliant.
Get a helper for ceiling installation. Holding panels overhead while driving nails alone is miserable. Use temporary braces — cut a 2×4 to floor-to-ceiling height plus half an inch and wedge it under the panel to hold it while you nail.
Budget: $500-$2,000.
Timeline: 1-2 weeks.
Step 9: Flooring Installation
Install your finish floor after the heavy construction is done so you don’t destroy it building furniture. The complete flooring guide covers every option.
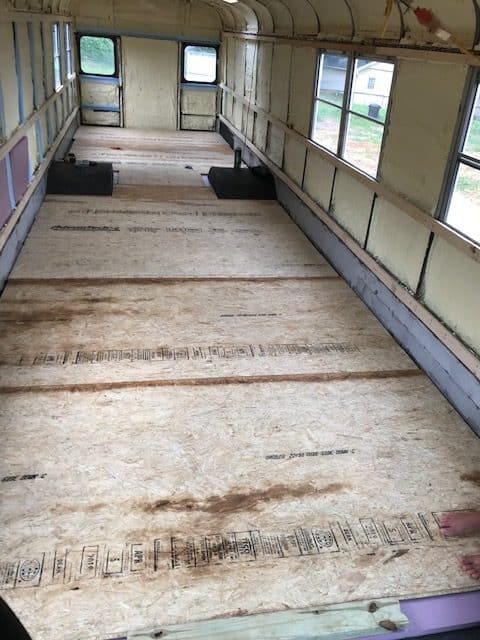
Luxury vinyl plank (LVP) is the overwhelming #1 choice and it’s not close. Waterproof, lightweight, durable, handles bus flex without cracking, easy to install, looks like real wood. $1.50-$3 per sqft. This is what I’d recommend for any first-time builder.
Other options: Vinyl sheet (cheaper, seamless, waterproof), real hardwood (beautiful but heavy and humidity-sensitive), tile (looks great in bathrooms but can crack — use small mosaic tiles on cement board with flexible grout and thinset if you go this route).
Budget: $500-$1,500.
Timeline: 1-3 days for LVP.
Common mistake: Installing flooring before building cabinets. Heavy furniture sitting on floating floor prevents it from expanding and contracting, causing buckling.
Step 10: Building the Kitchen, Bathroom, and Bedroom
This is the stage where every bus becomes unique. Your layout comes to life here, and this is also where the build takes the longest.

Kitchen
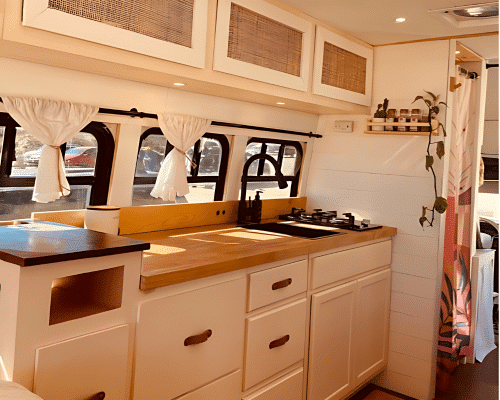
The complete kitchen guide covers this in detail. Build plywood cabinet boxes, install countertops, mount the sink, hook up the stove and fridge. Most skoolie kitchens use 3/4″ plywood frames finished with paint, stain, or laminate.
Key decisions: butcher block countertop ($100-$300) vs. laminate ($50-$150). Propane cooktop vs. electric induction. 12V compressor fridge ($300-$800) vs. residential mini fridge off the inverter. Every choice is a tradeoff of cost, weight, and power draw.
Bathroom
The bathroom guide covers everything. A basic skoolie bathroom is roughly 3×4 feet — wet bath style where the shower and toilet share one waterproofed space. Dry baths (separate areas) are nicer but take more room.
Toilet choice: composting (Nature’s Head, $900-$1,000), cassette ($100-$200), or standard RV flush with black tank ($150-$300 plus the tank). Most builders go composting to avoid dealing with black water entirely.
I loved a tip I found from a builder who said she taped out her bathroom dimensions on the floor with painter’s tape and then actually stood in the space. Pretended to shower. Sat on an imaginary toilet. She said it saved her from a layout that worked on paper but would’ve been claustrophobic in practice.
Bedroom
Most builds put the bed in the back on a raised platform, which creates massive storage underneath. A queen mattress fits between the walls of most full-size buses. The bed options guide covers all the configurations. Platform height of 18-24″ gives you the best balance of under-bed storage and ceiling clearance.
Budget: Kitchen $2,000-$5,000, Bathroom $1,000-$3,000, Bedroom and furniture $500-$2,000.
Timeline: 4-8 weeks total. This is the longest stage. Nothing is square in a bus. Every piece of furniture gets scribed and custom-fitted.
Step 11: Systems Installation (Solar, Batteries, Propane)
Your rough-in wiring and plumbing are done. Now you install the actual hardware.
Solar panels
Mount on the roof with Z-brackets or tilt mounts. Bolt through the roof, then seal every penetration heavily with Dicor self-leveling sealant. Every hole is a potential leak. Don’t get stingy with the sealant. The solar sizing guide helps you figure out how many watts you need.
Batteries
Lithium (LiFePO4) is the standard recommendation now. They cost 2-3x more than AGM lead-acid upfront but last 4-5x longer, weigh less, and discharge deeper. Most builders mount them under the bed or in a dedicated compartment. Keep them accessible — you’ll want to check connections.
Inverter and charge controller
Inverter converts 12V battery power to 120V AC for outlets. Charge controller manages solar input to the batteries. Size the inverter to handle your peak load with headroom — if you’ll run a 1,200W microwave, get at least a 2,000W inverter.
Propane
The propane systems guide covers everything. Standard setup: one or two 20-lb tanks mounted outside in a ventilated compartment, with an auto-switchover regulator and approved gas line run to your cooktop, water heater, and furnace.
I’ll be honest, propane is one area where I’d seriously consider hiring a professional if you’re not confident. Gas leaks in an enclosed space are no joke. A propane tech can install and pressure-test your system for $200-$500, and that’s cheap peace of mind.
Budget: Systems hardware is mostly included in the electrical and plumbing budgets above. Add $100-$300 for propane setup DIY, $200-$500 if hired out.
Timeline: 3-7 days.
Step 12: Exterior Paint
Paint last or near-last, after all roof work, window modifications, and exterior fixtures are done. You don’t want to cut holes through fresh paint.
The complete painting guide covers every method in detail.
Roller paint (Rust-Oleum): $200-$400 in materials. Sounds janky, looks surprisingly good with proper prep and multiple thin coats. Most common DIY method. Takes a weekend.
HVLP or airless sprayer: Better finish. $400-$800 including paint and sprayer rental. Requires masking everything.
Professional body shop: $2,000-$5,000. Magazine-quality finish.
Prep is 80% of the work. Wash, sand or scuff existing paint, prime bare metal, mask everything, then paint. Good prep with cheap paint beats bad prep with expensive paint every time.
Common mistake: Painting in direct sun on a hot day. Paint dries too fast and goes streaky. Overcast days, early morning, or late afternoon.
Step 13: Registration and Titling as an RV
You’ve built a home. Now the government needs to agree.
The complete registration guide covers state-specific details. General process:
- Remove all school bus markings, stop signs, and flashing lights
- Meet your state’s RV definition (most require cooking, sleeping, and bathroom facilities)
- Get a VIN inspection if required
- Apply for title change from “School Bus” to “Motor Home” or “RV” at the DMV — bring interior photos and appliance receipts
- Get new plates and RV insurance
Some states make this easy. South Dakota, Texas, and a handful of others are consistently mentioned as skoolie-friendly. Others make it painful with strict inspection requirements. Know your state’s process before you start building so you can meet whatever requirements they’ll want to see.
Budget: $100-$500 depending on state.
Timeline: A few hours of your time plus whatever processing wait your DMV imposes.
Step 14: Finishing Touches
This phase never technically ends. You move in and immediately start a list of things to add, change, tweak, and improve. That’s just how it works.
Common finishing touches:
- Window coverings for privacy and temperature control (Reflectix, blackout curtains, custom shades)
- Trim and molding at every joint, seam, and edge
- Kitchen backsplash
- Shelving and storage — you’ll realize you need more approximately 48 hours after moving in
- LED strip lighting under cabinets and in alcoves
- Exterior storage (roof rack, rear cargo platform, under-bus boxes)
- Securing everything for travel — latches on cabinets, non-slip liners, bungee cords on shelves
- Cabinet hardware, outlet covers, switch plates, all the small details that make it feel finished
When is it “done?”
Every builder I asked this question laughed. The build is never really done. You’ll tweak and upgrade and fix things for as long as you own the bus. One builder put it perfectly: “Version 1.0 is a place to sleep, eat, and not die. Everything after that is a software update.”
So Here’s Where I Landed
Fourteen stages. From buying to moving in, with a realistic budget window of $15,000-$50,000 for most real-world builds, and a timeline of 3-18 months depending on your pace, your experience, and how many times you change your mind about the countertop.
What surprised me most in all my research wasn’t any single technique or product recommendation. It was how consistent the core advice is across hundreds of different builders. Everyone says the same handful of things: plan before you build, don’t skip rust treatment, run your wires before you close the walls, keep track of your weight, and add 30% to whatever number you think the build will cost. The people who follow that advice finish their builds. The people who don’t end up with half-built projects in their driveways and forum posts asking how to sell a partially-converted bus.
I’ve linked to the deeper guides throughout this article on purpose. Each stage has its own full breakdown. This page is the map. Those are the turn-by-turn directions. Start with whatever step you’re on, read the detailed guide, then come back here for the next phase.
And if you’re still sitting there wondering whether you specifically — with your particular skill level and budget and situation — can convert a school bus into a home, the answer hasn’t changed from the top of this article. You can. Not because it’s easy. Because thousands of people who started with no more experience than you have already done it. They just started.