You’re standing in your half-built bus, looking at the roof, wondering how many solar panels you actually need and what all of this is going to cost. Maybe you’ve watched a dozen YouTube videos and you’re more confused now than when you started. Sizing a solar system isn’t as complicated as people make it sound — you just need to work through it step by step.
To size a skoolie solar system, you need to figure out four things in this order: how much power you use daily (in watt-hours), how many panels you need to generate that power, how much battery storage you need to bank it, and what size inverter you need to run your appliances. A typical couple’s skoolie needs 400-800 watts of solar, 200-400 amp-hours of lithium batteries, and a 2,000-3,000 watt inverter. Total cost for a solid system runs $2,000-5,000 depending on battery chemistry and component quality.
Step 1: Calculate Your Daily Power Needs
Before you buy a single panel, you need to know how much electricity you actually use in a day. This is where most people skip ahead and just guess — and then they end up with a system that’s either way oversized (expensive) or undersized (useless).
Here’s how you figure it out. Make a list of everything you’ll run on electricity. Every single thing. Then find the wattage of each item (it’s on the label or in the manual) and estimate how many hours per day you’ll use it. Multiply watts times hours and you get watt-hours.
A quick example:
- LED lights (50W total) x 5 hours = 250 Wh
- Laptop (60W) x 4 hours = 240 Wh
- Phone charging (15W) x 3 hours = 45 Wh
- 12V fridge (50W average) x 24 hours = 1,200 Wh (this is the big one)
- Vent fan (30W) x 8 hours = 240 Wh
- Water pump (60W) x 0.5 hours = 30 Wh
That gives you about 2,000 Wh (or 2 kWh) per day. That’s a pretty typical number for a couple living in a skoolie without air conditioning.
This is expensive though — must be tens of thousands a month to run all that. Where does the power come from?
Alright, let’s clear this up because this question comes up constantly. Running a skoolie on solar doesn’t cost tens of thousands a month. It doesn’t cost anything per month once your system is installed — the sun is free. Your upfront cost is in the equipment, and after that, your only recurring cost is replacing batteries every 5-15 years depending on the type. That’s it. No electric bill. No monthly charges. The power comes from solar panels on your roof charging batteries inside your bus, and an inverter converts that stored battery power into the 120V AC that your appliances use. (See our guide on 6 Best Batteries for a Skoolie Solar System for more on this.)
What do you use for electricity?
Most skoolies run on a combination of solar panels, a battery bank, and an inverter. Some people add a generator as backup for cloudy stretches or heavy loads like air conditioning. And when you’re at an RV park or campground, you can plug into shore power with a standard RV power cord. So you’re not relying on any single source — you’ve got options. But solar is the backbone of most off-grid setups, and that’s what we’re sizing here. (See our guide on Skoolie Generators and Shore Power: The Complete Guide for more on this.)
Step 2: Size Your Solar Panels
Now that you know your daily power needs, you can figure out how many panels you need. So how do you get from watt-hours to panel wattage?

Here’s the math. A solar panel’s wattage rating tells you its output under perfect conditions — full sun, perfect angle, no shade. In reality, you’ll get about 4-6 hours of usable sun per day depending on where you are and the season. Let’s use 5 hours as a reasonable average.
Take your daily watt-hours and divide by 5. Then add about 20% for system losses (wiring, controller efficiency, heat, imperfect angles on a flat-mounted roof panel).
Using our 2,000 Wh example: 2,000 / 5 = 400 watts, plus 20% = 480 watts of solar panel capacity. So you’d want roughly 500 watts of panels. That’s two 250W panels, or three 175W panels — whatever combination fits your roof.
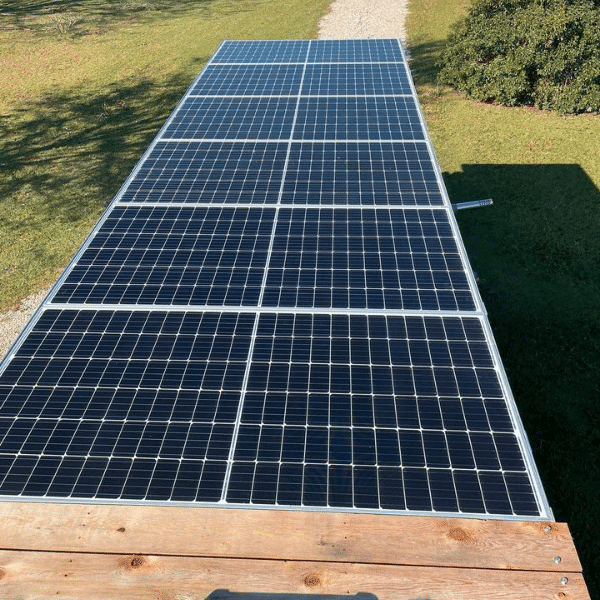
Well, most skoolies have 150-300 square feet of roof space, so fitting 400-800 watts of panels is rarely a problem. Each 100W panel is roughly 4 square feet, and a 400W panel is about 16 square feet. You’ve got room.
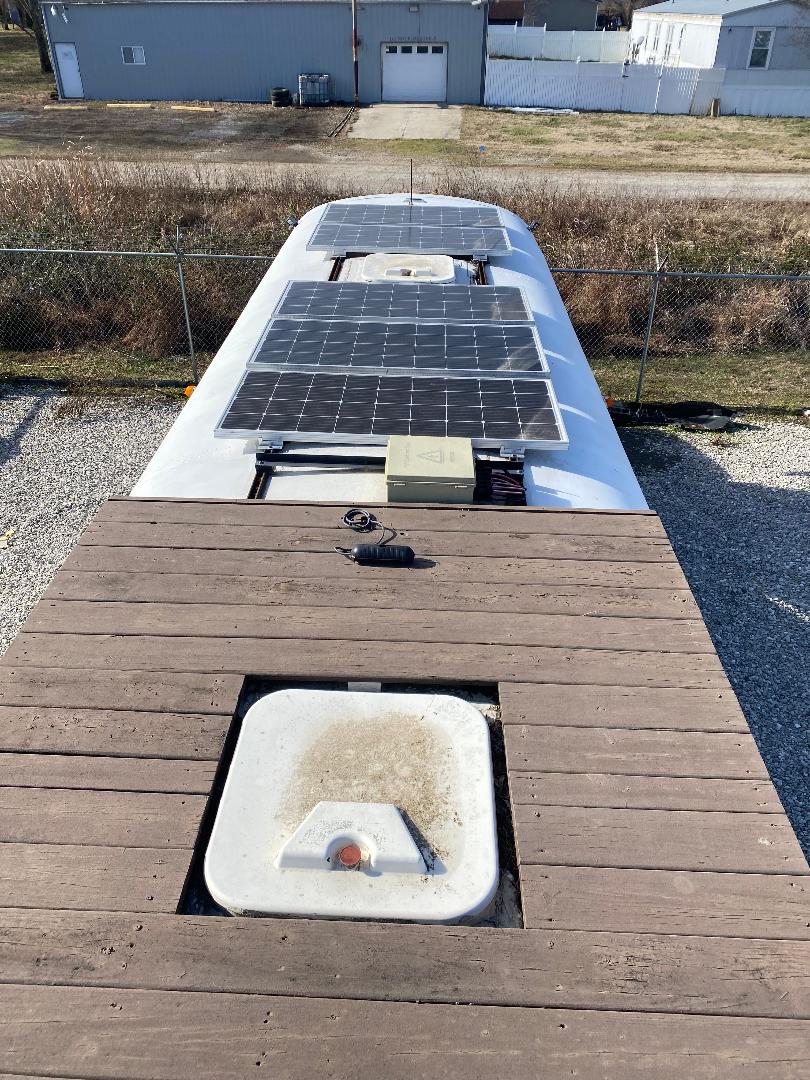
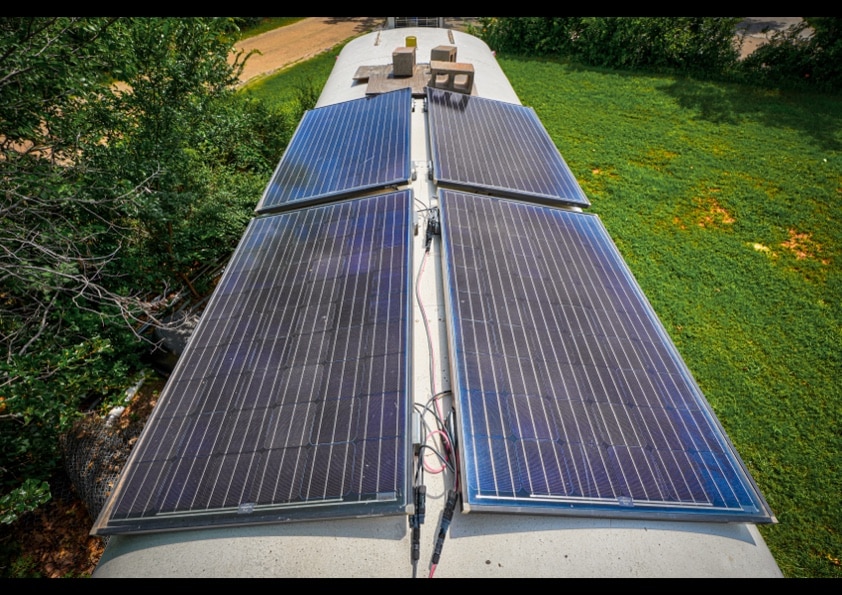
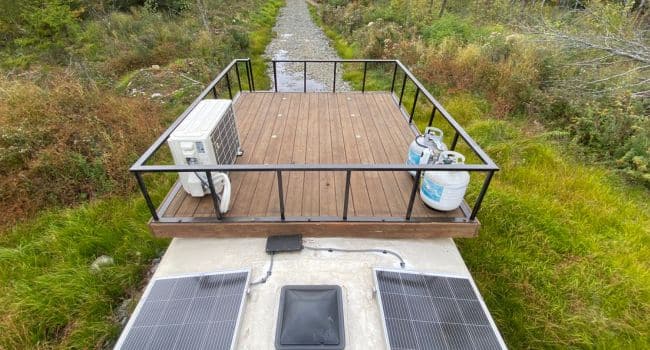
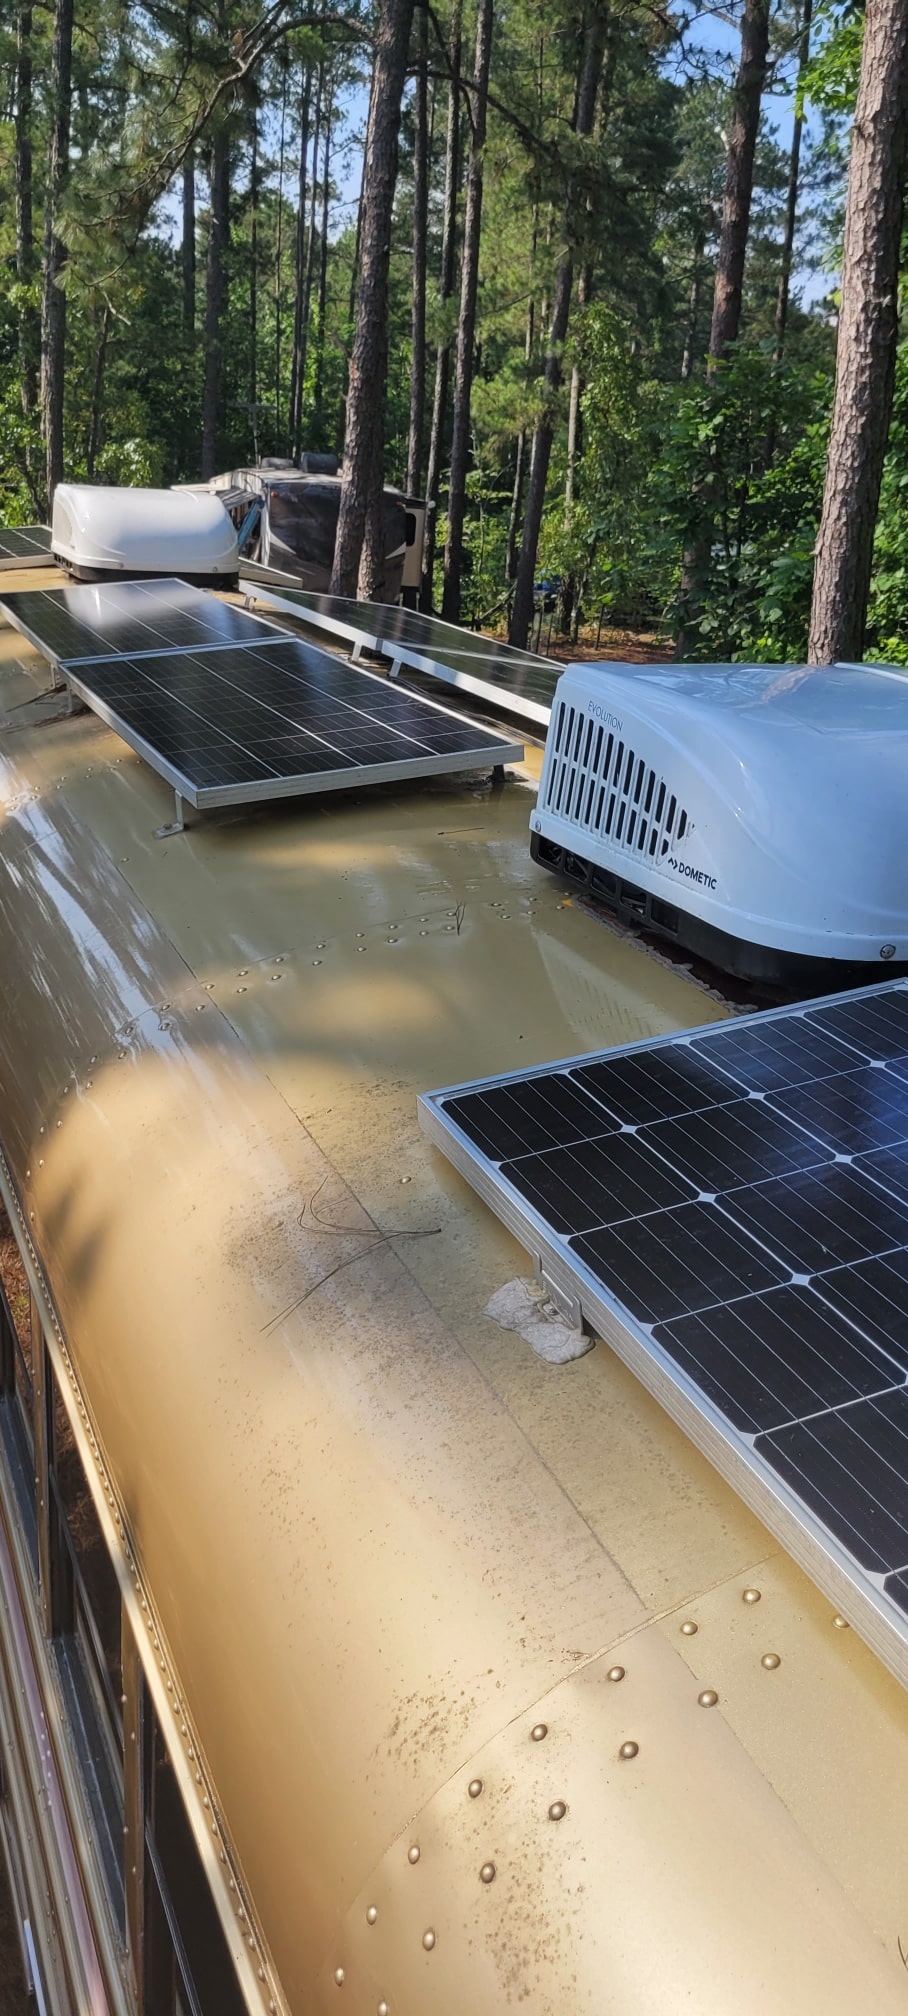
Would it be a good idea to mount solar panels to the roof of the bus?
Yes. That’s the standard approach, and it works great. Flat-mount them on the roof using Z-brackets or a tilt-mount rack. Flat mounting is simpler and more aerodynamic — you won’t lose them going under a low bridge or through a drive-through. The trade-off is you get about 15-20% less production compared to panels angled toward the sun, but most people accept that trade-off for the simplicity.
Drill through the roof with stainless steel bolts, seal everything with Dicor self-leveling sealant, and you’re done. Use the same sealant around your wire penetrations. Dicor is the standard for RV roofs and it doesn’t let go.
Why can’t solar panels be mounted on a metal frame that can be fixed at different angles?
They can. Tilt mounts exist and some people use them. You hinge one side of the panel and prop it up with an adjustable arm. On a clear day at camp, you tilt the panels toward the sun and pick up that extra 15-20% of output.
The downside? You’ve got to go up on the roof every time you want to adjust them, and you absolutely must lay them flat before driving. People forget, catch a gust of wind, and suddenly their panel is in the road behind them. For most skoolie builds, flat-mounted panels are the better call. The extra output from tilting isn’t worth the hassle unless you’re boondocking long-term in one spot.
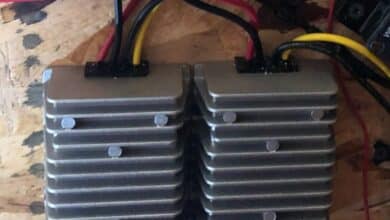
You had 4 x 400W solar panels but showed a 40amp MPPT solar charger — that’s a bit small
Good catch — this is actually a common sizing mistake. Your charge controller has to handle the current from your panels. If you’ve got 1,600 watts of solar going into a 12V battery bank, that’s potentially 130+ amps. A 40A controller can’t handle that — it’ll throttle your system and you’ll waste panel capacity. For 1,600W at 12V, you’d need at least a 100A MPPT controller, or better yet, wire the panels in series to raise the voltage and lower the current. This is exactly why you need to size the controller to the panels, not just grab whatever’s cheap.
Step 3: Choose Your Battery Bank
This is the decision that affects your budget more than anything else. Your batteries store the power your panels generate during the day so you can use it at night and on cloudy days.
You’ve got two real options: lithium (LiFePO4) or AGM lead-acid. Let me just break it down plainly.
Lithium (LiFePO4):
- You can use 80-100% of the rated capacity
- Lasts 2,000-5,000 charge cycles (8-15 years)
- Weighs about half as much as lead-acid
- Costs $400-800 per 100Ah battery
- Charges faster
AGM Lead-Acid:
- You can only use about 50% of rated capacity (going deeper kills them)
- Lasts 500-1,000 cycles (2-5 years)
- Heavy — a 100Ah AGM weighs about 65 lbs
- Costs $150-250 per 100Ah battery
- Slower to charge
So here’s the math that makes this decision for most people. A 200Ah lithium battery gives you 200Ah of usable power. To get the same usable power from AGM, you’d need 400Ah of batteries (because you can only use half). Those 400Ah of AGM batteries weigh about 260 lbs and last 3-4 years. The 200Ah lithium weighs about 55 lbs and lasts 10+ years. You’ll replace the AGMs two or three times before the lithium gives out.
For our 2,000 Wh daily example at 12V, you need about 170Ah of usable capacity. A 200Ah lithium bank covers that with room to spare.
Did she do her own solar setup? Wondering why she doesn’t like the sealed batteries and wants to switch to lithium
This is one of the most common upgrades in the skoolie world. People start with AGM because it’s cheaper upfront, and then a year or two in, they’re tired of the weight, the limited depth of discharge, and having to replace batteries that died too soon. Lithium costs more upfront but it’s genuinely cheaper over the life of the system. If your budget allows it, start with lithium. If it doesn’t, AGM will work — just know you’ll probably switch eventually.
What about battery fumes? Would it be better with a compartment outside?
Lead-acid batteries (flooded type) vent hydrogen gas when charging and must be in a ventilated compartment. AGM and lithium batteries don’t off-gas during normal operation, so they’re safe to mount inside the bus — under a bed, in a cabinet, wherever. Most people put their battery bank under the bed platform or in a dedicated electrical cabinet. Just make sure the compartment has some airflow and that your battery monitor’s wiring is accessible. (See our guide on Skoolie Electrical and Solar: The Complete Guide for more on this.)
My only question is how it feels sleeping above 3,000 watts of power. If any of those batteries catch fire, wouldn’t it be devastating?
Ok, so this is a fair concern but it’s also a bit overblown. LiFePO4 batteries (the type used in skoolies) are the safest lithium chemistry available. They don’t have the thermal runaway issues of the lithium-ion batteries in phones and laptops. They don’t explode. With proper fusing, a battery management system (BMS — all quality lithium batteries have one built in), and correct wiring, the risk is extremely low. Thousands of people sleep above their battery banks every night. Use proper fuses, don’t cheap out on wiring, and buy batteries from reputable brands. That’s your safety plan.
Step 4: Pick Your Inverter
Your inverter converts the 12V DC power from your batteries into 120V AC power — the same stuff that comes out of wall outlets in a house. Without it, you can only run 12V appliances.
Sizing an inverter is straightforward. Add up the wattage of everything you might run at the same time, then pick an inverter rated for that load. You don’t need an inverter sized for every appliance you own — just the ones you’d realistically run simultaneously.
A common scenario: microwave (1,000W) + laptop (60W) + lights (50W) + fridge (50W) = 1,160W running at the same time. A 2,000W inverter handles that easily with headroom for startup surges.
Now, most skoolies end up with a 2,000W or 3,000W pure sine wave inverter. Pure sine wave is important — modified sine wave inverters are cheaper but they’ll damage sensitive electronics, make your microwave sound like it’s dying, and won’t run some appliances at all. Spend the extra $100-200 and get pure sine wave. You’ll be glad you did.
What happens when the power goes out?
In a skoolie, there is no grid to go out. That’s the whole point. Your solar panels charge your batteries, and your batteries power everything. If you have three cloudy days in a row and your batteries are getting low, you’ve got a few options: run a generator for a few hours to top them off, plug into shore power at a campground, or just reduce your usage for a day. Most well-sized systems can handle 1-2 cloudy days without any issue. Extended overcast stretches are really the only time you need backup.
Why the generator when you can connect the lights and other electric appliances to the bus engine?
So the bus engine does charge your starter battery through the alternator, and yes, you can install a battery-to-battery charger (also called a DC-DC charger) that uses the alternator to charge your house batteries while you drive. A lot of people do this, and it’s a great supplement to solar. But it only works while the engine is running, and you’re not going to idle your diesel engine for hours just to charge batteries — that’s expensive and hard on the motor. Solar works all day while the bus is parked. The two systems complement each other perfectly — solar for when you’re camped, alternator charging for when you’re driving.
Step 5: Select Your Charge Controller
The charge controller sits between your solar panels and your batteries. Its job is to regulate the voltage and current coming from the panels so your batteries charge correctly and don’t get overcharged.

You’ve got two types: PWM and MPPT.
PWM (Pulse Width Modulation): Cheaper, simpler, less efficient. Fine for very small systems (under 200W). Costs $20-50.
MPPT (Maximum Power Point Tracking): More efficient by 20-30%, especially in cloudy conditions and when panels are cold. Handles higher-voltage panel configurations. Costs $100-400.
For any skoolie system over 200W, go with MPPT. The efficiency gains pay for the price difference within a year, and they let you wire panels in series at higher voltages, which means smaller wire gauge and less voltage drop on long runs from the roof to your batteries.
Size your MPPT controller to handle the maximum current your panels can produce. Divide your total panel wattage by your battery bank voltage, then add 25% safety margin. For 500W of panels on a 12V system: 500 / 12 = 42A, plus 25% = 52A. A 60A MPPT controller would be perfect.
Step 6: Plan Your Wiring
Alright, this is the part where people’s eyes glaze over. But getting your wiring right is actually more important than anything else we’ve talked about, because bad wiring is how fires start.
Here are the basics:
- Wire gauge matters. Thicker wire for higher current. Use an online wire gauge calculator — enter your current (amps), wire length (round trip), and acceptable voltage drop (keep it under 3%). The calculator tells you what gauge to use. Don’t guess.
- Fuse everything. Every positive wire in your system needs a fuse. Between the panels and the controller. Between the controller and the batteries. Between the batteries and the inverter. Between the inverter and your outlets. No exceptions.
- Use bus bars. A positive bus bar and a negative bus bar give you a clean, organized central connection point instead of a rat’s nest of wires.
- Keep battery-to-inverter runs short. This is your highest-current connection. Ideally under 3 feet. Longer runs need thicker (and more expensive) wire.
What’s wrong with aluminum wiring?
In a skoolie, use copper. Period. Aluminum wiring is lighter and cheaper, but it expands and contracts more with temperature changes, which loosens connections over time. Loose connections create resistance, resistance creates heat, and heat creates fires. In a house, aluminum wiring can work with the right connectors and maintenance. In a bus that’s constantly vibrating and flexing as it rolls down the road, aluminum connections will work themselves loose faster. Copper is the standard for mobile electrical systems and there’s a good reason for it.
What did you do for structured wiring — media, entertainment, internet, speakers?
Run your 12V and 120V circuits separately from your data cables. Use standard Romex for AC circuits and marine-grade wire for DC circuits. For media and internet, run Cat6 ethernet and speaker wire through the walls before you close them up — it’s a nightmare to add later. Plan your outlet locations before you install paneling. Draw it all out on paper first, mark every outlet and switch location on the actual walls, and then wire it. Sounds tedious, right? It is. But doing it right once beats tearing out walls to fix it later.
Step 7: Understand What It All Costs
Here’s a realistic cost breakdown for a solid mid-range skoolie solar system — the kind that’ll keep a couple comfortable off-grid:
- Solar panels (500W): $250-400
- MPPT charge controller (60A): $150-300
- Lithium batteries (200Ah): $800-1,600
- Inverter (3,000W pure sine): $300-600
- Wiring, fuses, bus bars, breakers: $200-400
- Battery monitor: $50-150
- Misc (cable glands, sealant, connectors): $100-200
Total: $1,850-3,650
If you go with AGM batteries instead of lithium, you’ll save $400-800 upfront but you’ll spend more in the long run on replacements.
Can you post your solar setup? I’m building my first off-grid bus and want ideas
The system I just laid out — 500W solar, 200Ah lithium, 3,000W inverter, 60A MPPT controller — is a great starting point for most builds. It’ll run lights, a fridge, laptops, phone charging, fans, a water pump, and a microwave (in short bursts). What it won’t comfortably run on solar alone is air conditioning. A mini-split AC draws 500-1,500W continuously, and that’ll drain your batteries in a few hours. If you need AC, you’re looking at 800-1,200W of solar, 400-600Ah of lithium, and probably a generator for backup.
Can the AC you got run using 6 solar panels up top?
It depends on the panel size and the AC unit, but probably not sustainably. Six 200W panels give you 1,200W, which in 5 hours of sun generates about 6,000Wh per day. A mini-split AC running 8 hours uses roughly 4,000-8,000Wh depending on the size. So on a perfect sunny day, you might break even. On a cloudy day, you’re draining batteries fast. If AC is a priority, oversize your panels and battery bank, and keep a generator as backup. There’s no shame in running a generator during the hottest part of summer — that’s what it’s for.
You’ve Got This — It’s Just Math
Sizing a solar system feels overwhelming at first, but once you break it down, it’s really just multiplication and a few decisions. Here’s your cheat sheet:
- List every appliance and calculate daily watt-hours
- Divide daily watt-hours by 5 (hours of sun), add 20% — that’s your panel wattage
- Divide daily watt-hours by battery voltage — that’s your minimum battery capacity (double it for AGM)
- Add up simultaneous loads — that’s your minimum inverter size
- Size your charge controller to handle your panel output
The components aren’t that expensive. The math isn’t that hard. And thousands of people who started out with zero electrical knowledge have built solid, reliable solar systems in their buses. You don’t need to be an electrician — you just need to follow the steps, size things correctly, and not cut corners on wiring and fuses.
Is there a learning curve? Absolutely. Will you second-guess yourself at some point? Probably. But this is one of those things where once it’s done and working — once you’re parked out in the middle of nowhere running your fridge, charging your laptop, and watching the sun do all the work — you’ll wonder why you were ever worried about it. You’ve got this.