You want to know how much it actually costs to turn a school bus into a home. Not a vague “it depends” — real numbers you can plan around. That’s what this article is for. (See our guide on How Much Does It Cost to Convert a Bus Into a Home? for more on this.)
A full school bus conversion typically costs between $10,000 and $50,000 for a DIY build, with the bus itself running $3,000-$7,000 and the build-out making up the rest. Budget builds can come in under $10,000 if you’re scrappy and use recycled materials. High-end builds with premium finishes, lithium batteries, and professional systems can push past $80,000-$100,000. The biggest cost variables are your electrical system, insulation, and whether you do the labor yourself or hire it out.
Bus Purchase Price
Everything starts here. You can’t build a home in a bus you don’t own, so let’s talk about what you’re actually looking at.
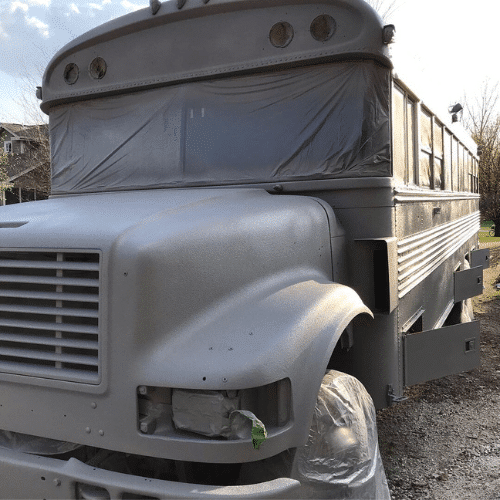
A used school bus in decent running condition typically costs between $3,000 and $7,000. Shorter buses (the kind most people call “shorties” or mini buses) tend to run $2,500-$5,000. Full-size 40-foot buses in good mechanical shape usually land between $4,000-$8,000. Transit buses and coaches are a different animal entirely — a retired MCI or Prevost coach can run $15,000-$40,000 depending on condition.
“How much does a used school bus cost?”
Well, it depends on where you buy it and what shape it’s in. Government auctions are usually the cheapest route — you can find buses for $1,500-$4,000 at municipal auctions. School district direct sales tend to be in the $3,000-$6,000 range. Private sellers on Craigslist or Facebook Marketplace usually ask more because they know what the bus life market looks like now. (See our guide on Where Do You Buy a School Bus for Conversion? for more on this.)
Here’s a rough breakdown by source:
- Government/school district auctions: $1,500-$4,000
- Direct from school district: $3,000-$6,000
- Private sellers (Craigslist, Facebook): $3,000-$10,000
- Dealer lots: $5,000-$12,000
“How much would it cost to buy the bus, insure it and then how much to do this to it if I do not have any stuff lying around?”
This is a great question because it forces you to think about the total startup cost, not just the build. If you’re starting from zero — no bus, no tools, no materials — you need to budget for the bus ($3,000-$7,000), basic tools ($500-$1,500), insurance during the build ($50-$100/month), and a place to park it while you work ($0-$200/month if you don’t have your own space). So before you even buy your first piece of lumber, you might be $5,000-$10,000 in.
Demolition and Prep
Before you build anything, you’ve gotta tear everything out. Seats, rubber flooring, ceiling panels, wall panels — all of it comes out. This phase is mostly sweat equity, not cash.
The good news? You can actually make money here. School bus seats sell for $10-$30 each on Facebook Marketplace. A full-size bus has 20-30 seats. That’s $200-$900 back in your pocket just from the demo phase.
“I bought a school bus, now I don’t know where to park it. My HOA won’t let me park it in my driveway.”
Alright, this isn’t exactly a cost question, but it’s a cost you need to plan for. If you can’t park in your own driveway, you’re looking at storage lots ($50-$200/month), a friend’s property, or rented land. Some people rent cheap rural lots for $100-$150 a month just to have a place to work on the build. Factor this into your budget if your living situation doesn’t allow a bus in the driveway.
Total demolition costs:
- Tools for demo (angle grinder, pry bars, etc.): $50-$150
- Dump fees for removed materials: $50-$100
- Rust treatment supplies: $50-$200
- Revenue from selling seats: +$200-$900
Net cost: roughly $0-$200 if you sell the seats. Not bad.
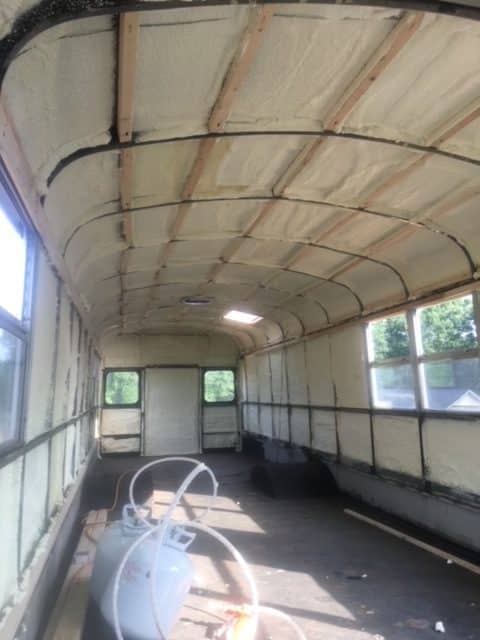
Insulation
This is where your build budget starts to take real shape, and it’s one of the most important decisions you’ll make. Bad insulation means a miserable bus — too hot in summer, freezing in winter.
“Can you or do you have insulation for very cold weather? Or is this just for warm climate?”
If you want to live in your bus year-round (and most people do), you need to insulate for cold weather, not just warm. That means insulating the walls, ceiling, and floor — and doing it with materials that won’t trap moisture against the metal and cause rust.
So what are your options? Here’s where it breaks down:
- Rigid foam board (XPS/polyiso): $300-$600 for a full-size bus. Most popular choice. Good R-value, moisture resistant, easy to cut and fit.
- Spray foam (closed cell): $1,500-$3,000 if hired out, $400-$800 DIY with kits. Best R-value per inch, seals everything, but messy and expensive.
- Wool insulation (Havelock): $800-$1,500. Natural, breathable, handles moisture well, but pricey.
- Fiberglass batts: $150-$300. Cheap, but a bad choice for buses — absorbs moisture, sags, and can cause mold.
“I feel like they’re going to have a massive mold problem with the windows and metal touching the insulation?”
This is a legitimate concern and the reason material choice matters so much. Closed-cell spray foam and rigid foam board are the safest options because they don’t absorb water. If you use fiberglass or cotton batts without a proper vapor barrier, you’re asking for trouble. Budget an extra $50-$100 for vapor barrier material if you go with anything other than closed-cell spray foam. (See our guide on Is a Skoolie Cheaper Than Buying an RV? for more on this.)
Budget range: $300-$600 | Mid-range: $600-$1,200 | High-end: $1,500-$3,000
Electrical and Solar
Now, this is the big one. Electrical is consistently the most expensive single system in a bus conversion, and it’s the one where people most often underestimate costs.
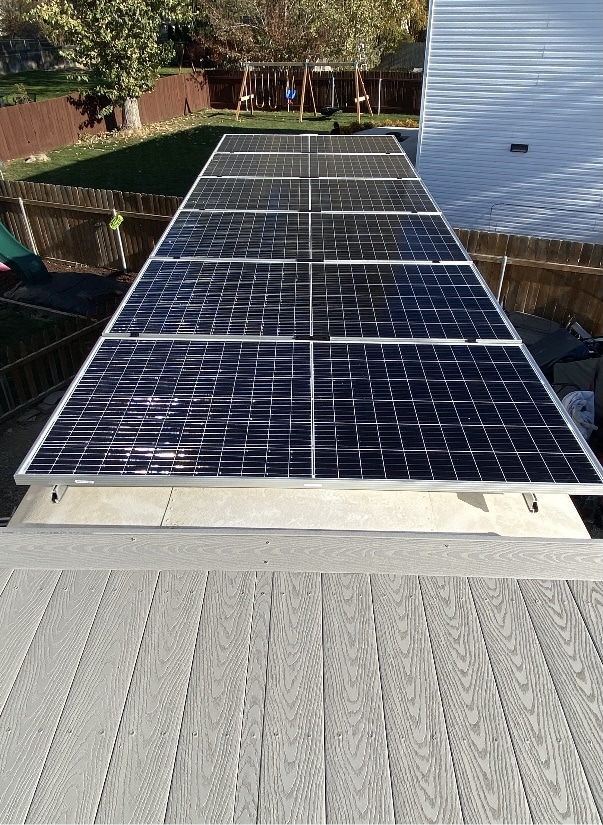
“Would it be a good idea to mount solar panels to the roof of the bus?”
Good idea? It’s practically a requirement if you want any real off-grid capability. But let’s talk about what it actually costs.
A basic electrical setup — enough to run lights, charge phones, and maybe run a small fan — can be done for $500-$1,000. But most people want more than that. They want a fridge, a water pump, maybe an induction cooktop, maybe air conditioning. And that’s where the numbers climb fast.
Here’s the thing — your electrical system cost depends almost entirely on one decision: what kind of batteries you use.
- Lead-acid/AGM batteries: $200-$600 for a usable bank. Cheap upfront, but heavy, shorter lifespan (3-5 years), and you can only use 50% of the capacity.
- Lithium (LiFePO4) batteries: $800-$3,000 for a usable bank. Expensive upfront, but lighter, longer lifespan (10+ years), and you can use 80-100% of the capacity.
“She did her own solar setup? Wondering why she doesn’t like sealed batteries and wants to switch to lithium.”
This is exactly why most experienced bus builders say to go lithium from the start if you can afford it. Buying AGM to save money now usually means buying lithium later anyway — and then you’ve paid for batteries twice.
Full electrical system breakdown:
- Solar panels (400-800W): $400-$1,200
- Charge controller (MPPT): $100-$300
- Battery bank (lithium): $800-$3,000
- Inverter (2000-3000W): $200-$600
- Wiring, breakers, fuse box, bus bars: $200-$500
- Shore power inlet and transfer switch: $100-$200
- Alternator charging (DC-DC charger): $150-$350
- Lights and switches: $100-$300
Budget range: $1,000-$2,000 | Mid-range: $2,500-$4,500 | High-end: $5,000-$8,000+
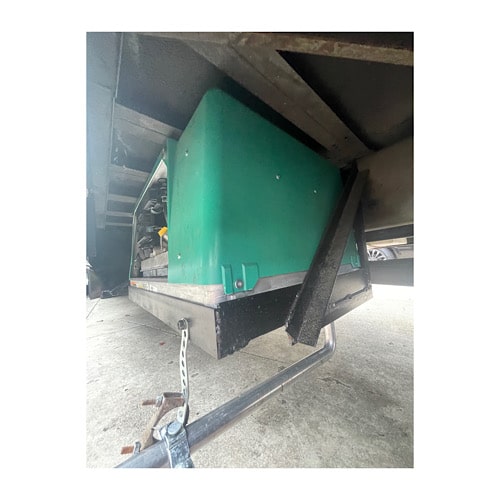
Plumbing and Water System
Plumbing in a bus is simpler than in a house, but it still costs real money. You’re building a water system from scratch — fresh water tank, water pump, hot water heater, drain lines, and gray/black water tanks.
“Why did you choose to use shark bites on some of your plumbing and then regular crimp fittings on other?”
This is a detail question, but it reveals something important: there are multiple ways to do bus plumbing, and they vary in cost and reliability. PEX with crimp fittings is the most common and cost-effective approach. SharkBite fittings are easier (no special tools) but more expensive per connection. Most builders use a combination.
Here’s what you’re looking at:
- Fresh water tank (30-50 gallons): $100-$300
- Water pump: $50-$150
- Hot water heater (tankless propane): $150-$350
- PEX tubing and fittings: $100-$200
- Gray water tank: $100-$250
- Black water tank (if you have a flush toilet): $100-$250
- Toilet (composting): $100-$1,000 (basic DIY to Nature’s Head)
- Shower pan and fixtures: $100-$300
- Sink and faucet: $50-$200
“How will the bathroom plumbing work???”
Well, it works basically the same way it does in an RV. Fresh water gets pumped from your tank to your fixtures. Gray water (sinks, shower) drains into a gray tank underneath the bus. If you have a flush toilet, that goes to a separate black tank. Composting toilets skip the black tank entirely, which is why they’re so popular in bus builds — one less tank to deal with and dump.
Budget range: $500-$1,000 | Mid-range: $1,000-$2,000 | High-end: $2,000-$4,000
Flooring
Flooring is one of those areas where you can spend very little or quite a lot, and both can look great.
“I noticed you installing the floor right over the rubber flooring. Is it unrealistic to pull that up to check for rust on my first build?”
No, it’s not unrealistic — it’s actually smart. You should always pull up the original rubber flooring to check for rust before you put anything new down. Skipping this step is how people end up with rust eating through their subfloor a year later. Treat any rust you find with a rust converter ($15-$30 a can), then seal it with a good primer. (See our guide on Should You Buy a Gas or Diesel School Bus? for more on this.)
Once the floor is prepped, here are your material options:
- Vinyl plank (LVP): $200-$500. Lightweight, waterproof, looks great, easy to install. This is what most builders use.
- Real hardwood: $500-$1,200. Beautiful but heavy and more susceptible to moisture and movement.
- Tile: $300-$800. Looks amazing but adds serious weight and can crack from road vibration.
- Laminate: $150-$400. Affordable but not waterproof — one leak and it’s ruined.
- Subfloor materials (plywood): $100-$300.
Budget range: $200-$400 | Mid-range: $400-$700 | High-end: $800-$1,500
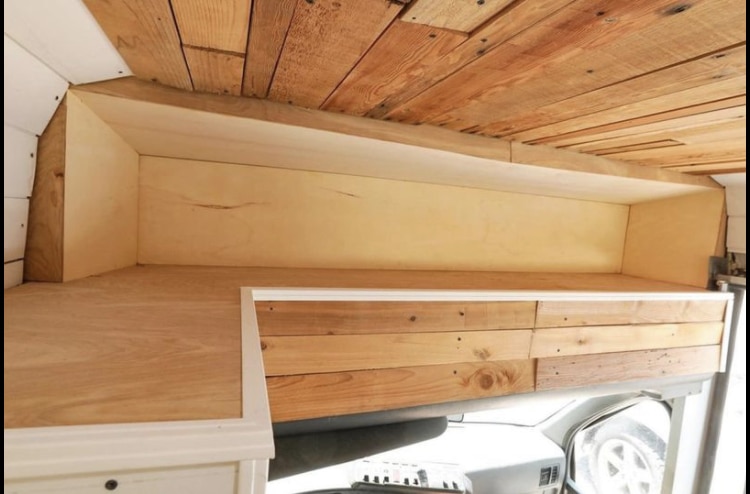
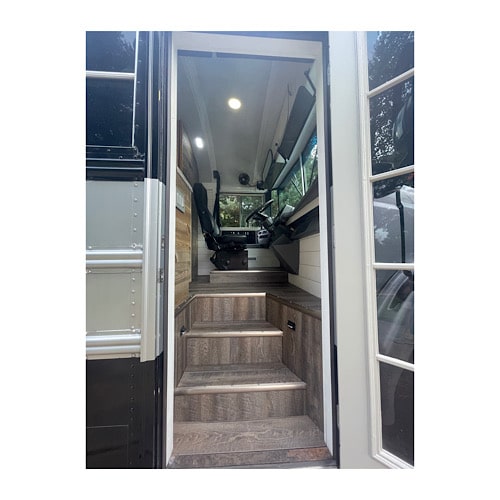
Walls and Ceiling
After insulation, you need to cover it up with something. This is where your bus starts to actually look like a home instead of a metal tube.
“I love the white walls and ceiling, is it drywall?”
Some people use drywall (or at least thin drywall), but it’s not the most popular choice for buses. It’s heavy, it can crack from road vibration, and it doesn’t handle moisture well. More common options:
- Tongue and groove pine/cedar: $300-$800. The classic skoolie look. Warm, relatively lightweight, and forgiving of the uneven surfaces you’ll find in a bus.
- Luan plywood paneling: $100-$300. Light, cheap, paints well.
- Shiplap: $200-$600. Similar to tongue and groove, slightly different profile.
- Drywall (thin): $100-$300. Cheap but heavy and prone to cracking.
- Vinyl plank on walls: $200-$500. Waterproof and trendy.
“Wouldn’t the 2 by 4s and dry wall add an awful weight to the wheels and frame and tires?”
This is a great question that a lot of first-time builders overlook. Weight matters in a bus conversion. Every material decision you make adds up, and school buses have a GVWR (Gross Vehicle Weight Rating) that you can’t exceed. This is why most experienced builders avoid heavy materials like real tile, brick, and thick drywall in favor of lighter alternatives. A full-size bus build can easily add 3,000-5,000 pounds of weight, so you’ve gotta be intentional about every choice.
Budget range: $200-$400 | Mid-range: $500-$900 | High-end: $1,000-$2,000
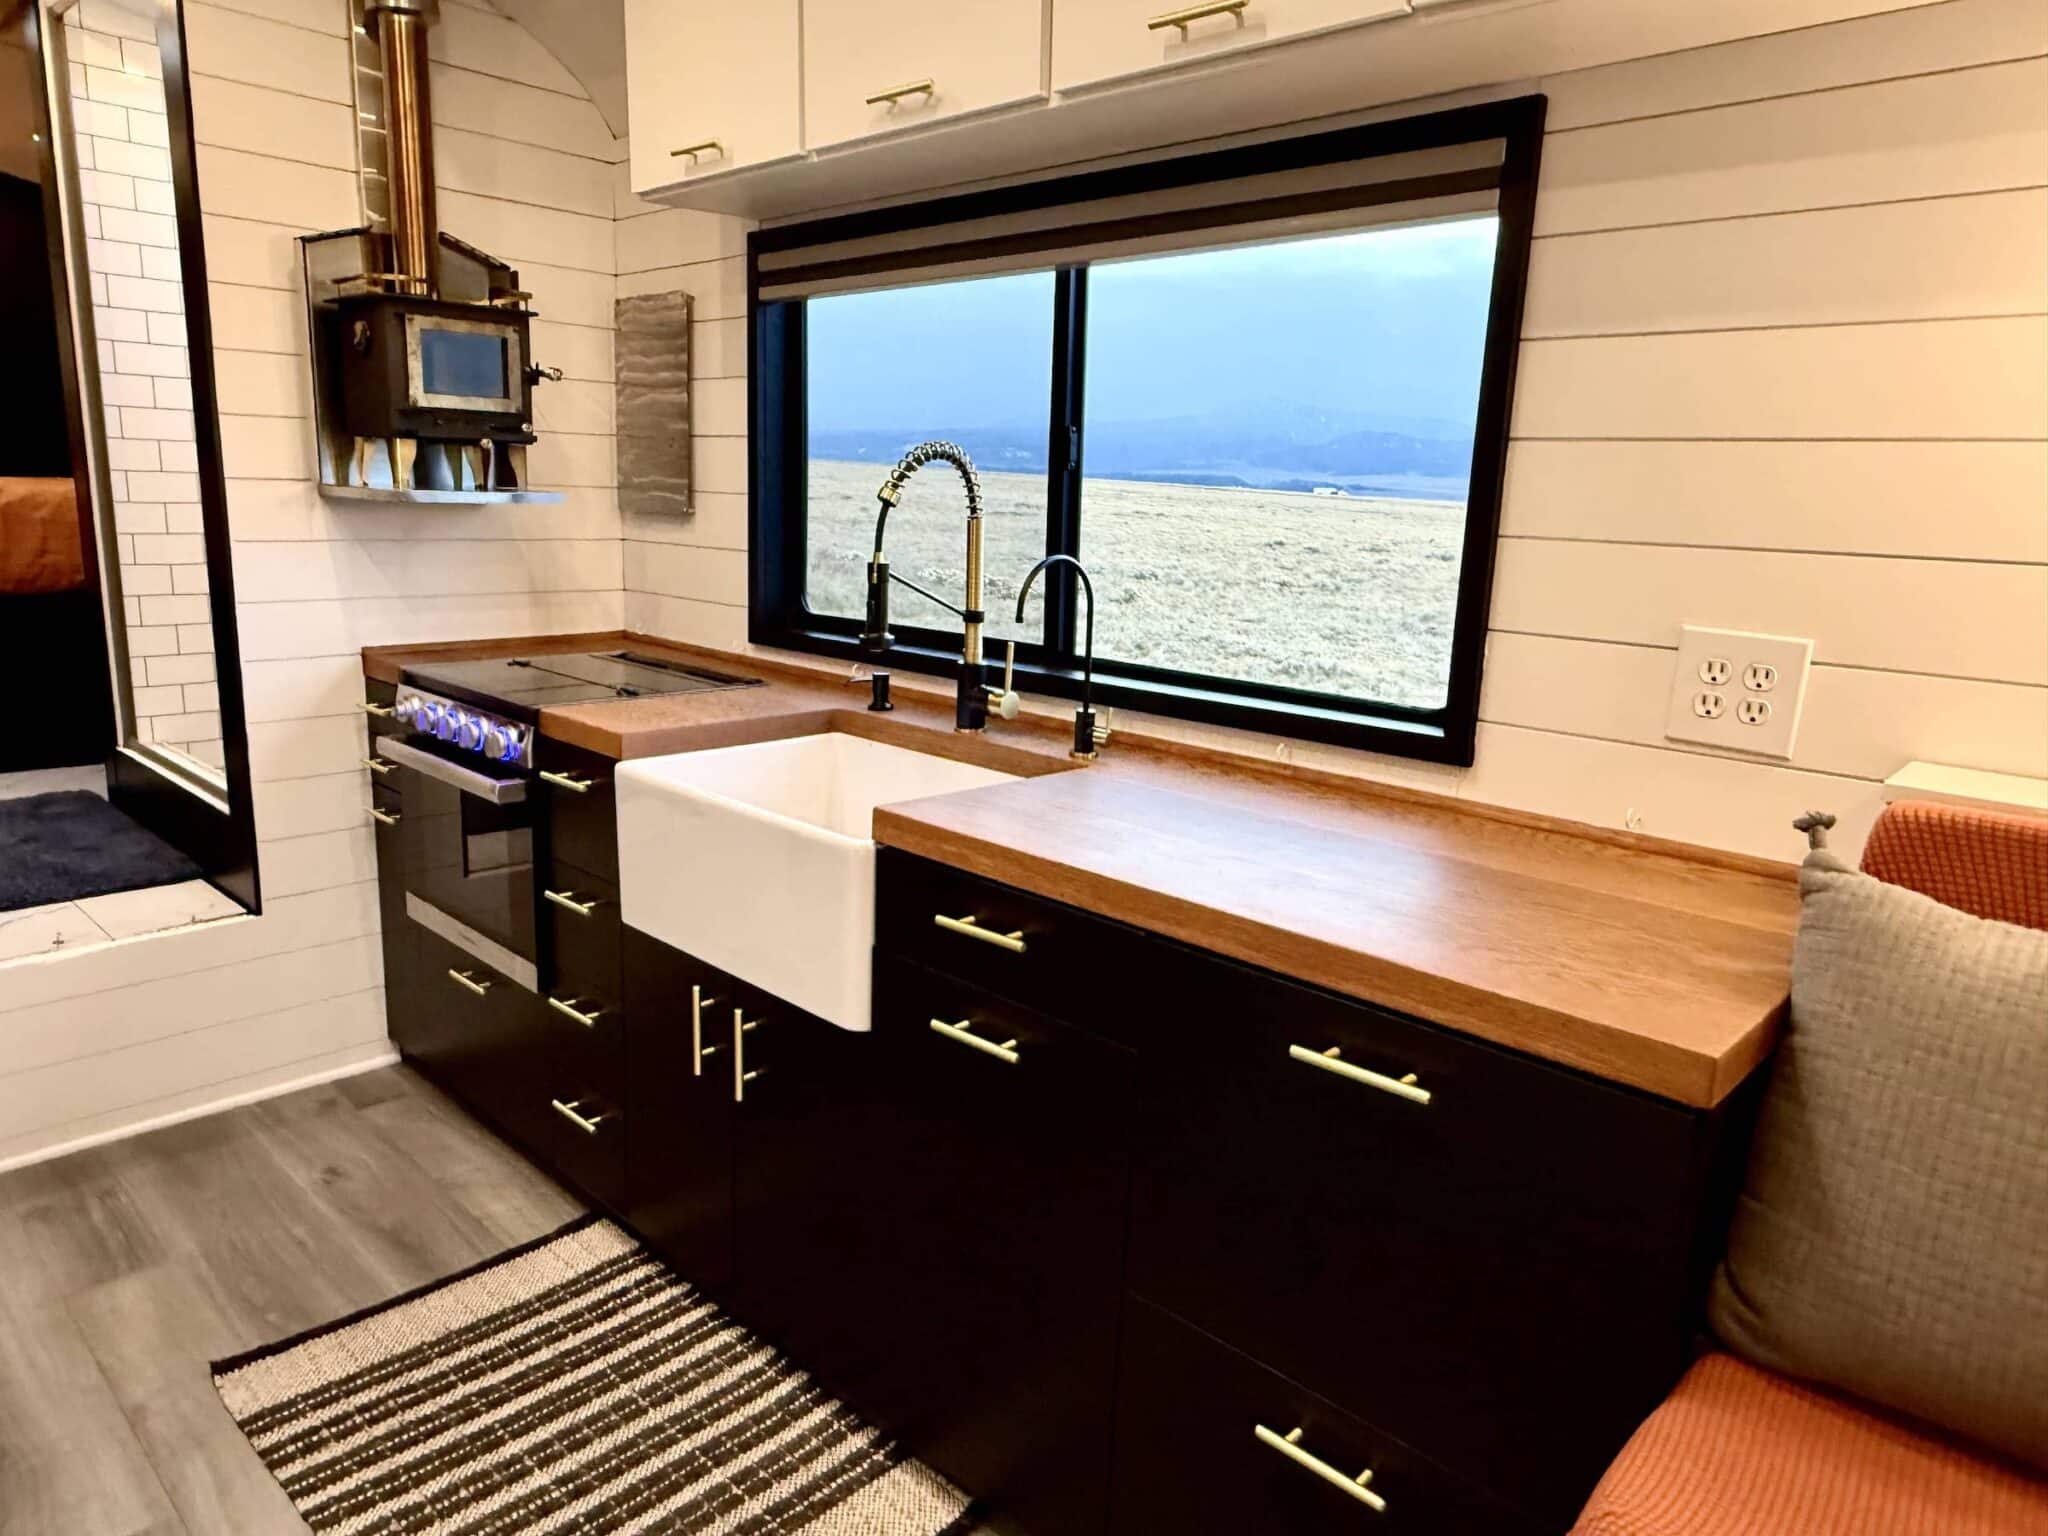
Kitchen
The kitchen is where bus life starts feeling like real life. You need a way to cook, a place to prep, and somewhere to store food. How much you spend depends entirely on how fancy you want to get.
- Cooktop (propane 2-burner): $30-$100
- Cooktop (induction, requires more solar): $50-$200
- Oven (propane, small): $200-$500
- Refrigerator (12V compressor fridge): $300-$1,200
- Countertop (butcher block): $100-$400
- Countertop (laminate): $50-$150
- Cabinets (DIY): $200-$600
- Cabinets (pre-built/IKEA): $300-$800
- Sink and faucet: $50-$200
So do you need a full kitchen? Technically, no. Some people live out of a two-burner propane stove and a cooler for months. But if you’re building for full-time living, a proper kitchen with a real fridge and actual counter space makes a massive difference in quality of life.
Budget range: $400-$800 | Mid-range: $800-$1,800 | High-end: $2,000-$4,000
Bathroom
“Why do you guys always start with the bathroom and not with something else?”
Because the bathroom dictates so much of your floor plan. The plumbing has to go somewhere, the vent has to reach the roof, and you want it as far from the kitchen as possible. Smart builders figure out the bathroom location first and build everything else around it.
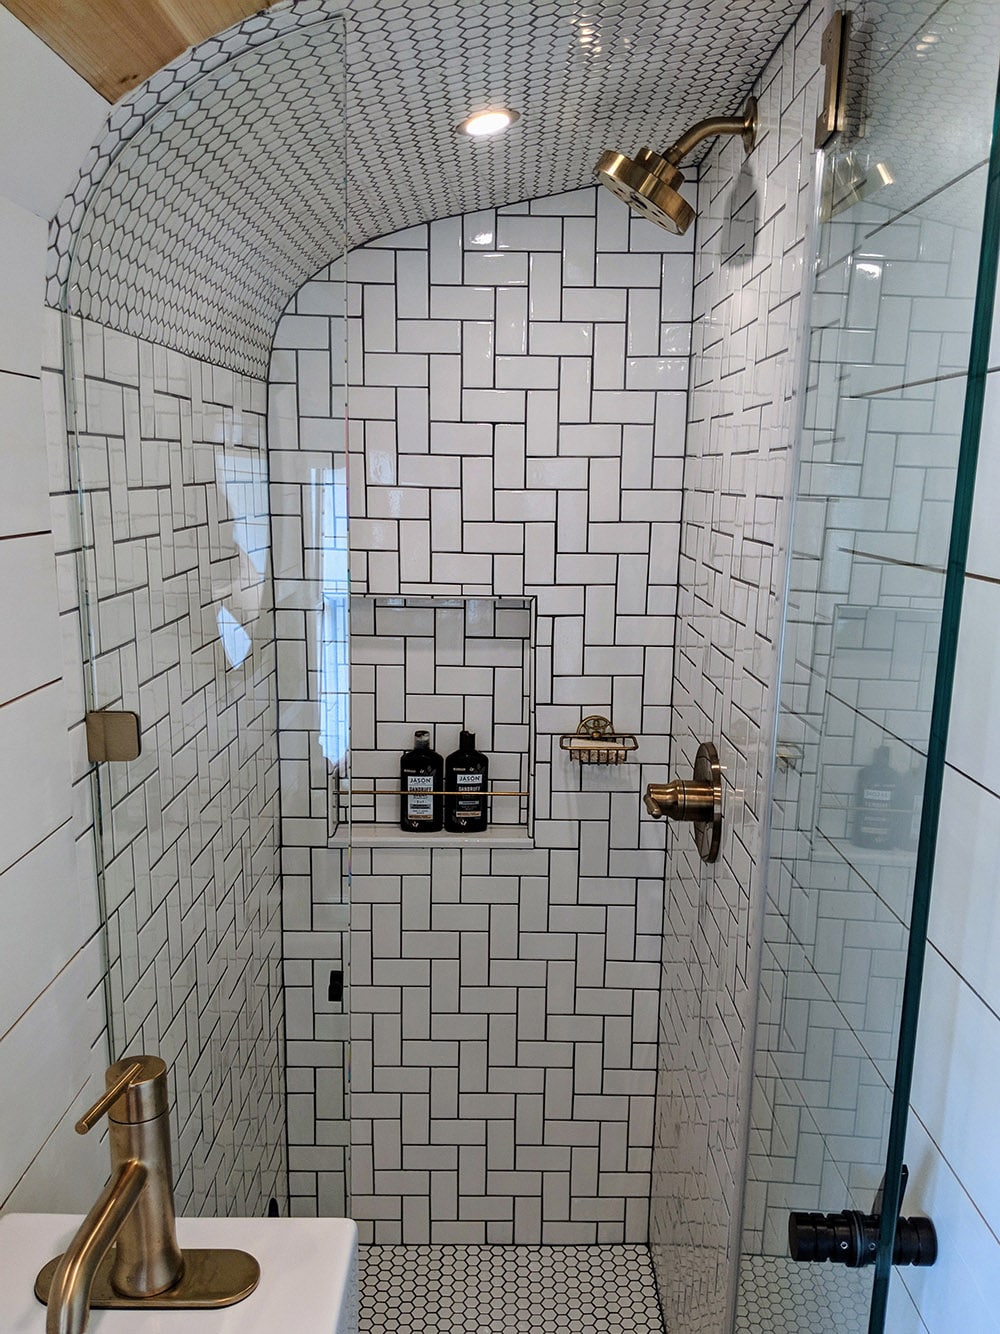
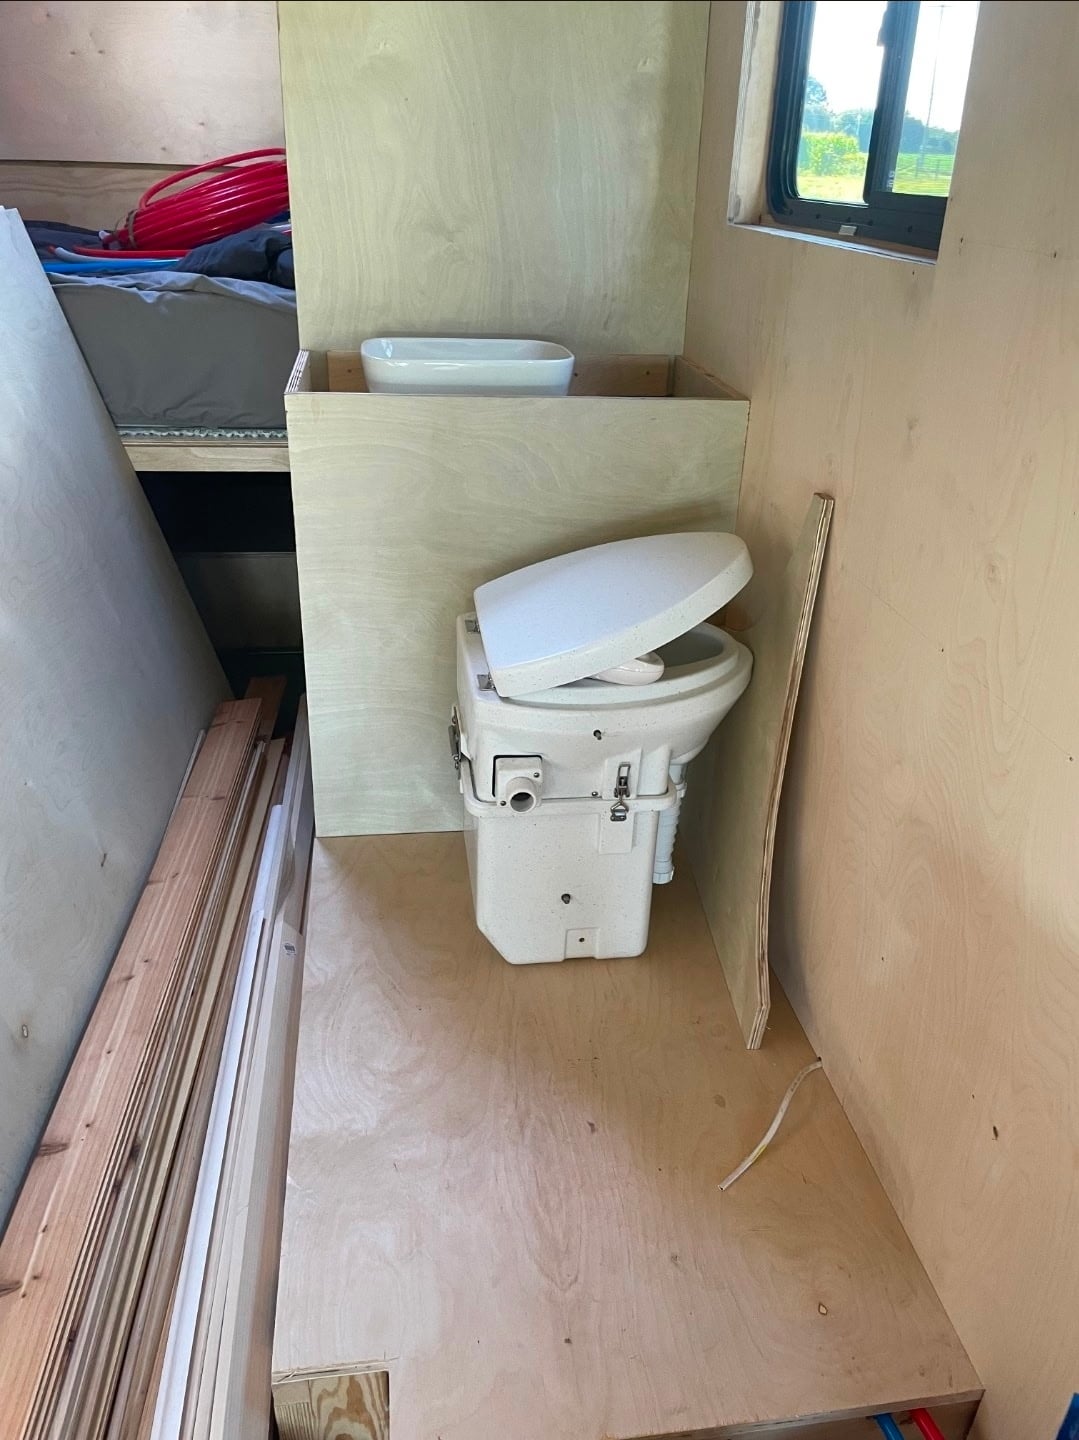
Your bathroom cost depends heavily on one decision: composting toilet or flush toilet.
- Composting toilet (DIY bucket style): $30-$50
- Composting toilet (Nature’s Head): $950-$1,050
- Flush toilet + black tank: $200-$500
- Shower walls (FRP panels): $50-$150
- Shower walls (tile): $200-$500
- Shower door or curtain: $20-$80
- Vent fan (bathroom): $30-$80
Now, a lot of people skip the bathroom entirely in smaller builds and use public restrooms, gym memberships, or a portable toilet. Totally valid for a short bus or weekend warrior build. But for full-time living? You want a bathroom. Trust me on that one.
Budget range: $100-$400 | Mid-range: $400-$1,000 | High-end: $1,200-$2,500
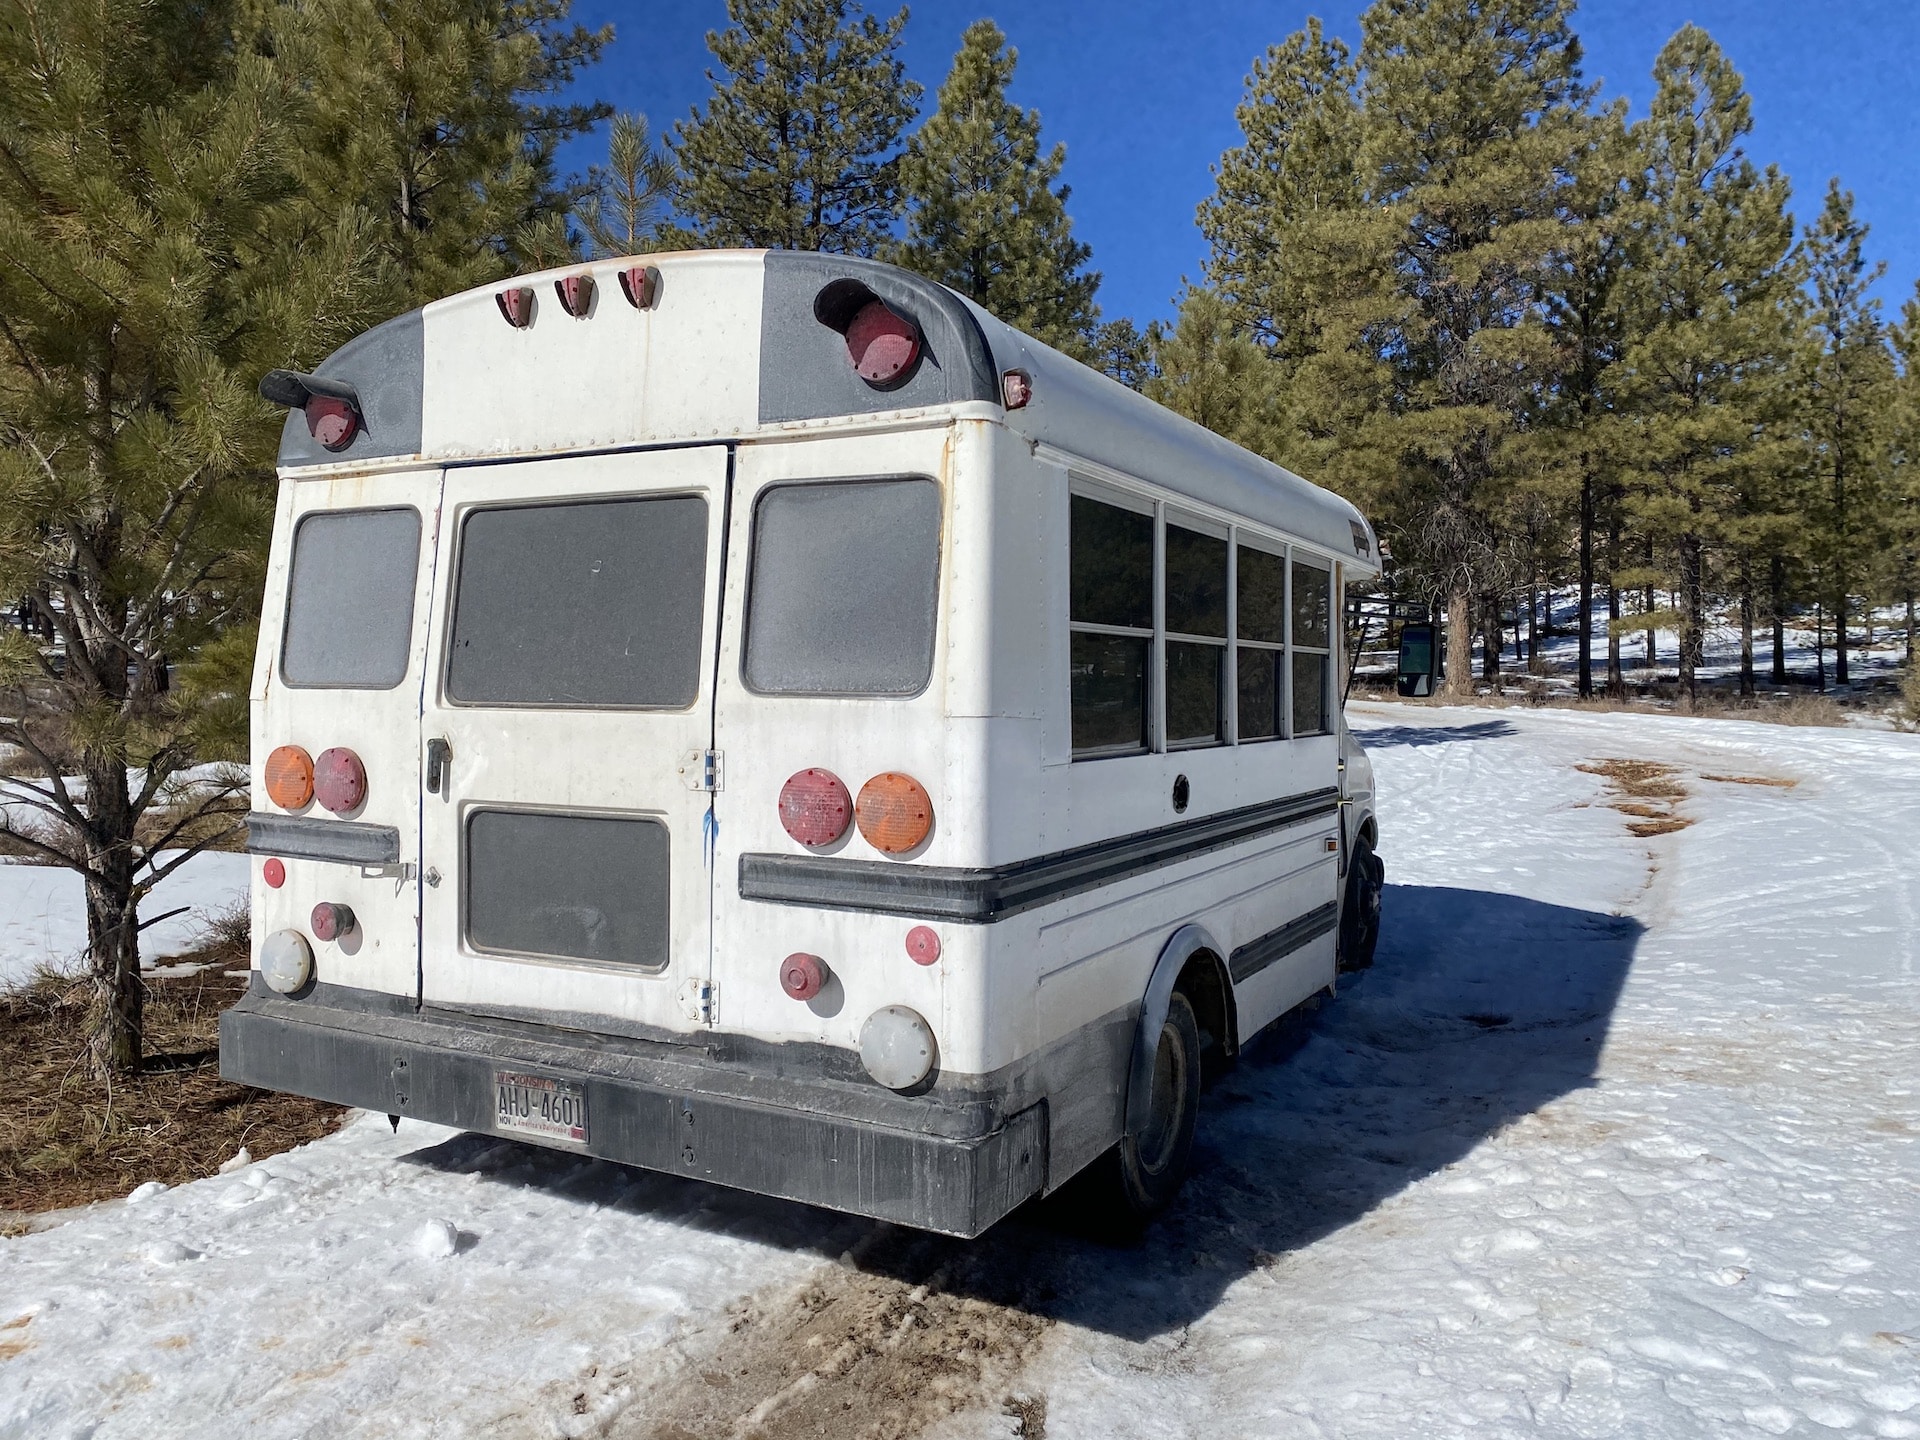
Exterior Paint
“Beautiful Color! How much did it cost you to paint it yourselves with all the materials?”
Painting your bus is optional but highly recommended, both for aesthetics and for heat management. A white or light-colored roof alone can drop your interior temps by 10-15 degrees in summer.
Here’s what painting typically costs:
- Rust-Oleum roller paint (DIY): $100-$300. This is the budget move, and it works fine. Multiple coats with a foam roller and you’ve got a solid finish.
- Automotive spray paint (DIY with spray gun): $300-$800. Better finish, more work, requires equipment.
- Professional paint job: $3,000-$8,000. Beautiful results but expensive. Most bus builders can’t justify this unless they’re building to sell.
“After the 4k quote how much did it end up costing for the DIY?”
This is why so many people go the DIY route. A professional quote of $4,000+ turns into a $200-$400 DIY project with Rust-Oleum and some patience. It won’t look like a factory finish, but it’ll look good, protect the metal, and save you thousands.
Budget range: $100-$300 | Mid-range: $300-$800 | High-end: $3,000-$8,000
Mechanical Repairs and Maintenance
Alright, here’s the section nobody wants to talk about but everybody needs to plan for. Your bus is an old commercial vehicle. Things will need fixing.
“I wish people would mention how much they paid for their vehicles and how much work they had to put into them. Because when you say you bought a 1985 bus, what does that mean exactly? Did it run when you purchased it?”
This is one of the most honest questions in the entire bus life community, and more people should be asking it. A bus that “runs” might still need $2,000-$5,000 in mechanical work before it’s road-trip ready. Things like tires, brakes, fluids, belts, hoses, and suspension components all wear out, and on a bus, they’re bigger and more expensive than on a car.
Common mechanical costs:
- Tires (6 tires for a full-size): $1,200-$3,000
- Brakes (full service): $500-$1,500
- Fluids, belts, hoses: $200-$500
- Suspension work: $300-$1,000
- Exhaust repairs: $200-$600
- Coolant system overhaul: $200-$500
- Pre-trip mechanical inspection: $100-$300
“So many old bus conversions. Surely the expensive mechanical repairs must be an ever ongoing threat?”
They can be if you skip the upfront work. This is why experienced builders say to spend the money on a thorough mechanical inspection BEFORE you start the cosmetic build. Dropping $5,000 on a new interior and then discovering you need a $3,000 transmission repair is a nightmare. Get the mechanicals sorted first. Always.
Budget range: $500-$1,500 | Mid-range: $1,500-$4,000 | High-end: $4,000-$8,000+
Tools
“How much does it cost to convert a bus if I do not have any stuff lying around?”
If you’re starting with zero tools, you need to budget for them. The good news is you don’t need anything exotic. The bad news is it adds up faster than you’d expect.
Essential tools for a bus build:
- Angle grinder: $30-$60
- Drill/impact driver: $80-$200
- Circular saw: $50-$120
- Jigsaw: $40-$80
- Rivet gun: $15-$40
- Basic hand tools (wrenches, screwdrivers, pliers, etc.): $100-$300
- Measuring and layout tools: $30-$60
- Safety gear (respirator, gloves, glasses): $50-$100
- Crimping tools (for PEX and electrical): $30-$80
- Miscellaneous (caulk gun, clamps, sandpaper, etc.): $50-$100
Total tool budget from scratch: $500-$1,500
Well, here’s a tip — buy tools as you need them, not all at once. Harbor Freight is your friend for tools you’ll only use a few times. Invest in quality for the tools you’ll use daily (drill, circular saw, angle grinder).
Unexpected Costs (The Ones Nobody Tells You About)
Every single bus builder has a story about something they didn’t budget for. Every. Single. One. Here are the most common surprises:
- Rust repair you didn’t see during inspection: $200-$2,000
- Replacing a windshield: $300-$800
- Registration, titling, and inspection fees: $100-$500
- Building permits (some areas require them): $0-$500
- Propane system certification: $100-$300
- Moving the bus to a new work location: $50-$300 in fuel
- “While I’m at it” upgrades that snowball: $500-$2,000+
- Replacing materials after a mistake: $100-$500
“How much did you spend on this project even with the design changes?”
Design changes are the silent budget killer. You install something, realize it doesn’t work, tear it out, and redo it with different (usually more expensive) materials. This happens to everyone. Budget an extra 15-20% on top of your total estimate as a contingency. If you don’t need it, great — you’ve got money left over. If you do need it (and you probably will), you won’t be scrambling. (See our guide on What Happens If Your Skoolie Breaks Down? for more on this.)
The Full Picture
Alright, let’s put it all together. Here’s what a complete bus conversion looks like at three price points:
Budget Build ($5,000-$15,000):
- Cheap bus from auction: $2,000-$4,000
- Rigid foam insulation: $300-$500
- Basic electrical (no solar, minimal battery): $500-$1,000
- Simple plumbing (hand pump, gravity drain): $200-$500
- Vinyl plank flooring: $200-$400
- Luan/plywood walls: $100-$300
- Minimal kitchen (2-burner, cooler): $200-$400
- Basic bathroom (bucket composting): $50-$200
- DIY paint: $100-$300
- Minimal mechanical work: $500-$1,500
- Tools: $500-$1,000
Mid-Range Build ($20,000-$40,000):
- Good condition bus: $4,000-$7,000
- Spray foam or quality rigid foam: $600-$1,500
- Full solar/lithium electrical: $2,500-$4,500
- Complete plumbing with composting toilet: $1,000-$2,000
- Quality LVP flooring: $400-$700
- Tongue and groove walls/ceiling: $500-$900
- Full kitchen with 12V fridge: $800-$1,800
- Complete bathroom: $400-$1,000
- Quality DIY paint: $300-$600
- Thorough mechanical service: $1,500-$3,000
- Tools: $800-$1,200
- Contingency (15%): $2,000-$4,000
High-End Build ($50,000-$100,000+):
- Premium bus or coach: $8,000-$25,000
- Professional spray foam: $2,000-$3,000
- Large solar array, lithium, inverter: $5,000-$8,000
- Full plumbing with on-demand hot water: $2,000-$4,000
- Hardwood or premium flooring: $800-$1,500
- Custom woodwork walls/ceiling: $1,000-$2,000
- Full kitchen with residential appliances: $2,000-$4,000
- Luxury bathroom with tile: $1,200-$2,500
- Professional paint: $3,000-$8,000
- Complete mechanical overhaul: $4,000-$8,000
- Premium tools: $1,500+
- Contingency: $5,000-$10,000
“How much does this bus conversion cost? Also what is the monthly expenses?”
So now you’ve got the build cost picture. But what about after? Monthly expenses for full-time bus life typically run:
- Fuel: $200-$600 (depends heavily on how much you drive)
- Insurance: $50-$200
- Campground/parking fees: $0-$800
- Food: $300-$600
- Cell/internet: $50-$150
- Maintenance fund: $100-$300
- Propane: $20-$60
- Miscellaneous: $100-$200
Total monthly: $800-$2,900 — which is a whole lot less than rent in most American cities.
Wrapping It Up
Is it a lot of numbers? Yeah, it is. But here’s what I want you to take away from all of this: a bus conversion costs whatever you want it to cost. People have built beautiful, functional homes on wheels for under $10,000. Other people have spent six figures and built something that belongs in a magazine. Neither approach is wrong.
The key is knowing your budget before you start, building a spreadsheet, tracking every dollar, and adding that 15-20% contingency. The people who get into financial trouble with bus builds are the ones who start without a plan and figure out the budget as they go.
You’re going to hit surprises. That’s just how it works with a project this big. But now you’ve got real numbers to plan around, not just guesses. So grab a spreadsheet, pick your price point, and start planning. You’ve got this — and the numbers are probably better than you expected.
xvik9s