
Living in a steel tube year-round means dealing with temperature extremes that most homeowners never think twice about. I spent months digging into every heating and cooling option people actually use in their bus builds, and the amount of conflicting advice out there is honestly staggering. Some people swear by one solution, others call that same solution a waste of money, and the truth is almost always somewhere in the middle and depends entirely on where you are and how you travel.
This guide covers everything I’ve found about keeping a skoolie comfortable in any climate. Heating options include diesel heaters (both the cheap Chinese units and premium Webasto/Espar), propane furnaces, wood stoves, and mini split heat pumps. Cooling options include rooftop RV air conditioners, mini split AC, swamp coolers for dry climates, and ventilation fans like the MaxxAir. But none of those systems matter much if your insulation isn’t right, because insulation is the foundation that makes everything else work. And if you’re running any of this off-grid, your electrical system has to be sized for it from day one. I’ll walk through all of it — what works, what doesn’t, what it costs, and how to decide what’s right for your build.
Understanding Heat Loss in a Steel Box
Before you spend a dollar on a heater or an AC unit, you need to understand what you’re actually dealing with. A school bus is a steel shell. Steel conducts heat incredibly well, which is the opposite of what you want in a home. In winter, heat pours out through the walls, ceiling, and floor. In summer, the sun turns that metal skin into a radiator pumping heat inward. I remember reading a forum post where someone measured the surface temperature of their uninsulated bus roof in Arizona and it was over 160 degrees. The inside wasn’t much better.
The physics here are pretty straightforward. Heat moves three ways: conduction (through materials), convection (through air movement), and radiation (through electromagnetic waves, like sunlight hitting your metal roof). An uninsulated bus is losing heat — or gaining it — through all three pathways simultaneously. Your heating and cooling systems are fighting against all of that, and if you don’t address the shell itself first, you’re just throwing energy at a problem that has a much cheaper fix.
This is why I keep hammering on insulation before anything else. I’ve seen builds where someone dropped $2,000 on a beautiful mini split system and then wondered why it couldn’t keep up on a 100-degree day. Turns out they’d skipped insulating the ceiling. That’s like running your house AC with the front door open.
The small space actually works in your favor once you address the shell. You’re heating or cooling maybe 200 to 300 square feet instead of 1,500. A properly insulated bus with a decent heat source warms up in minutes. The challenge isn’t raw power, it’s efficiency and managing the specific weaknesses of a metal structure.
Heating Options Overview
There are more ways to heat a bus than most people realize when they first start planning their build, and the right choice depends on a bunch of factors that are specific to your situation. Your climate, your electrical setup, whether you’re on shore power or off-grid, whether you’re full-timing or weekending, your budget, and honestly your tolerance for complexity all play into it.
I’ve broken down each major option below with real numbers and real tradeoffs. When I was doing my research, I found that a lot of people end up combining two heating methods — a primary system and a backup. That kept coming up over and over. It’s not that any single option is bad, it’s that each one has a scenario where it falls short, and having a plan B makes winter a lot less stressful.
The major categories are diesel heaters, propane furnaces, wood stoves, mini split heat pumps, and electric space heaters on shore power. Each has a sweet spot and each has real limitations.
Diesel Heaters (Chinese Heaters and Premium Brands)
I’ll start here because this is where the community lands more often than anywhere else, and after all the digging I’ve done, I understand why.
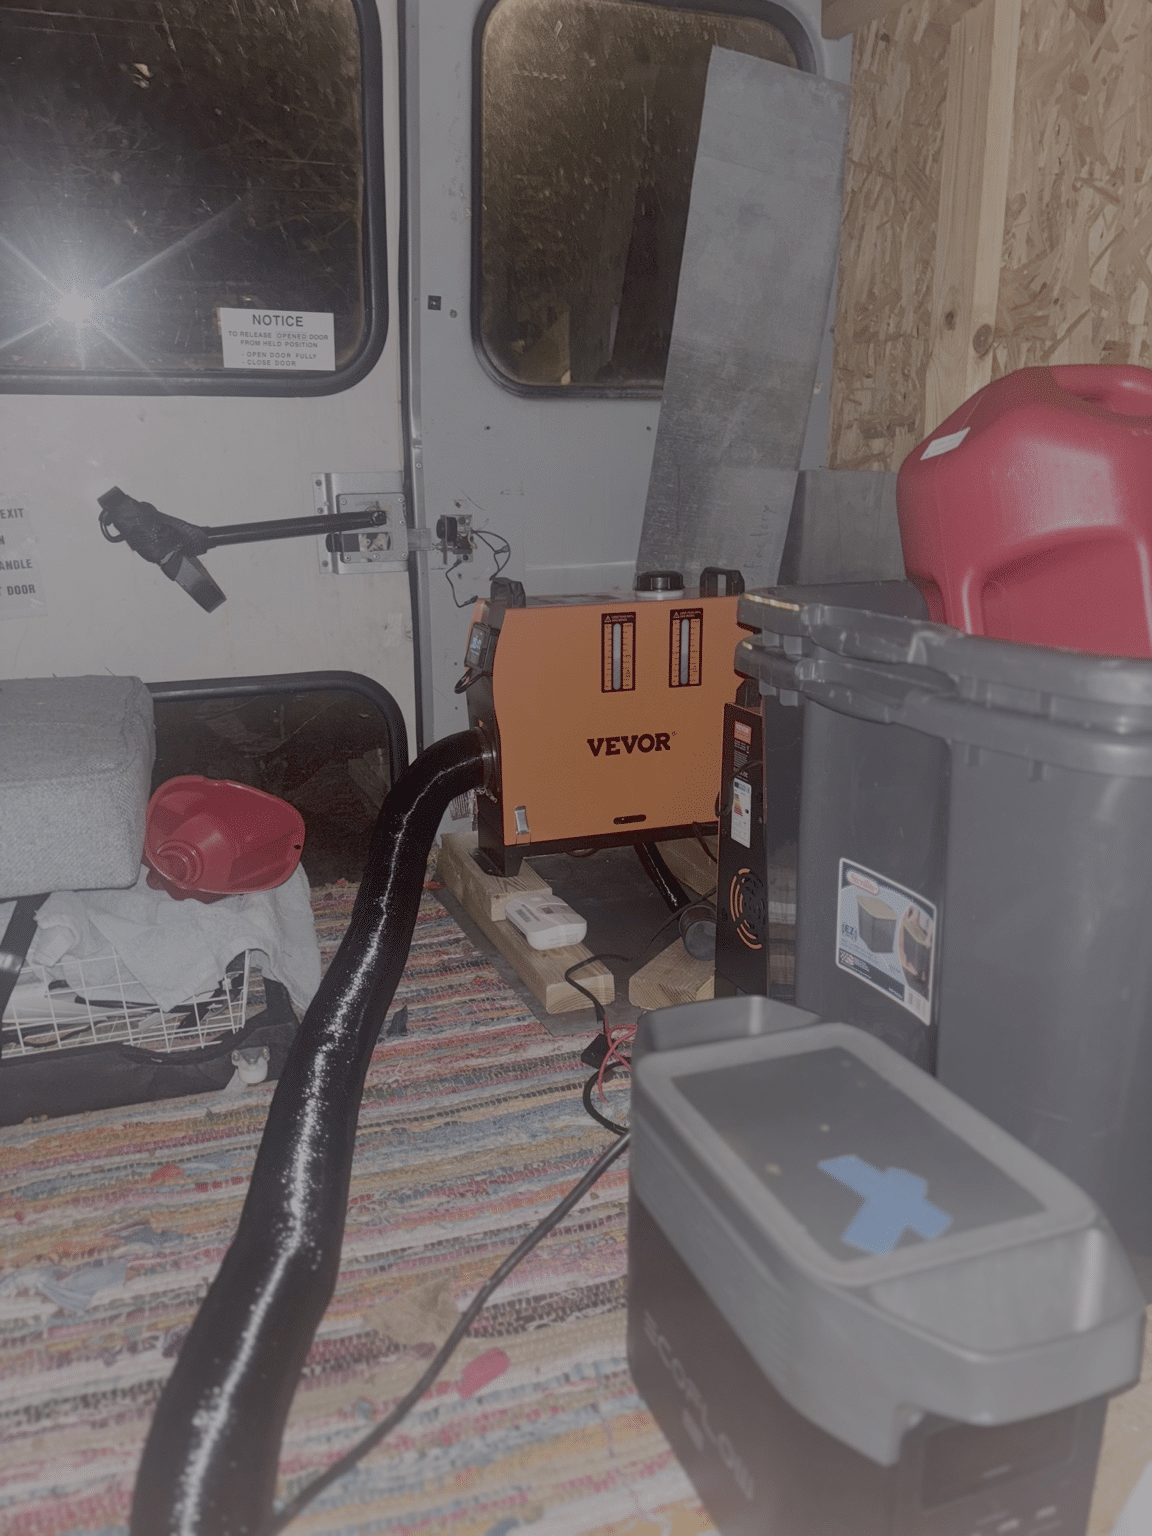
A diesel air heater pulls fuel from your bus’s tank (or a separate small tank if you prefer), burns it in a sealed combustion chamber, exhausts the fumes outside through a pipe, and blows heated air into your cabin. The air you breathe never touches the combustion. It’s clean, it’s safe, and it’s efficient.
Now, the community splits into two very distinct camps on this one. The Chinese diesel heaters — you’ll find them on Amazon for $100 to $200 under a rotating cast of brand names that seem to change every few months — are basically clones of the more expensive European units. I was chatting with a guy in a skoolie forum who’d run a $130 Amazon unit through three winters in Colorado without a single issue. Heated his 35-foot bus down to 10 degrees outside. For $130. That’s a pretty compelling argument.
But I also talked to people who had the opposite experience. Error codes after six weeks. Fuel pumps that got loud enough to wake them up at 2 AM with this rhythmic ticking. Glow plugs that burned out. The quality control is inconsistent, and you’re rolling the dice a bit. Parts are cheap though, usually $10 to $30 for whatever breaks, and there’s a huge community of people troubleshooting these things online. If you’re handy and not afraid of some basic repair work, the budget units can be a great value.
Webasto and Espar are the other camp. These are the units that go into ambulances, military vehicles, and long-haul trucks. A Webasto Airtop 2000 runs $800 to $1,200 and it’s probably the single most recommended heater in the entire skoolie community. Quieter, better temperature control, more reliable, and you get actual customer support if something goes wrong. The Espar Airtronic is the other big name and it’s comparable in every way.
Fuel consumption is shockingly low on these. Most diesel air heaters burn 0.03 to 0.1 gallons per hour depending on the heat setting. Even running one all night you’re using maybe half a gallon. Over a full winter month of heavy use, that’s $60 to $150 in diesel. The electrical draw is minimal too, maybe 10 to 30 watts running, so your battery bank barely notices it. Installation takes a weekend for most people — mount the unit under the bus or in a compartment, run a fuel line to the tank, run the exhaust and intake through the floor, wire it to 12V, and you’re done.
For most first-time builders, this is where I’d point you. If budget is tight, grab a Chinese unit and keep a spare glow plug and fuel pump on hand. If you want to buy it once and forget about it, go Webasto or Espar. Either way, you’ve got a heating system that runs on fuel you already carry, barely touches your electrical system, and keeps a bus toasty in genuinely cold weather.
Propane Furnaces
If you’re already running propane for your cooktop or water heater, a propane furnace slots right into the existing infrastructure. Tank, regulator, gas lines — just add another branch. The most common units in bus builds are RV furnaces from Suburban and Atwood. Forced air, meaning a blower fan pushes heated air through ducts. A 30,000 BTU unit heats a full-size bus without breaking a sweat. Cost is $400 to $800 for the furnace.
The thing about propane furnaces that catches people off guard is consumption. Running one through a cold night can chew through a 20-pound tank in two to three days. If you’re buying propane at campground prices, that’s $40 to $90 a month in serious cold. Not terrible, but more than diesel. And then there’s the noise. These things cycle. The blower fan kicks on at full blast when the thermostat calls for heat, runs for a while, shuts off, then kicks back on 20 minutes later. At 3 AM that cycle will wake you up.
Mr. Buddy heaters come up constantly in these conversations and I need to be straight about them. They’re cheap, $80 to $150. They work immediately — no installation, no fuel lines, just screw one onto a propane bottle and light it. Throw serious heat. But they’re unvented. You’re burning propane inside your living space and the combustion gases stay inside with you. That means carbon monoxide and moisture. CO detectors are absolutely mandatory, not optional, not “probably a good idea” — mandatory. And you’ll wake up to condensation on every window, every morning. For occasional use as a backup they’re fine. As a primary heating system for full-time living, I’d point you toward a vented furnace or diesel heater instead.
One thing I hadn’t considered until someone pointed it out in a build thread — propane combustion produces water vapor as a byproduct. In a small sealed space like a bus, that moisture adds up fast. A diesel heater vents all combustion products outside. A propane furnace does too, if it’s a ducted RV-style unit. But a Mr. Buddy? All that moisture goes straight into your cabin air. In cold weather, that’s a condensation and mold recipe.
Wood Stoves
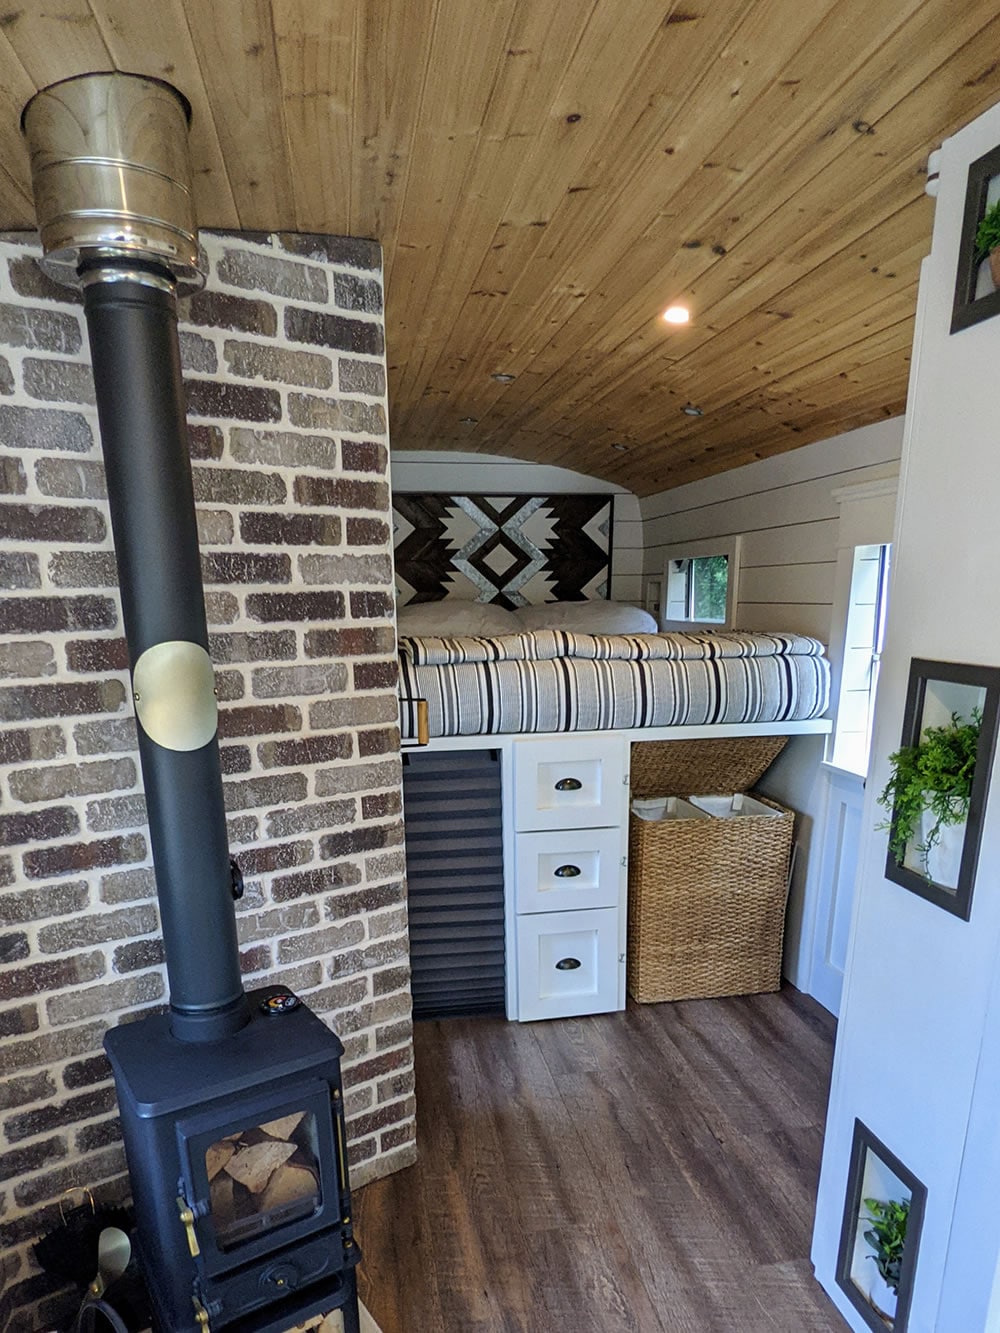
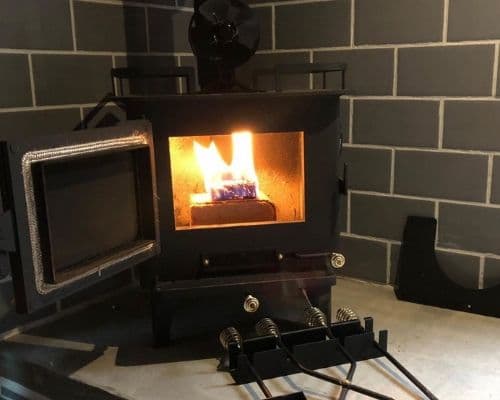
I’ll be honest, the wood stove builds were the ones that first pulled me into the skoolie world. There’s just something about a little cast iron stove with the chimney pipe going through the roof that makes a bus feel like a cabin. Brands like Cubic Mini, Dwarf, and Dickinson make small marine and tent stoves designed for exactly this kind of space. A Cubic Mini Grizzly is about a foot cube and puts out enough heat to warm a full-size bus in moderate cold.
I was watching a build tour from a couple up in Vermont who had a Dwarf stove in their 40-footer. They’d set it up in this little alcove with stone tile behind it and copper pipe going up through a triple-wall chimney. Looked like something out of a magazine. They said on a fall evening it was genuinely the coziest spot they’d ever lived in. Hard to put a price on that feeling.
But the tradeoffs are real and I can’t sugarcoat them.
Fire risk is obvious. You’re putting an active fire inside a vehicle. Heat shields, proper clearances from combustible surfaces, a correctly installed chimney with roof flashing and a spark arrestor — all of it has to be done right. Insurance is the other big issue. Many insurance companies won’t cover a vehicle with a wood stove installed. Some specialty RV insurers will, but your options narrow and premiums go up. I covered this more in the insurance guide, but it’s worth knowing before you fall in love with a stove.
And then there’s the practical side of overnight heating. A Cubic Mini burns through a load of wood in two to four hours. You’re either waking up at 2 AM to feed the fire, or you’re waking up to a cold bus at 5 AM. Neither is great in January. This is why the combination approach keeps coming up. A lot of the happiest winter builds I’ve seen use a wood stove for evening coziness and ambiance, then let a diesel heater on a thermostat take over while they sleep. Best of both worlds, but two systems instead of one.
Cost for the stove itself is $400 to $800. Add another $200 to $400 for chimney pipe, heat shields, and roof penetration hardware. Fuel is free if you gather wood, $5 to $10 a day if you’re buying it. If you’re parked somewhere with access to deadfall wood, the operating cost is essentially zero.
Mini Split Heat Pumps
Mini splits keep showing up more and more in bus builds, and for good reason. They heat AND cool, which means one system handles your climate control year-round. In a small space where every component needs to justify its weight and its square footage, that two-for-one deal is a big advantage.
A heat pump works by moving heat rather than creating it, which makes them wildly efficient. For every watt of electricity they consume, they produce two to three watts of heating. The units most builders install are 9,000 or 12,000 BTU models running $700 to $1,500 for the equipment. Installation involves mounting the indoor head unit on a wall, the outdoor condenser on the roof or back of the bus, and running refrigerant lines between them. If you’re not certified to handle refrigerants, a technician adds $500 to $1,000 to the project.
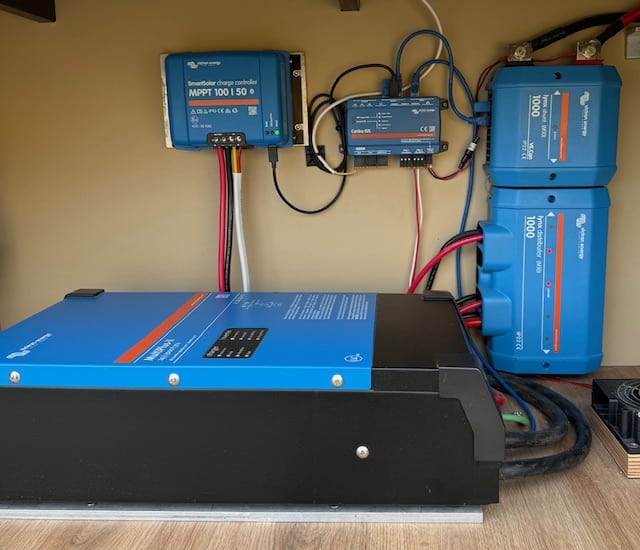
Here’s where most people don’t think it through far enough. Mini splits need electricity, and not a trivial amount. Running one in heat mode pulls 500 to 1,500 watts depending on how hard it’s working. That means a serious inverter (2,000W minimum, 3,000W preferred), a hefty lithium battery bank (400Ah or more), and enough solar to replenish what you use. On shore power this is a non-issue. Off-grid it becomes the centerpiece of your entire electrical planning. I’ve written more about sizing solar systems in the solar setup guide if you’re going this route.
The other limitation nobody tells you about upfront is temperature range. Standard mini splits start losing efficiency below 25 to 30 degrees and basically stop producing useful heat below about 5 degrees. Cold-climate models like the Mitsubishi Hyper Heat are rated down to negative 13 degrees, but they cost more. Most people in genuinely cold climates end up pairing a mini split with a diesel heater as backup for the worst nights, and honestly that hybrid approach is probably the smartest setup I’ve come across if you’ve got the budget and the electrical capacity for it.
Cooling Options Overview
Cooling a bus is in some ways a harder problem than heating one, because you’re fighting the sun, and the sun doesn’t care about your budget or your battery bank. A well-insulated bus with a small diesel heater stays warm in most conditions. But cooling requires moving heat out of the space, which takes energy, and in the worst heat you can’t just crack a window and call it done.
The approach that works for most people is layered. Insulation blocks heat from getting in. Window management reduces solar gain. Ventilation moves air through the space. And mechanical cooling — AC or evaporative — handles the rest when passive strategies aren’t enough. I’ll go through each one, but the takeaway up front is that you probably need three or four of these working together, not just one.
Rooftop RV Air Conditioners
These are the white boxes you see sitting on top of every fifth wheel and Class A at the campground. Dometic and Coleman are the big names. They bolt right onto a standard 14×14 inch roof vent opening, and if your bus already has one cut, installation is genuinely straightforward. A lot of people knock it out in an afternoon.
A typical rooftop unit puts out 13,500 to 15,000 BTU, which is more than enough for a bus. Effective coolers, no question about that. Cost is $500 to $1,100. The install is simpler than a mini split since everything goes through one roof opening, no refrigerant lines to run.
But the drawbacks are real. Power draw is 1,200 to 1,800 watts running, with startup surges that can hit 2,500 to 3,000 watts. You basically need shore power or a generator. Running one off-grid would drain most battery banks in a couple hours. And they’re loud. The compressor is literally sitting on your roof, a couple feet above your head. I talked to one couple who said they couldn’t hold a conversation at normal volume when their rooftop unit was running. Mini splits are whisper quiet by comparison.
Where rooftop ACs make sense is for people who are primarily at campgrounds with hookups. Plug into 30 or 50 amp service, flip the switch, bus gets cold. Simple. If you’re boondocking and off-grid most of the time, the power situation is going to be a constant headache.
Mini Split AC
I covered mini splits in the heating section, but they deserve their own mention on the cooling side because this is really where they shine. A 12,000 BTU mini split will cool a full-size bus with no trouble, and because of the inverter compressor technology, they’re significantly more efficient than a rooftop unit.
Once a mini split gets the bus down to temperature, it might only draw 300 to 500 watts to maintain it. Compare that to a rooftop unit hammering away at 1,500 watts nonstop. On a good solar day with 400 to 600 watts of panels and a decent lithium bank, you can actually run a mini split off-grid through a hot afternoon. I was reading about a couple in Tucson who kept their bus at 75 degrees through an Arizona summer running entirely on solar. They had 600 watts of panels and 400Ah of lithium. They said it worked every day except the absolute worst, 115-plus days when the compressor couldn’t quite keep up.
The efficiency advantage is why mini splits have become the gold standard for serious builds. If you can handle the upfront cost and the installation complexity, it’s the best AC option available for a bus, period.
Swamp Coolers and Evaporative Cooling
“For us primarily in the SW desert would a small water cooler be practical?”
This question comes up constantly from people planning to live in Arizona, New Mexico, Nevada, that sort of territory. And the answer surprised me a little when I first dug into it, because yes, in the right conditions a swamp cooler is legitimately effective and it uses almost no electricity.
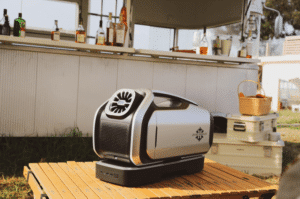
Evaporative coolers work by pulling air through wet pads. The water evaporates and absorbs heat from the air, dropping the temperature. Simple physics that’s been used for thousands of years. A small portable unit pulls maybe 50 to 100 watts — compare that to 800 or 1,200 watts for an AC — and can drop interior temps by 15 to 25 degrees. For off-grid solar setups, the power savings are massive.
But here’s the catch that makes or breaks this option. Swamp coolers only work in dry air. Below about 30% humidity, they’re fantastic. Between 30% and 50%, they’re okay but not impressive. Above 50% humidity, you’re just pumping moisture into already-humid air and making your bus feel like a steam room. So if you’re in Phoenix in June, great. Houston? Absolutely not.
I was reading about one couple who full-timed in the Southwest running a small portable evaporative cooler they’d picked up for about $80. Pulled maybe 50 watts. They said it kept their bus comfortable through most of the summer as long as they stayed in dry desert climates. When they’d drive to the coast or anywhere humid, they’d switch to their mini split instead.
For a dedicated desert setup, you’re looking at units in the $60 to $150 range, or you can DIY one with a 5-gallon bucket, a small fan, and some cooling pads for under $30. Not pretty, but functional. You’re filling the water tank once or twice a day depending on the size. The power draw is so low that even a modest solar setup handles it without breaking a sweat. If you’re in the Southwest and staying in the Southwest, this is honestly one of the smartest budget cooling strategies I’ve come across. Just have a backup plan for when the monsoons roll in.
Fans and Ventilation (MaxxAir, Fantastic Fan)
If I had to pick the single most universally recommended piece of equipment in the skoolie community, it might be a MaxxAir fan. I’ve talked to dozens of bus owners at this point and I have yet to find one who regretted installing one. The MaxxAir 7500K is the most popular model, runs about $250 to $300, and mounts in a standard 14×14 inch roof opening.
These are 12V powered fans that can push air in or pull air out. They run on multiple speeds, and the 7500K has a built-in rain sensor that closes the lid automatically if it starts raining. The Fantastic Fan is the other name you’ll see — similar concept, slightly different feature set, comparable price.
A fan isn’t air conditioning. It won’t make a 110-degree bus feel like 75. But moving air changes the perceived temperature dramatically, and the cross-breeze effect is real. Put a MaxxAir on one end of the bus pulling air out, crack a window on the other end, and you’ve got airflow moving through the entire space. On days in the 80s to low 90s, especially in shade, this alone can be enough. Most builds have two fans — one over the kitchen area and one in the bedroom or sleeping area. Some longer buses run three.
The power draw is almost nothing. Maybe 30 to 40 watts on medium speed. You can run one 24/7 off a small battery bank and barely notice it. This is important for the pet safety conversation too — a MaxxAir running constantly provides baseline ventilation even when you’re not there. But on genuinely hot days, a fan alone is not enough for an animal left unattended. You need actual AC for that, plus a temperature monitor on your phone.
Ventilation does double duty for moisture management. Two people sleeping in a bus produce about a liter of moisture overnight just from breathing. Add cooking, and that moisture has to go somewhere. Without ventilation it condenses on the coldest surface it can find, usually your windows or any exposed metal. A MaxxAir on low while you sleep solves most condensation issues. I’ve seen builds where someone had major moisture problems until they added a second fan for cross-ventilation, and then the problem vanished.
Insulation: The Foundation of Comfort
I’ve mentioned insulation about fifteen times already in this article, and that’s because everything else I’ve covered works dramatically better — or fails quietly — based on how well you’ve insulated the shell. I wrote a full article on insulating a school bus that goes deep on materials and methods, but here’s the core of it as it relates to heating and cooling.
“Can you or do you have insulation for very cold weather?”
I see this question constantly, and it usually comes from people who assume a bus is basically a tin can with no hope of temperature control. An uninsulated bus IS a tin can. I won’t fight that. But a properly insulated one? People live in these through Minnesota winters and Arizona summers. The trick isn’t some special cold-weather or hot-weather insulation. It’s about R-value, complete coverage, and no gaps.
Closed-cell spray foam is the gold standard for bus builds. R-6 to R-7 per inch, bonds directly to the metal, acts as its own vapor barrier, and eliminates the condensation problem that plagues other insulation types. Professional spray foam for a full-size bus runs $1,500 to $4,000. DIY kits are $500 to $1,500 but harder to apply evenly.
Rigid foam board (XPS or polyiso) is the budget alternative. R-5 per inch for XPS, R-6 for polyiso. You cut pieces to fit between the bus ribs and seal every edge with canned spray foam. Total materials cost is $400 to $900 for a full bus. Takes longer to install but works well if you’re meticulous about sealing.
Fiberglass is the one I’d steer people away from in a bus. It absorbs moisture, and when you press it against metal that sweats with temperature changes, you end up with a mold factory behind your walls that you can’t see. I was reading through a skoolie forum where this guy posted photos from tearing out his walls after two years of fiberglass insulation in the Pacific Northwest. Rusty metal, black mold, fiberglass that was basically a wet sponge. That image stuck with me and it’s why I keep recommending spray foam even though it costs more.
For hot climates specifically, don’t just think about R-value. Think about radiant heat. A white-painted roof reflects a massive amount of solar energy before it ever gets to your insulation. Foil-faced polyiso board adds a reflective component to the walls. And a Reflectix layer on the ceiling, with an air gap between it and the roof, bounces radiant heat back before it reaches your insulation. These passive measures reduce how hard your AC has to work, which saves you electricity and extends your off-grid capability.
The floor matters too and people skip it. Rigid foam board under your subfloor adds R-5 to R-10 and makes the bus feel dramatically more comfortable underfoot, especially in winter. And the wheel wells — insulate them. They’re a massive cold spot in winter and they radiate road heat in summer. Spray foam conforms to their irregular shape easier than anything else.
“How do you handle the heat?”
This is the comment I see on nearly every bus tour video. Beautiful build, wood paneling, plants hanging in the window, cozy bed, and then someone asks the obvious question: “that thing must be absolutely brutal in the summer.”
The people who handle heat well in their buses are usually doing five or six things at once. Insulation blocks heat from radiating through the metal. White roof paint reflects sunlight. Window covers or tinting reduces solar gain through all that glass. MaxxAir fans keep air moving so it doesn’t stagnate. Shade — whether from trees, awnings, or just smart parking — keeps direct sun off the bus. And when all of that isn’t enough, AC or evaporative cooling handles the remaining gap.
The combination is what makes it work. No single strategy handles serious heat alone. But when you layer them, each one reduces the load on the others. I talked to one builder who said the temperature difference between his insulated ceiling and the bare metal roof above it was over 30 degrees on a sunny day. That’s 30 degrees your AC doesn’t have to fight against.
Parking matters more than people think. A bus in full sun on asphalt versus one under a tree in a gravel lot — the interior temperature difference can be 15 to 20 degrees. In summer, shade should be near the top of your priority list when choosing where to stop. Some people set up awnings on the sunny side to shade the windows. Others orient the bus so the longest side faces north. These small decisions compound.
Running Heat and AC Off-Grid
This is where all the individual equipment decisions meet reality, and it’s the section I think most people need to pay the most attention to. It doesn’t matter how great your heater or AC is if your electrical system can’t support it.
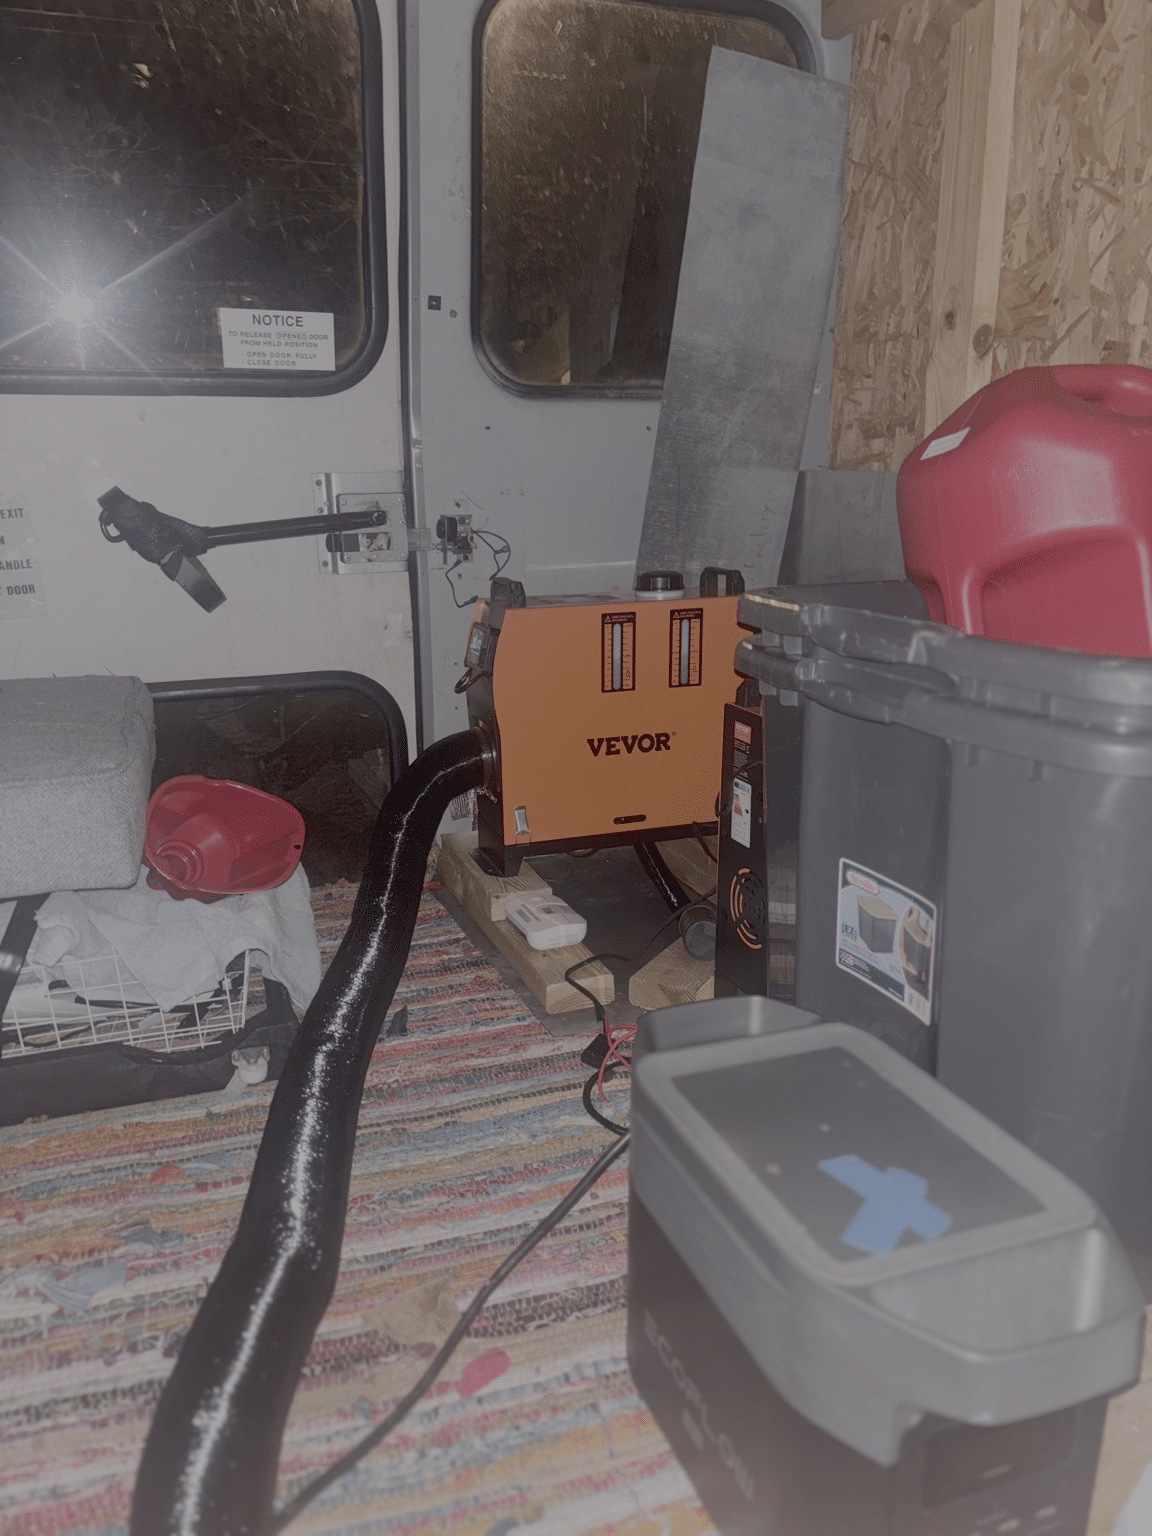
“How do you keep the engine warm during sub freezing temperatures?”
Let me tackle this one first because it’s related but distinct from cabin heating. An engine block heater is the standard answer — it plugs into a 120V outlet and keeps the engine coolant warm. Cold starts in sub-zero temps are brutal on diesel engines, and a block heater makes them easy. Most school buses already have a block heater port from the factory. If yours doesn’t, a mechanic can install one for $100 to $300.
If you’ve got shore power, just plug it in overnight and your engine starts fine in the morning. Off-grid, you’ve got a couple options. Some builders install a diesel-fired coolant heater (Webasto and Espar make these too, different from the air heaters) that keeps the engine coolant warm independently. It also doubles as a cabin heater if you run the hot coolant through the bus’s original heater cores. One system, two jobs. Cost is $800 to $1,500 plus installation, but it’s a slick solution.
Beyond the block heater, use winter-grade diesel fuel or add anti-gel additive when temps drop below 20 degrees. Diesel fuel can gel in extreme cold, clogging the fuel filter. A $10 bottle of anti-gel prevents a problem that could otherwise leave you stranded.
Now, for the bigger off-grid power picture. Here’s how the major heating and cooling options stack up electrically:
Diesel heaters are the easiest to run off-grid. They pull 10 to 30 watts, which is almost nothing. Your bus batteries can run one for days without any solar input at all. This is why they’re so popular with boondockers and cold-weather full-timers. Fuel cost is the main expense, not electricity.
Propane furnaces draw more than you’d expect because of the blower fan. A typical RV furnace pulls 3 to 7 amps at 12V, so 36 to 84 watts. Still manageable for most battery setups, but noticeably more than a diesel heater, and you’re buying propane on top of the electrical draw.
Wood stoves use zero electricity. No fan, no pump, no controls. Just fire. If you’re truly trying to minimize your electrical dependency, this is as off-grid as it gets. The downside is obvious — you’re feeding a fire manually.
Mini splits are the power-hungry option. Running one in AC mode pulls 800 to 1,200 watts at peak, dropping to 300 to 500 watts once the bus reaches temperature. In heat mode, similar numbers. To run one comfortably off-grid, you’re looking at 400 to 600 watts of solar panels, a 3,000W inverter, and at minimum 400Ah of lithium batteries. That’s a $3,000 to $6,000 electrical system just to support climate control. I broke down solar sizing in the solar guide if you want the full picture.
Rooftop RV ACs are the hardest to run off-grid. 1,200 to 1,800 watts constant, with 2,500 to 3,000 watt startup surges. Most people running these are on shore power or a generator. A 2,000W Honda generator handles a single rooftop unit, but you’re burning gas and making noise. Not ideal for dispersed camping.
Swamp coolers are the off-grid hero. 50 to 100 watts for legitimate cooling in dry climates. Your basic solar setup runs one all day without thinking about it. If you’re in the desert and off-grid, this is why people choose evaporative cooling despite its limitations. The power math just works.
MaxxAir fans at 30 to 40 watts are a non-issue for any battery setup. Run them 24/7 if you want.
The calculation I’d encourage everyone to do before choosing a climate control system is this: figure out your worst-case scenario. Hottest day you’ll face. Coldest night. Then figure out how many watts your system needs, for how many hours, and whether your solar and batteries can handle it. If the answer is no, either upgrade the electrical or choose a lower-draw climate option. Too many people buy the heater or AC they want and then realize they can’t actually run it the way they travel.
—
So after spending way too many hours researching all of this, here’s where I landed. For heating, a diesel heater is the right call for most people. Budget or premium, doesn’t matter, diesel heaters are efficient, low-draw, safe, and proven. If you want ambiance, add a wood stove for evenings and let the diesel heater take over at night. If you’re on shore power most of the time, a mini split handles both heating and cooling in one system and simplifies everything.
For cooling, the answer depends more on where you are than heating does. Desert dwellers should seriously look at swamp coolers for the power savings. Everyone else needs either a mini split or rooftop AC for the genuinely hot days, and MaxxAir fans are non-negotiable regardless of your other equipment. Layer passive strategies — insulation, window covers, white roof, shade — underneath whatever active cooling you choose.
And insulation comes before everything. Don’t buy a heater until your walls are done. Don’t buy an AC until your ceiling is insulated. I know it’s tempting to skip straight to the exciting equipment, but the boring foam behind your walls is what makes the exciting equipment actually work. Get that right and everything else gets easier. Get it wrong and no amount of equipment fixes it. That’s what I found, anyway, and I haven’t come across a builder yet who disagreed.