
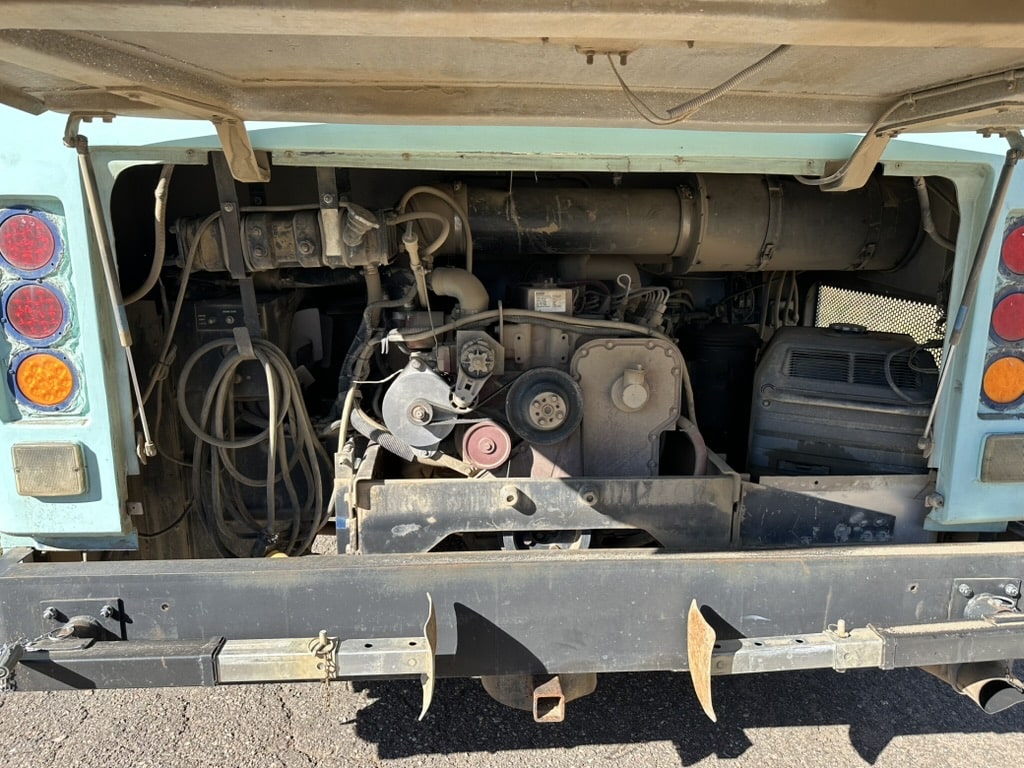
I remember the exact moment I went from casually watching skoolie videos on YouTube to actually thinking, “I could do this.” It was a build tour of this guy’s 40-foot Blue Bird — he’d done the whole thing himself, no construction background, no formal training, and the thing looked like it belonged in a magazine. And then in the comments someone asked the question that I think every single person who’s ever considered a bus conversion has thought at some point: “How does one get into converting a school bus into a home with no experience in woodworking, construction, or home modeling?”
That question stuck with me. Because honestly, when I started digging into this, I didn’t know the difference between PEX and CPVC. I’d never wired a light switch. The idea of cutting into the roof of a vehicle to install a fan made my palms sweat. But the more I researched, the more I talked to people who’d actually done it, the more I realized something: almost nobody who builds a skoolie started out knowing how to build a skoolie. They just started.
This guide covers everything a beginner needs to know about converting a school bus into a livable home, from buying the bus all the way through to registration and titling. I’ll walk through the full process step by step — buying the right bus, gutting it, treating rust, insulation, subfloor, framing, electrical, plumbing, building furniture, painting, and getting it road-legal. I’ll also cover realistic budgets, realistic timelines, the tools you actually need, common mistakes, and where to learn the skills you don’t have yet. This is the hub page. If you’re starting from zero, start here.
“As a single person, that bus is more than spacious as a camper. How does one get into converting a school bus into a home with no experience in woodworking, construction, or home modeling?”
So let’s just get this out of the way first, because it’s the thing that stops most people before they even start. You don’t need experience. I know that sounds like a motivational poster, but I’m not saying it to be encouraging — I’m saying it because the evidence is overwhelming. Forum after forum, build after build, the story is the same: “I had never picked up a circular saw before this project.”
When I was researching this, I found a woman on a skoolie forum who converted a 35-foot Thomas bus entirely by herself. No partner helping. No contractor friend on speed dial. She said the first thing she built was the bed platform and it took her three attempts before it was level. By the end of the build she was running PEX plumbing and wiring a solar system. Took her about 14 months working weekends.
The skills you need for a bus conversion break down into a handful of categories, and none of them require years of training:
- Basic carpentry: Measuring, cutting, screwing things together. You’ll learn this in the first week.
- Basic electrical: Understanding circuits, wiring lights, connecting a battery bank. YouTube tutorials cover this extensively.
- Basic plumbing: Running water lines, connecting a pump, draining a tank. PEX makes this dramatically easier than it used to be.
- Metalwork (light): Grinding rust, cutting window panels, maybe some basic welding. You can get through most builds with just an angle grinder and a drill.
- Problem solving: This is the big one. Every bus is different. Every layout presents unique challenges. You’ll spend as much time figuring out how to make things work as you will actually building.
The truth is that a bus conversion is not one big intimidating project. It’s about 200 small projects strung together, and most of them are things you can learn from a 15-minute YouTube video. I’ll be honest, the hardest part isn’t the skills. It’s starting.
“I’m 62 and this is my dream but I really dont know how to do this.”
I saw this comment on a build video and it kind of broke my heart, because the guy who built the bus in the video was probably 30 and in decent shape and yeah, that can feel discouraging if you’re coming at this from a different stage of life. But here’s what I found — there are people in their 60s and 70s doing bus conversions. Some hire help for the heavy lifting parts (roof raises, seat removal, welding) and do everything else themselves. Some go the short bus route because there’s just less bus to convert. Some take two or three years instead of rushing it in six months.
The point isn’t speed. It’s whether you want to do it badly enough to start.
“This project must have been incredibly fulfilling, did you have any experience in building prior or did you learn as you went?”
Almost every builder I’ve talked to or read about says the same thing — they learned as they went. A few had some handyman experience or had done home renovation work before. But the vast majority? They watched YouTube, asked questions in Facebook groups, made mistakes, fixed the mistakes, and kept going. One guy told me he considers his bus conversion the most expensive trade school on earth. But he also said he could now wire a house, plumb a bathroom, and build cabinetry, so the education wasn’t wasted.
How Do You Actually Start? The Process From Beginning to End
Alright, let me lay out the full process in order. This is the 30,000-foot view. Each of these steps has its own deep dive linked below, but if you’re brand new, this is the roadmap.
Step 1: Buy the bus. Find the right bus for your size, budget, and mechanical condition. This step alone has a ton of decisions baked into it — full-size vs short bus, gas vs diesel, what engine to look for, how many miles is too many, where to buy it.
Step 2: Get it home and do mechanical work first. Brakes, tires, fluids, anything the bus needs to be safe and reliable. This is not the exciting part but it’s the most important.
Step 3: Gut it. Remove the seats, pull up the rubber flooring, strip out anything that’s not staying.
Step 4: Treat the rust. Once the floor is exposed, grind down any rust, apply rust converter, and paint with a rust-inhibiting primer.
Step 5: Plan your layout. Before you build anything, decide where everything goes. Tape it out on the floor. Live in the empty bus for a weekend if you can.
Step 6: Insulate. Walls, ceiling, and floor. This step determines how comfortable you’ll be in every climate.
Step 7: Subfloor. Lay rigid foam insulation on the floor, then plywood on top. This is the foundation for everything.
Step 8: Frame walls and ceiling. Build out your interior walls using furring strips or metal studs. Some people skip formal framing and screw paneling directly to the bus ribs.
Step 9: Run electrical and plumbing rough-in. Before you close up the walls, run your wires and water lines. Much easier to do now than after the walls are paneled.
Step 10: Close up walls and ceiling. Install your wall and ceiling paneling — tongue-and-groove wood, lightweight panels, whatever you chose.
Step 11: Build your furniture. Bed platform, kitchen cabinets, bathroom, storage, seating. This is where the bus starts looking like a home.
Step 12: Install appliances and fixtures. Fridge, stove, water pump, lights, outlets, toilet, shower.
Step 13: Flooring. Install your finish flooring after the heavy construction is done to avoid damaging it.
Step 14: Paint the exterior. Most people do this last or near-last, after all the window work and exterior modifications are finished.
Step 15: Register and title as an RV. Depending on your state, this involves an inspection, paperwork, and sometimes specific build requirements.
That’s it. Fifteen steps. Some of them take a weekend. Some of them take months. But that’s the whole process start to finish.
Buying the Right Bus
“How much does a used school bus cost?”
I spent a lot of time looking at bus prices before I really understood the market. The range is genuinely enormous. You can find a retired school bus for as little as $2,000-3,000 if you’re patient and don’t mind higher miles. A lower-mile diesel in good mechanical shape might run $5,000-10,000. Some buses with less than 80,000 miles from a school district that maintained them well can go for $12,000-15,000.
The sweet spot I kept seeing was around $4,000-7,000 for a bus that runs well, has a diesel engine (usually a DT466, Cummins, or Cat), and doesn’t need major mechanical work right away. There’s a whole separate guide on how to choose the right school bus and where to buy one, but the short version is: government auctions, GovPlanet, school district surplus sales, and occasionally Craigslist or Facebook Marketplace.
The thing that tripped me up early on was focusing too much on the price of the bus and not enough on the mechanical condition. A $3,000 bus that needs $5,000 in engine work is not a $3,000 bus. Get a pre-purchase inspection from a diesel mechanic. It’s $200-400 and it’s the best money you’ll spend in this entire process.
“What engine did you have with your first bus? I’m learning what to avoid and what’s reliable.”
The engine question matters a lot. International DT466 engines are probably the most common in skoolie builds and they’re workhorses — easy to find parts for, mechanics know them, and they last a very long time. Cummins 5.9L and 8.3L are also excellent. Caterpillar 3116 and 3126 are popular but the 3126 has a reputation for injector problems. I’d avoid the early Ford V10 gas engines in full-size buses because they just don’t have the torque for a heavy build.
Gutting and Demo
Once you’ve got the bus home, the first real “build day” is demolition day, and honestly it’s the most satisfying part. You’re ripping out seats, pulling up rubber mat flooring, removing overhead luggage racks, yanking out the old heater system, taking down the ceiling panels. It’s loud, it’s physical, and you can see immediate progress.
“Do you need to remove school bus seats before converting?”
Yes. Full stop. The seats have to come out for the conversion, and in most states they need to come out before you can re-register the bus as an RV. Each seat is bolted to the floor with four to six bolts, usually 9/16″ or 1/2″. A socket wrench and some WD-40 will get most of them. Some bolts will be rusted and you’ll need to cut them with an angle grinder. A full-size bus has 20-26 rows and it takes most people a full day to get them all out.
Here’s the part nobody mentions in the quick how-to videos — each seat weighs 30-50 lbs. A full-size bus worth of seats is easily 1,000-1,500 lbs. That’s a lot of metal. Some scrap yards will take them. Some people sell them on Craigslist for $10-20 each. I’ve even seen people keep a few seats and bolt them back in with seatbelts for passenger seating while driving.
Pulling the floor and checking for rust
Under those seats, under the rubber mat, is the original steel floor. And you need to look at it carefully. After 15-20 years of kids tracking in water and snow, with rubber matting trapping moisture on top, there’s a good chance you’ll find rust. Sometimes it’s surface rust you can grind off and treat. Sometimes it’s holes you can see daylight through.
This is not the time to be optimistic. If the floor has structural rust — meaning the metal is thin or perforated, not just surface discoloration — you need to address it before you build on top of it. Cutting out rusted sections and welding in new steel is the proper fix. For smaller spots, some builders use metal patches riveted and sealed with adhesive.
The thing that I kept seeing people regret was covering up rust without treating it. They’d lay insulation and plywood right over rusty metal and then wonder why their floor was soft two years later.
Rust Treatment
This part isn’t glamorous, and you won’t see it in most Instagram-worthy build photos, but it’s one of the most important steps. After you’ve gutted the bus and exposed all the metal surfaces, you need to deal with rust.
Here’s the process I found most builders follow:
- Grind it down. Use an angle grinder with a flap disc or wire wheel to knock the rust back to bare metal. You don’t need to get every speck, but you need to remove the loose, flaky stuff.
- Apply rust converter. Products like Ospho or Rust-Oleum Rust Reformer chemically convert the remaining rust into a stable surface that paint can adhere to. Brush it on, let it dry.
- Prime and paint. Use a rust-inhibiting primer (Rustoleum makes good ones) and then a topcoat. Some people use rubberized undercoating on the floor for extra protection.
- Seal any holes. Small holes can be filled with body filler or riveted metal patches sealed with adhesive. Larger holes need welding.
Pay special attention to the wheel wells, the area around the emergency exit door, and anywhere water could have pooled. Those are the common rust spots on school buses.
“How much does it cost to convert a bus into a home?”
Alright, money. The question everyone wants answered and nobody gives a straight answer to. So I’m going to try.
I’ve tracked dozens of build budgets from forums, YouTube videos, and conversations with builders, and here’s what I found. The range is ridiculous — anywhere from $5,000 to $100,000+ depending on what you want. But there are some patterns.
Budget build ($5,000-15,000 total including the bus): You’re buying a cheaper bus ($2,000-5,000), doing all the work yourself, using reclaimed materials where possible, and making compromises. Basic electrical with a small battery bank and maybe two solar panels. Simple plumbing with a smaller water tank. Minimal appliances. This is totally doable, and a lot of people live happily in buses built at this level.
Mid-range build ($15,000-40,000 total): This is where most builds land. A decent bus ($4,000-8,000), a proper electrical system with lithium batteries and 400-800 watts of solar, PEX plumbing, a composting toilet or cassette toilet, good insulation, real cabinetry. You’re still doing the labor yourself but you’re buying quality materials.
High-end build ($40,000-80,000+): Roof raise, tile work, custom cabinets, washer/dryer, full residential appliances, professional spray foam insulation, maybe hiring out some of the work. These are the ones that look like tiny luxury apartments.
Here’s what I wish someone had told me earlier: the bus itself is usually only 10-20% of the total build cost. It’s everything that goes into it that adds up fast. A decent solar and electrical setup alone can run $3,000-8,000 depending on your needs. Plumbing with tanks, pump, water heater, and fixtures is another $1,000-3,000. And then there are the surprise costs that nail everyone.
“How much would it cost to buy the bus, insure it and then how much to do this to it if I do not have any stuff lying around?”
Starting truly from scratch with zero materials, zero tools, nothing? Budget higher than you think. Tools alone can run $500-1,500 if you don’t own any. And that’s buying the midrange stuff, not the cheapest and not the best. Insurance on a converted bus runs about $1,000-2,500 a year depending on coverage, your state, and which company you go with.
I made a rough breakdown for someone starting with absolutely nothing:
- Bus purchase: $4,000-7,000
- Mechanical repairs/maintenance: $1,500-5,000
- Tools (if you own none): $800-1,500
- Insulation: $500-2,000
- Subfloor and flooring: $500-1,500
- Framing and wall paneling: $500-1,500
- Electrical system: $2,000-6,000
- Plumbing system: $1,000-3,000
- Kitchen (cabinets, countertop, stove, fridge): $1,500-4,000
- Bathroom (toilet, shower, fixtures): $500-2,000
- Bed and furniture: $300-1,500
- Exterior paint: $200-800
- Registration/titling/insurance: $500-2,500
- Misc and “oh crap” fund: $1,000-3,000
That puts you at roughly $14,800 on the low end to about $41,800 on the high end. The full cost breakdown article goes into more detail on each of these categories.
“am I the only one who plans to do this in the future but plan on it costing more like 10K total?”
You’re not the only one, and it IS possible. But you need to be realistic about what a $10K build looks like. It means a cheaper bus, reclaimed and free materials wherever you can find them, a basic electrical setup, and probably no solar panels bigger than a couple hundred watts. It means shopping at Habitat ReStore, hitting up demolition sites, and watching Craigslist free section like a hawk. People absolutely do it. But go in knowing you’ll be making trade-offs.
“How long does a bus conversion take?”
This was one of the things I was most curious about when I started researching, because the YouTube timelapse videos make it look like a weekend project and the forum posts make it sound like a lifetime sentence. The truth is somewhere in between, and it depends heavily on your situation.
“How long did it take you to make that? Did you document the man hours involved?”
Here’s what I found from tracking real builds:
Working on it full-time (40+ hours/week): 3-6 months for a solid, livable build. This is someone who’s dedicated to finishing, has the money to buy materials as needed, and isn’t waiting around for decisions.
Working weekends and evenings (10-20 hours/week): 6-18 months. This is the most common scenario. People have jobs, they have other responsibilities, and the build happens in stolen time. Weather delays, supply runs, and decision paralysis all stretch it out.
Working on it casually (a few hours when you can): 1-3 years. No shame in this. Some people enjoy the process and aren’t in a rush. Some have budget constraints and build a section at a time as money allows.
“How long in man hrs did it take to complete?”
The honest answer from most builders I’ve talked to is 500-1,500 hours of actual labor for a full-size bus with a complete interior. That’s not counting research time, materials shopping, trips to Home Depot, staring at the bus trying to figure out your next move, or redoing things you messed up the first time. A short bus with a simpler layout might be 300-600 hours.
What stretches timelines more than anything isn’t usually the physical labor — it’s decision fatigue. You spend two weeks trying to decide between LVP and engineered hardwood. Three weeks researching composting toilets vs cassette toilets. A month going back and forth on your floor plan. I heard someone say once that their build was 30% building and 70% overthinking, and that sounds about right from everything I’ve seen.
“What tools do you need for a bus conversion?”
“I would love to know how yall learned how to do woodworking especially and the electrical stuff”
So here’s some good news. The tool list for a bus conversion is surprisingly short compared to what you might think. You don’t need a fully equipped wood shop. Most of the work is done with a handful of power tools and a collection of hand tools.
The essential tools (you can’t really skip these):
- Circular saw — cuts plywood, lumber, paneling. This is your most-used tool.
- Drill/impact driver — you’ll use this every single day of the build. Get a good one. Cordless.
- Angle grinder — rust removal, cutting metal, grinding bolts. Essential for demo and metalwork.
- Jigsaw — curved cuts, cutting holes for outlets and fixtures, notching around wheel wells.
- Tape measure, speed square, level — basic measuring and marking. You’ll use the tape measure more than any other tool in the bus.
- Socket set — removing bus seats, working on anything mechanical.
- Wire strippers, crimpers, multimeter — for electrical work.
- Safety gear — respirator (not just a dust mask, an actual respirator), safety glasses, hearing protection, work gloves.
Really nice to have (makes the build significantly easier):
- Miter saw — makes clean, angled cuts for trim and framing. You CAN use a circular saw for everything but a miter saw is faster and more accurate.
- Oscillating multi-tool — cuts in tight spaces, flush cuts, trimming. Incredibly useful in a bus where everything is awkward and cramped.
- Table saw — ripping boards to width. Not essential but saves a lot of time if you’re doing custom cabinetry.
- Brad nailer or finish nailer — attaching paneling and trim. Way faster than screwing everything.
- Rivet gun — for attaching sheet metal, window blanks, anything to the bus exterior.
- PEX crimping tool — if you’re running PEX plumbing lines.
- Heat gun — removing stickers, bending PVC, shrink-wrapping electrical connections.
You probably don’t need (despite what gear lists tell you):
- Welder — unless you’re doing a roof raise or serious structural modifications. Most builds don’t require welding.
- Router — nice for decorative edges but not essential.
- Planer/jointer — these are woodshop tools. You’re building in a bus, not a furniture studio.
I’d estimate the tool investment at $500-800 if you’re buying everything new and going with decent mid-range brands like Ryobi or Craftsman. If you can borrow tools, buy used, or pick them up at pawn shops, you can cut that down significantly. Harbor Freight tools get a bad rap from serious woodworkers but for a bus build? They’re fine. Your angle grinder doesn’t need to last 20 years. It needs to last one build.
Insulation — Don’t Skip This and Don’t Cheap Out
I’ve written a full guide to insulating a school bus that goes deep on this topic, but here’s the overview for beginners.
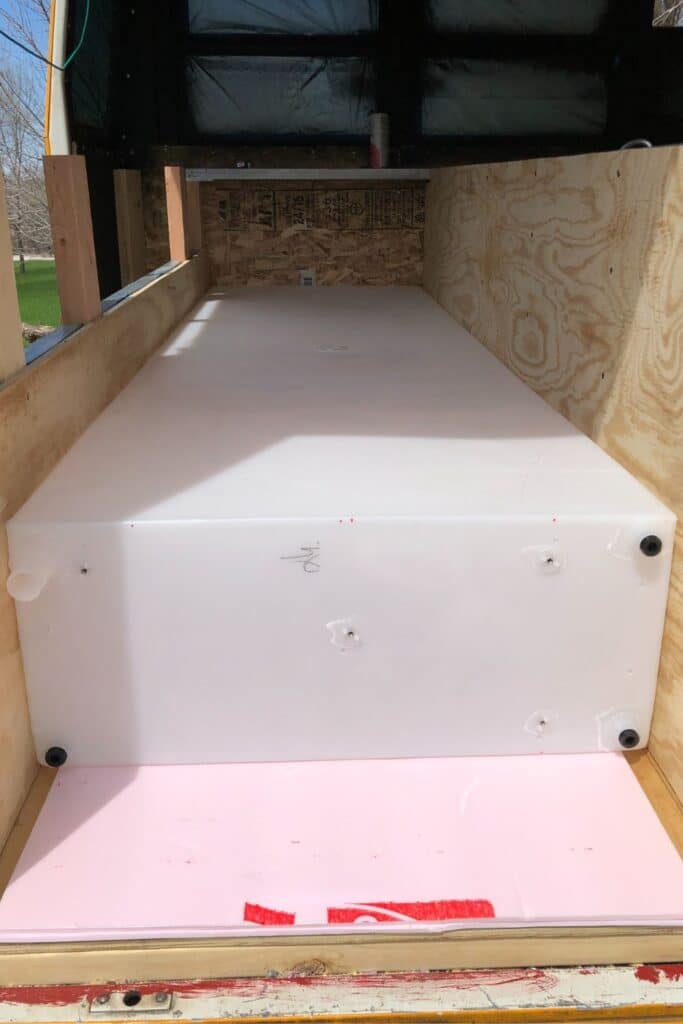
A school bus is a steel box. Steel is terrible at insulating — it conducts heat and cold right through. Without insulation, your bus will be an oven in summer and a freezer in winter, and you’ll get condensation on every metal surface that leads to mold.
There are three main insulation options for a bus:
Closed-cell spray foam is the gold standard. It sticks directly to the metal, creates its own vapor barrier, and has the highest R-value per inch. Downside is cost — hiring a professional to spray a full-size bus runs $1,500-3,000. You can buy DIY spray foam kits for less, but the application is tricky and wasteful if you haven’t done it before.
Rigid foam board (XPS or polyiso) is the most popular DIY option. You cut it to fit between the bus ribs and seal the edges with spray foam or caulk. It’s much cheaper than professional spray foam — maybe $300-600 for a full bus. The trade-off is more labor and you need to be really thorough about sealing gaps.
Fiberglass batts are cheap but problematic in a bus. They absorb moisture, they sag with vibration, and they don’t conform to curved surfaces. Most experienced builders will tell you to avoid fiberglass in a bus even though it’s the cheapest option.
For the floor, rigid foam board is standard. You lay it over the treated metal, then put your plywood subfloor on top.
Subfloor and Flooring
The subfloor is straightforward but it matters. Here’s the typical layering from bottom to top:
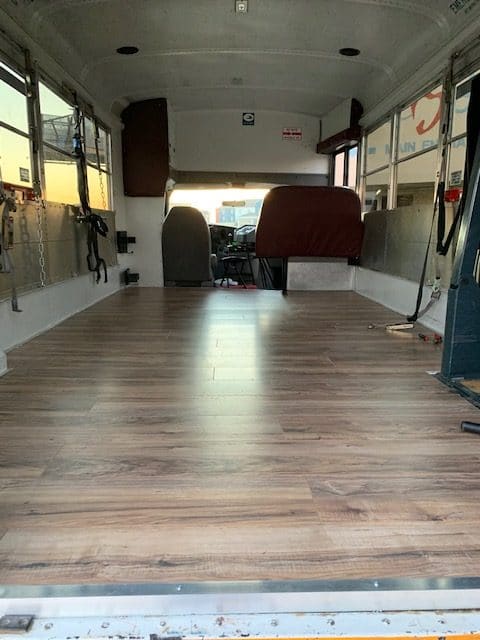
- Treated and painted metal bus floor
- Rigid foam insulation (1-2 inches)
- Plywood (1/2″ or 3/4″)
- Finish flooring (LVP, vinyl, engineered hardwood, whatever you choose)
Some people glue the foam down. Some just lay it. The plywood gets screwed down through the foam into the metal ribs in the floor. A quick tip I picked up from a builder forum — use self-tapping screws so you don’t have to pre-drill through the metal. Saves a ton of time.
For the finish flooring, luxury vinyl plank (LVP) is the overwhelming favorite in the skoolie community and for good reason. It’s waterproof, lightweight, handles the flexing and vibration of a moving bus, looks good, and it’s cheap. Somewhere around $1-3 per square foot for decent stuff. It clicks together and installs in an afternoon.
I’d avoid tile (too heavy, cracks with bus movement), real hardwood (warps and separates), and carpet (moisture, mold, impossible to clean). The flooring guide covers all the options in detail.
Framing Walls and Ceiling
This is where you’re actually building the interior structure of your home. And there are a couple different approaches.
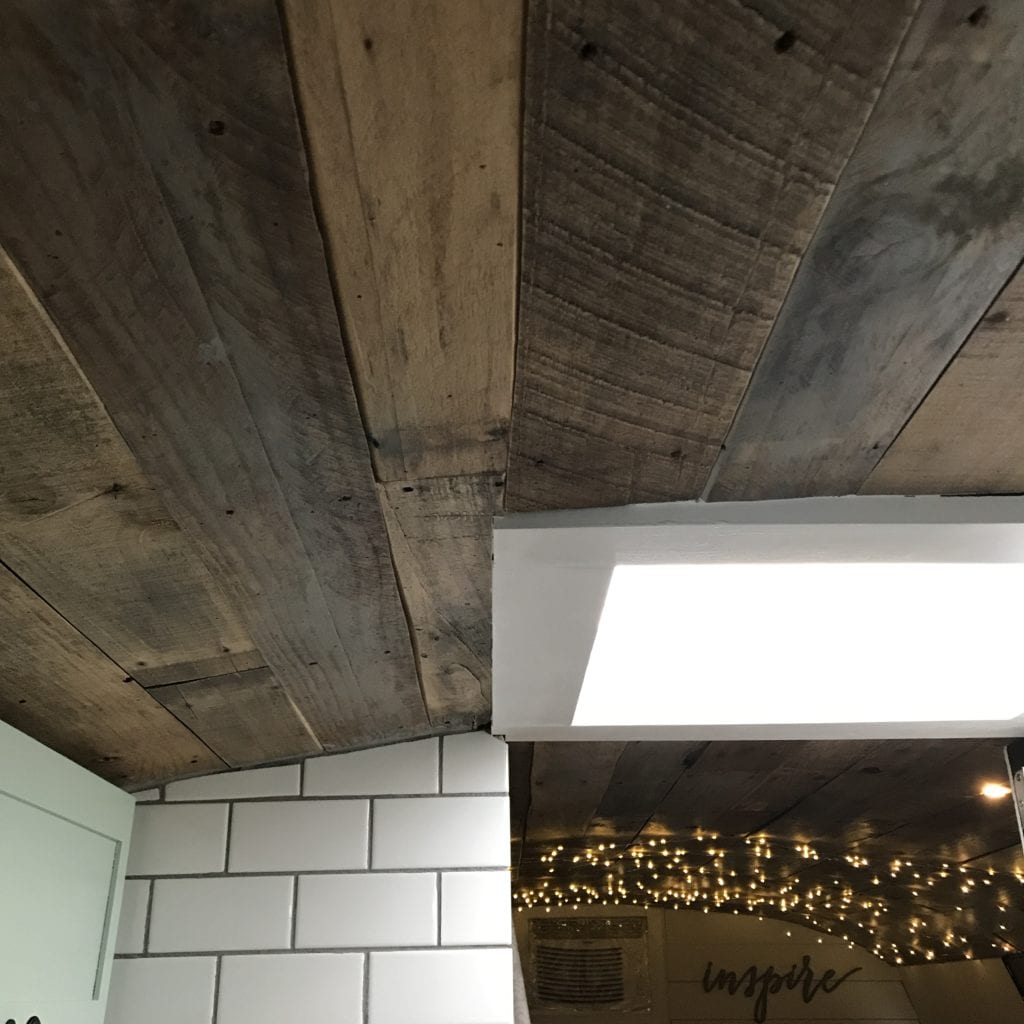
Furring strips on the bus ribs: This is the simplest approach. You screw 1×2 or 1×3 strips of wood horizontally across the existing metal ribs, with insulation filling the cavities behind them. Then your wall paneling attaches to the furring strips. Light, simple, and it preserves maximum interior space.
2×2 or 2×4 stud walls: Some builders frame actual stud walls like you’d see in a house. This gives you more insulation depth and a flat wall surface, but it eats into your interior space and adds significant weight. For a full-size bus with a standard ceiling height, this might be overkill. For a roof-raised bus with room to spare, it works well.
Metal studs: Lighter than wood. Don’t absorb moisture. Some builders swear by them. The downside is they’re slightly harder to work with if you’re not used to them, and screwing into metal studs requires self-tapping screws.
The ceiling is similar — furring strips across the ceiling ribs with paneling over top. Tongue-and-groove pine is one of the most popular ceiling treatments because it looks great, it’s lightweight, and it hides imperfections in the curved ceiling shape.
“Why didn’t you use lighter materials? All that wood is so heavy. Metal studding might have been better.”
Weight is a real concern and it’s something to think about during framing. I covered this in the GVWR article but the short version is, every pound you add to the bus counts toward your gross vehicle weight rating. Using 2×4 framing throughout a full-size bus adds hundreds of pounds that 1×2 furring strips wouldn’t. If weight is a concern — and it should be — go lighter on the framing.
Electrical Basics
I’m not going to try to make you an electrician in a few paragraphs. The complete electrical guide and the wiring guide go deep on this. But here’s what you need to understand at a high level as a beginner.
A bus electrical system is basically a small off-grid power system. You have:
- A battery bank that stores your power. Lithium iron phosphate (LiFePO4) batteries are the current standard — they’re lighter, last longer, and handle deep discharges better than lead-acid. A typical setup is 200-400 amp-hours at 12 volts.
- Solar panels on the roof that charge the batteries during the day. Most builds run 400-800 watts of solar.
- A charge controller between the solar panels and batteries that regulates the charging.
- An inverter that converts 12V DC battery power to 120V AC so you can run normal household appliances and outlets.
- A DC fuse panel for 12V circuits (lights, fans, water pump, USB chargers).
- An AC breaker panel for 120V circuits (outlets, fridge, microwave).
- A battery-to-battery charger (B2B) that charges your house batteries from the alternator while driving.
“Where does the power for toilet pump and laundry come from?”
Everything runs from the battery bank. Solar keeps it charged during the day. Driving charges it through the B2B charger. And if you’re plugged in at an RV park, a shore power connection charges it from the grid.
Here’s my biggest takeaway from researching bus electrical systems: size it bigger than you think you need. I can’t tell you how many builders I’ve read about who installed 200 amp-hours and two solar panels thinking it would be plenty, then had to redo the entire system within a year because they were constantly running low on power. Plan for what you’ll actually use, then add 30-50% on top. The solar sizing guide walks through the math.
Plumbing Basics
Plumbing in a bus is simpler than house plumbing because you’re not dealing with municipal water pressure, city sewer connections, or copper pipes. Here’s the basic system:
- Fresh water tank (30-100 gallons depending on your space and needs). Fills from a hose connection on the exterior.
- 12V water pump that pressurizes the system when you turn on a faucet.
- PEX water lines running to your kitchen sink, bathroom sink, and shower. PEX is flexible, doesn’t corrode, and handles vibration well. It’s also very beginner-friendly — you just crimp the fittings and run the lines.
- Water heater — either a small tankless propane unit or a 6-gallon tank heater. Tankless saves space and weight.
- Grey water tank under the bus that collects sink and shower drainage.
- Toilet — most skoolies use a composting toilet or cassette toilet, which means no black water tank needed. If you go with a flush toilet, you’ll need a black water tank too.
The complete plumbing guide covers all of this in detail, including what size water tank you need and toilet options.
I was intimidated by plumbing until I realized that PEX is basically Legos for water. You cut a tube, crimp on a fitting, and push it onto the connection. If you mess up, you cut it and redo it. It’s probably the most forgiving part of the entire build.
Building Furniture and the Interior
This is the part that people get excited about, and rightfully so — this is where the bus starts looking like a home. But it’s also where a lot of people stall out because the number of decisions becomes overwhelming.
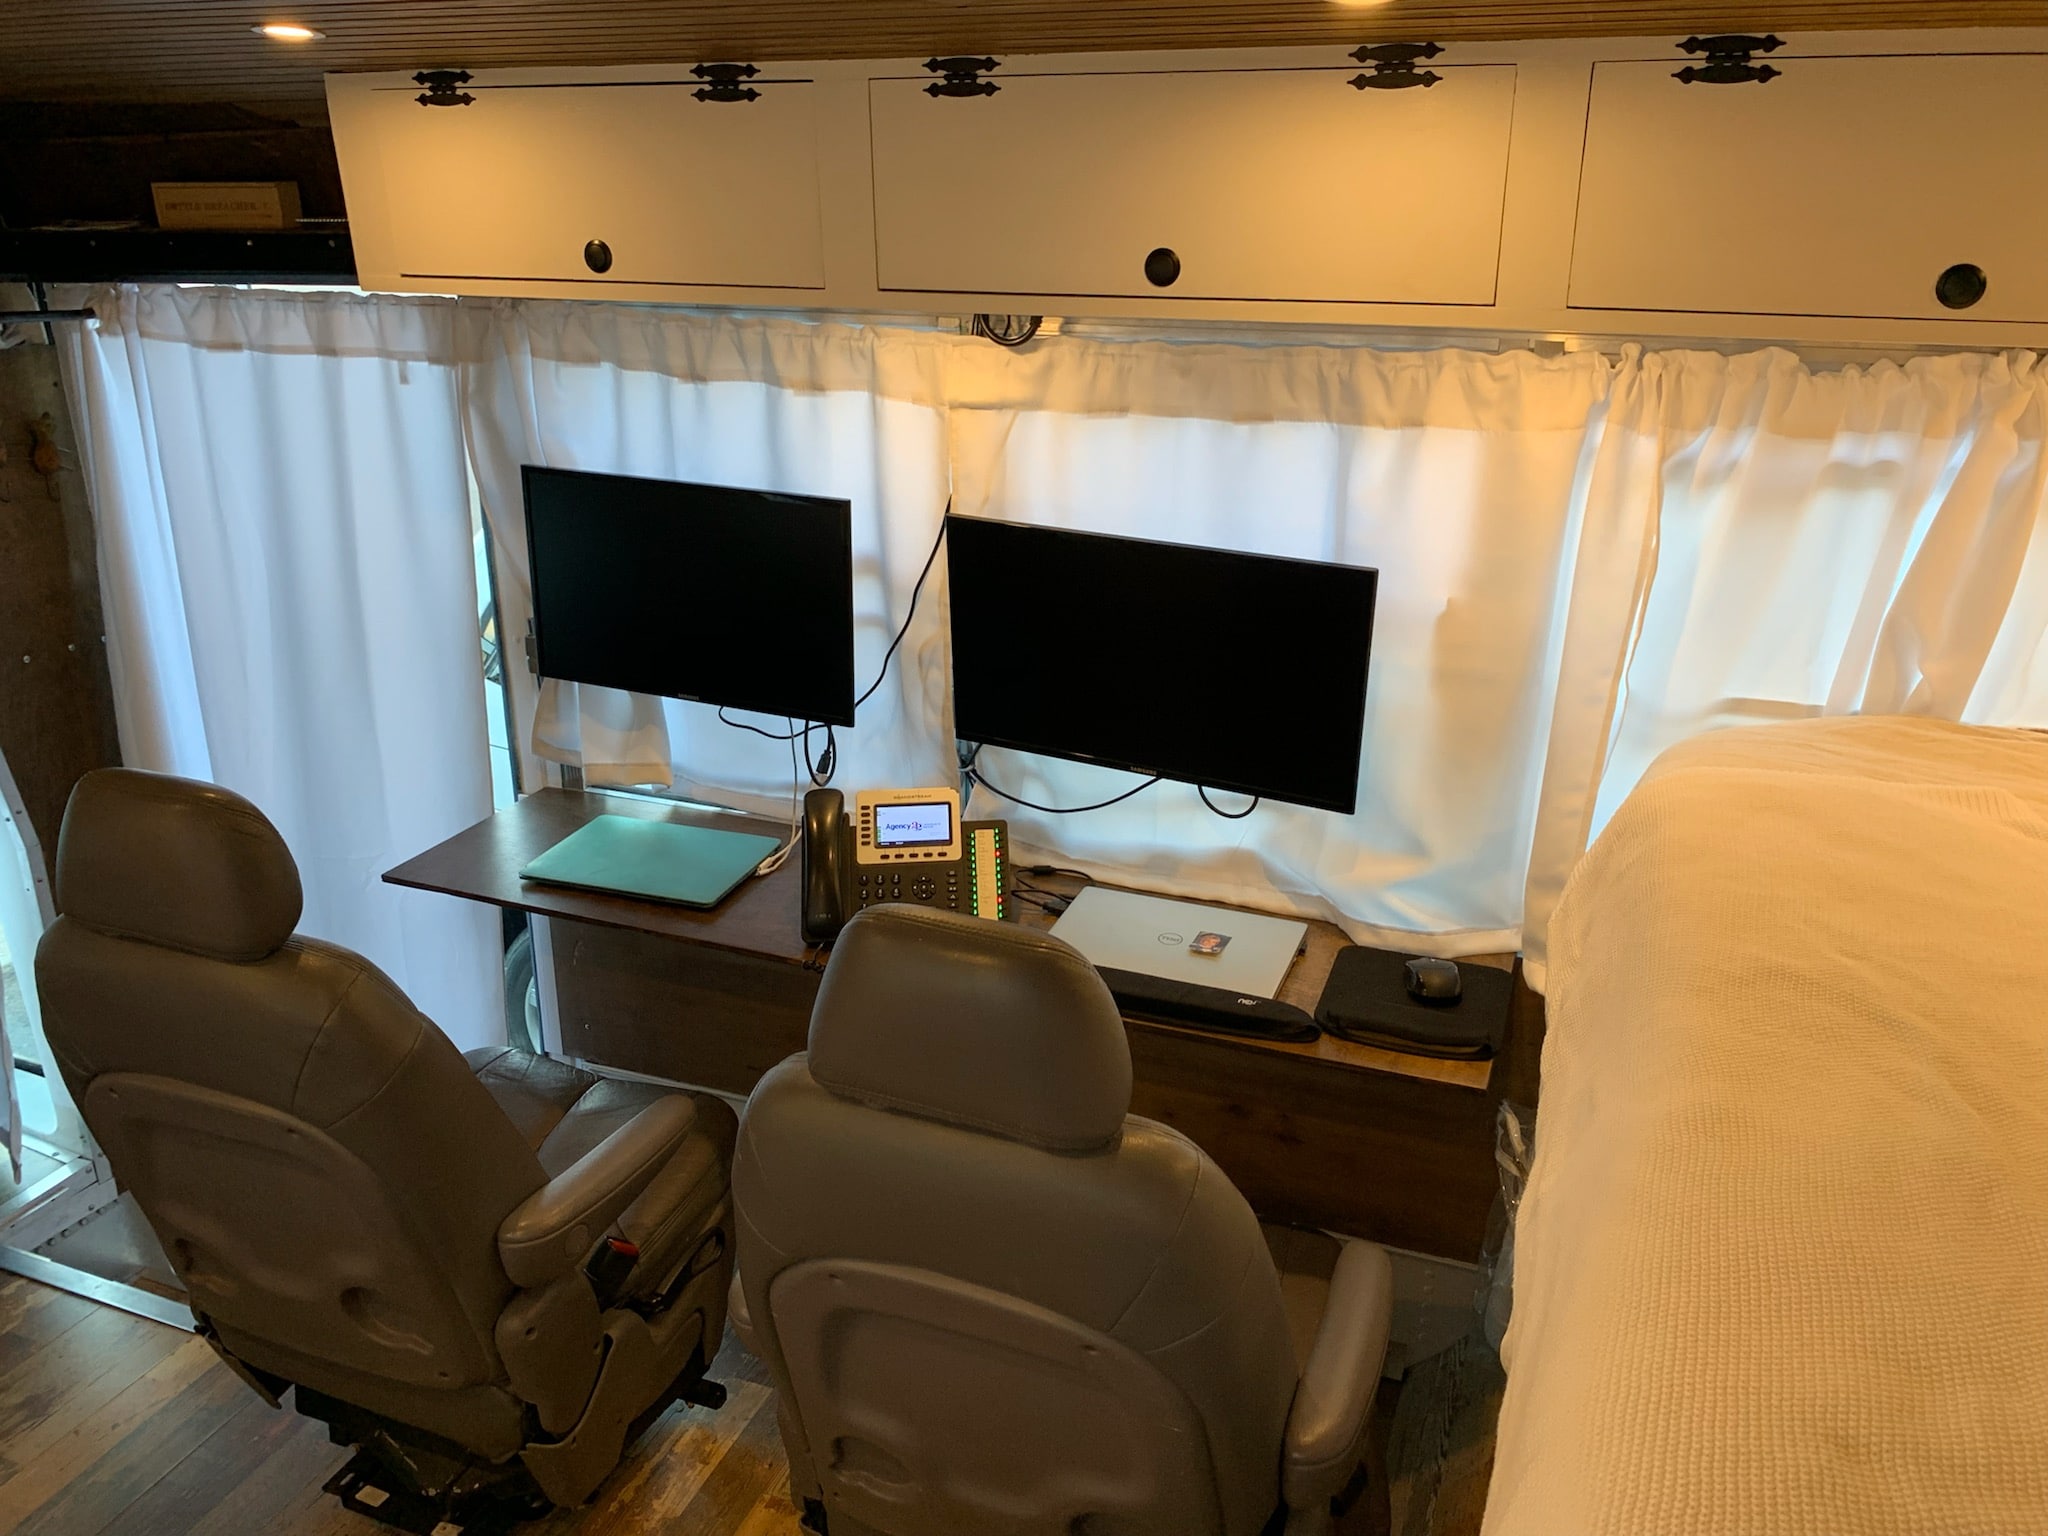
My advice, based on everything I’ve researched and everyone I’ve talked to: build the bed first, build the kitchen second, build the bathroom third. Those are your three essentials. Everything else — dinette, desk, storage cabinets, decorative stuff — can come later.
“Why do you guys always start with the bathroom and not with something else?”
I actually found that builders are split on this. Some start with the bathroom because the plumbing rough-in dictates where the bathroom has to go, and everything else builds around it. Others start with the bed platform because it’s the simplest piece and gives you an immediate sense of progress, plus you can sleep in the bus during the build.
There’s no wrong order, but I’d say have your full floor plan decided before you build any permanent furniture. Building the bed in the wrong spot means tearing it out and rebuilding when you realize the kitchen doesn’t fit where you planned. The floor plan ideas article covers common layouts for different bus sizes.
For cabinetry and furniture, most builders use basic plywood construction. 3/4″ birch plywood for the structure, pocket screws or wood glue and screws for the joints, and then paint or a clear coat for the finish. You don’t need dovetail joints and furniture-grade hardwood. It’s a bus. Build it sturdy and functional.
“Do you have a way to get those major appliances out without removing internal walls in case of replacement needed?”
This is one of those things that’s easy to overlook in the excitement of building and then becomes a huge problem later. Before you build anything permanent around an appliance, ask yourself: “Can I get this thing out when it eventually dies?” If the answer is no, redesign the space. Appliance access is one of the top ten mistakes builders make and it’s completely preventable with 20 minutes of planning.
Painting the Exterior
Most people paint the exterior after the build is mostly done, once all the window modifications and exterior changes are complete. The painting guide covers this in depth, but the overview for beginners:
You’ve got two main options: DIY with Rustoleum or similar paint and a roller, or professional spray. DIY costs $200-500 in materials. Professional spray costs $2,000-5,000 depending on the size and prep needed.
The roller method with Rustoleum actually looks surprisingly good if you thin the paint properly, use a foam roller, and apply 3-4 thin coats. It’s what the majority of budget builds use and from 10 feet away you genuinely can’t tell the difference from a spray job. The key is surface prep — sand the existing paint, clean it thoroughly, and prime any bare metal.
“Beautiful Color! How much did it cost you to paint it yourselves with all the materials?”
Most DIY paint jobs I’ve seen budgeted $200-500 total. That covers 2-3 gallons of Rustoleum paint, a gallon of primer, rollers, trays, painter’s tape, and sandpaper. If you’re doing a two-tone design or adding accent colors, bump that up a bit. It’s one of the cheapest parts of the build relative to the visual impact it makes.
Registration, Titling, and Getting Road Legal
So you’ve built your bus. Now you need to make it legal. This part varies enormously by state, and I’ve written a complete guide to registering and titling a converted bus that covers the state-by-state differences. But the general process looks like this:
- Remove all school bus markings — the “School Bus” sign, the stop arm, the flashing lights, sometimes the yellow paint. Most states require this.
- Install required RV features — most states want to see at least a cooking appliance, a sleeping area, and a toilet or bathroom area before they’ll classify it as an RV/motorhome.
- Get an inspection — some states require a vehicle inspection, some don’t. Some states are easier than others.
- Apply for a title change at your DMV, reclassifying the vehicle from “School Bus” to “Motorhome” or “RV.”
- Get insurance — finding an insurer can be its own adventure, but several companies now specialize in converted buses.
The best states for registration are generally the ones with minimal inspection requirements and straightforward re-titling processes.
Skills You Need vs Skills You’ll Learn Along the Way
I want to come back to this because it’s the core of the beginner question. Here’s how I’d break it down after researching this extensively:
Skills you should have before starting (or at least learn first):
- How to safely operate a circular saw, drill, and angle grinder. Watch a YouTube video. Practice on scrap wood. This takes an afternoon.
- How to measure and cut a straight line. Seriously, that’s most of carpentry.
- Basic safety awareness — wear a respirator when grinding, safety glasses when cutting, don’t touch live wires.
Skills you’ll learn during the build whether you wanted to or not:
- Framing
- Running electrical wire and connecting circuits
- Plumbing with PEX
- Insulating
- Problem solving in weird, tight, curved spaces that nothing fits in properly
- Patience
“I would love to know how yall learned how to do woodworking especially and the electrical stuff”
YouTube. That’s the honest answer from almost every builder I’ve asked. Channels like Dylan Magaster, Wild Wonderful Off-Grid, and dozens of others have detailed, step-by-step videos for every single stage of a bus conversion. For electrical specifically, Will Prowse’s channel on solar and battery systems is practically a free education. And then there are the Facebook groups — “Skoolie Nation” and “School Bus Conversion Resources” have thousands of members who answer beginner questions daily.
Forums on skoolie.net have archives going back years with detailed build threads where people document every mistake and every solution. It’s an incredible resource if you’re willing to dig through the threads.
Common Beginner Mistakes
I’ve written a full article on the biggest builder mistakes, but here are the ones that hit beginners specifically:
Not weighing the bus and tracking weight. Your bus has a gross vehicle weight rating (GVWR) and exceeding it is both illegal and dangerous. Weigh the bus before you start, track what you add, and weigh it when you’re done.
Skipping the mechanical work. The engine, brakes, and tires are more important than your kitchen cabinets. Do mechanical work first, always.
Not having a floor plan before building. I can’t stress this enough. Tape out your layout. Live in the empty bus. Decide where everything goes before you cut a single board.
Building too heavy. Real wood everything, tile floors, granite countertops — it adds up terrifyingly fast. A guy on a forum I was reading built his interior with all solid wood framing and real ceramic tile and ended up 6,000 lbs over his GVWR. Use lightweight materials where you can.
Forgetting about ventilation. A bus needs roof fans. At least one, preferably two. Moisture from cooking, showering, and breathing will destroy your build from the inside out if you don’t vent it.
Rushing the insulation. Take your time here. Gaps and shortcuts in insulation turn into cold spots, condensation, and mold. Do it right or you’ll end up tearing it all apart later.
Not budgeting for surprises. Keep at least $1,000-3,000 as an “unexpected costs” fund. Something will come up. The alternator will die. You’ll discover rust you didn’t see before. A material will be discontinued. Something always happens.
Where to Learn More
One of the things I love about the skoolie community is how open people are about sharing knowledge. Here’s where I found the most useful information when I was starting out:
YouTube channels: There are hundreds of bus conversion channels ranging from quick overview builds to incredibly detailed multi-part series. Search for your specific bus model + whatever you’re working on and chances are someone has already made a video about it.
Facebook groups: “Skoolie Nation,” “School Bus Conversion Resources,” “Bus Life Adventure” and others. These have tens of thousands of members. Post a question with a photo and you’ll get answers within hours, usually from people who’ve dealt with the exact same issue.
Skoolie.net forums: The oldest and deepest resource for bus conversions specifically. Build journals on there go back over a decade and they’re goldmines of real-world information.
Reddit: r/skoolies is active and helpful. Good for quick questions and browsing other people’s builds for inspiration.
Instagram and TikTok: Better for inspiration and layout ideas than for technical learning. But seeing what other people have done with similar buses is genuinely useful during the planning phase.
Local makerspaces and community colleges: Some offer intro classes in welding, woodworking, or basic electrical that can give you hands-on practice before you start cutting into your bus. I think this is an underused resource. A $50 weekend welding class is way cheaper than learning to weld on your actual bus.
So Where Does That Leave You?
After all the research I’ve done, all the builds I’ve followed, all the forum threads I’ve read through at 2 AM when I should’ve been sleeping — here’s what I keep coming back to. Building a skoolie is not one overwhelming impossible project that requires years of training and a contractor’s license. It’s a series of manageable steps, each one learnable, each one doable by someone with no prior experience. I know that because the proof is everywhere. Thousands of people have done this with backgrounds in teaching, nursing, software, cooking, retail, you name it. The common thread isn’t that they all knew how to build things. It’s that they were willing to learn.
The beginning is the hardest part, and I don’t mean the physical building. I mean making the decision that you’re going to actually do this. Once you buy the bus and pull out the first seat, the momentum carries you. You’ll make mistakes. Everybody does. You’ll redo things. You’ll spend more than you planned. You’ll have weekends where nothing goes right and you’ll stare at the bus wondering what you were thinking.
And then one day you’ll cook a meal in your own kitchen, in a bus you built with your own hands, parked somewhere beautiful and quiet, and none of the frustration will matter anymore.
That’s what every builder I’ve talked to says, anyway. And I believe them.