When I first started digging into what a bus conversion actually involves, this was one of those questions that seemed obvious but also kind of daunting. Like, of course you have to remove the seats, right? But then I started reading forum posts and watching videos and realized there’s way more to it than just ripping them out. Some people salvage them. Some people sell them. Some people just haul them to the dump and move on. So I spent some time looking into the actual mechanics of it and why removing the seats matters so much in the first place.
Yes, you need to remove the school bus seats before converting, and honestly it’s one of the first things you’ll do on your build. The seats themselves are bolted down to the floor, and underneath them is typically rubber matting, old staining, and potential rust. Once you get those seats out, you expose what you’re really working with, and that’s where the actual problems sometimes start. Most converters remove seats completely and repurpose or sell them, but the floor situation underneath is what really matters for your timeline and budget.
Why Are the Seats on One Side Small and the Other Side Big?
I remember reading about this in a Reddit thread and thinking it was just me not understanding school bus design. Turns out it’s completely intentional. The driver’s side has individual smaller bench seats because that’s where the driver sits, and on the passenger side you’ve got those longer bench seats that can fit three or four kids each. It’s just how the manufacturer designed them for the original purpose of hauling kids to school.
When you’re planning your conversion, understanding this layout actually matters. Some people ask if they can keep one or two seats for extra seating or storage benches. I’ve seen builders keep a seat and flip it around to use as a dining booth, or strip it down for the frame. The driver’s side seats take up less space, so technically you could work around them, but most people just remove everything. It’s cleaner, and you get a completely blank slate for your floor plan.
The size difference also affects weight distribution, not that it matters much once they’re gone. But if you’re planning to keep a seat or two, knowing that the passenger benches are heavier gives you a sense of what you’re dealing with in terms of labor. A single driver’s side seat is way easier to muscle out than a full passenger bench.
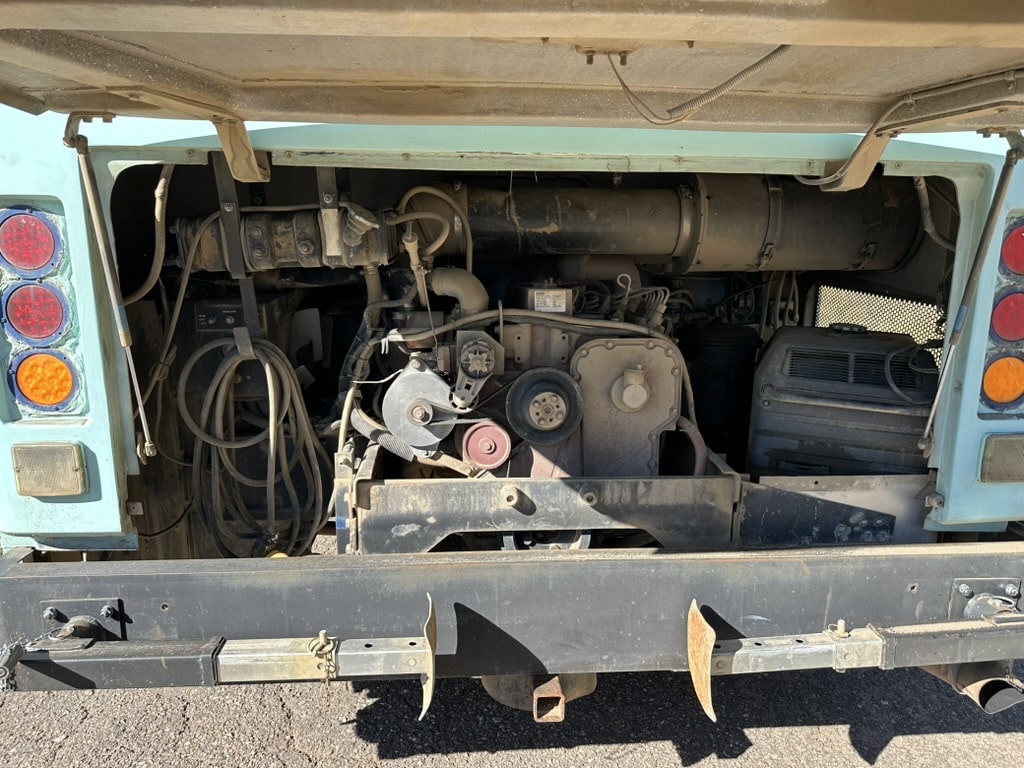
Why Do the Original Floors Have to Be Removed?
This is where things get real. When I was looking into this, a guy at a truck stop told me he left the original rubber floor under his wood subfloor and regretted it within a year. Said he started finding moisture under there, and by the time he noticed, there was already some mold developing. That stuck with me, and it’s basically why I’m addressing this now.
School buses come with a rubber floor mat glued or bolted over the steel floor. Under that mat, sitting between the metal bus floor and years of kid dirt and moisture, you’ve got a rust factory waiting to happen. Some converters will install their new floor right over that rubber, and I’ll be honest, it can work. But you’re essentially sealing in whatever is already under there. If there’s rust starting or moisture trapped, you’ve just made your problem worse because now you can’t see it or address it.
The smart approach is to pull that rubber flooring up, inspect the steel underneath, treat any rust with rust converter or sanding depending on how bad it is, and then you’ve got a clean foundation for your subfloor. It adds a day or two to your timeline, but it saves you from opening walls three years in because mold has become a problem. And if you’re already removing the seats and emptying the bus anyway, you might as well do the floor right.
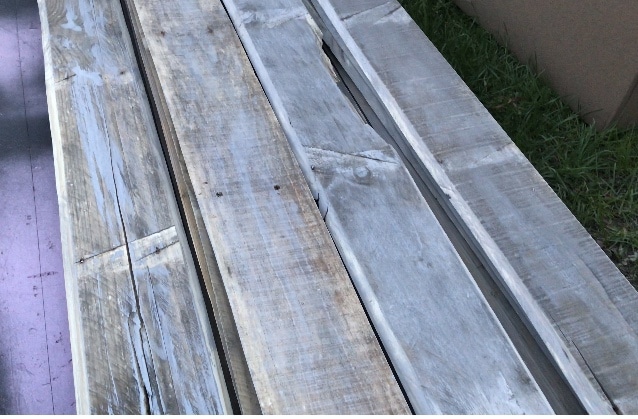
How Do You Get the Floor Up in Nice Solid Strips?
This one surprised me because I initially thought people just ripped out chunks of rubber and dealt with it. But there’s actually a smarter way to do it. The rubber matting is either glued or held down with bolts in certain spots, depending on the bus age and manufacturer. If you can find the bolts and undo them, you can get big sections up without tearing them to shreds.

I looked into this a bit more and found that some converters heat the rubber with a heat gun or even just work on a warm day, then use a putty knife or pry bar to peel it back. Starting from one corner and working slowly gives you bigger strips instead of the whole thing crumbling. If it’s really adhered, you might have to accept some tearing, but the goal is to get it up in pieces manageable enough to pull out through the door.
Once you’ve got the big sections out, there’s always some adhesive residue and bits left behind. Most people use a scraper or wire wheel to clean that up before they start their new floor. It’s tedious work, but it’s important work. You want that steel floor as bare as you can get it so you can see what you’re working with and apply primer or rust treatment if needed.
Any Regret Taking the Passenger Seat Out Next to the Driver?
A lot of people ask this before they pull the trigger, and I get it. The passenger seat is the only OEM seating in the front of the bus, and it’s actually a real seat with a seatbelt. When you’re driving across the country with someone, a comfortable front passenger seat starts to sound pretty good. I’ve read threads where people wrestled with this decision.
Here’s what I found out talking to people who’ve done it. Most of them took it out and don’t regret it at all. Why? Because once you’ve removed it, you suddenly have closet space or a small seating area or maybe a dog crate, and that changes the whole usability of your bus. The driver’s side needs visibility and open space, especially when you’re driving a large vehicle in traffic. An extra passenger seat in a finished build becomes something you’re navigating around constantly.
That said, I’ve also met converters who added a quality RV captain’s seat that’s removable or swivels, so they get a comfortable place to sit without giving up all the functionality. If you really want someone to have a comfortable seat while you’re driving, that’s a legitimate upgrade. But the original school bus passenger seat? Most people yank it and never think about it again. The space it opens up is worth more than keeping a mediocre school bus seat.
So Here’s Where I Landed
Removing the seats and floor is basically the foundation work of your entire build, and I don’t think there’s really a scenario where you skip it entirely. You need those seats gone to see what you’re working with, and you need to address the floor properly so you’re not building your dream home on top of a future moisture problem.
The seat situation is straightforward enough. Get them out, salvage them if you want, but don’t overthink it. The floor is where most people either do the work right or create problems for themselves later. I’ve read enough cautionary tales about moisture issues and rust that I’m convinced it’s worth the extra time on the front end.
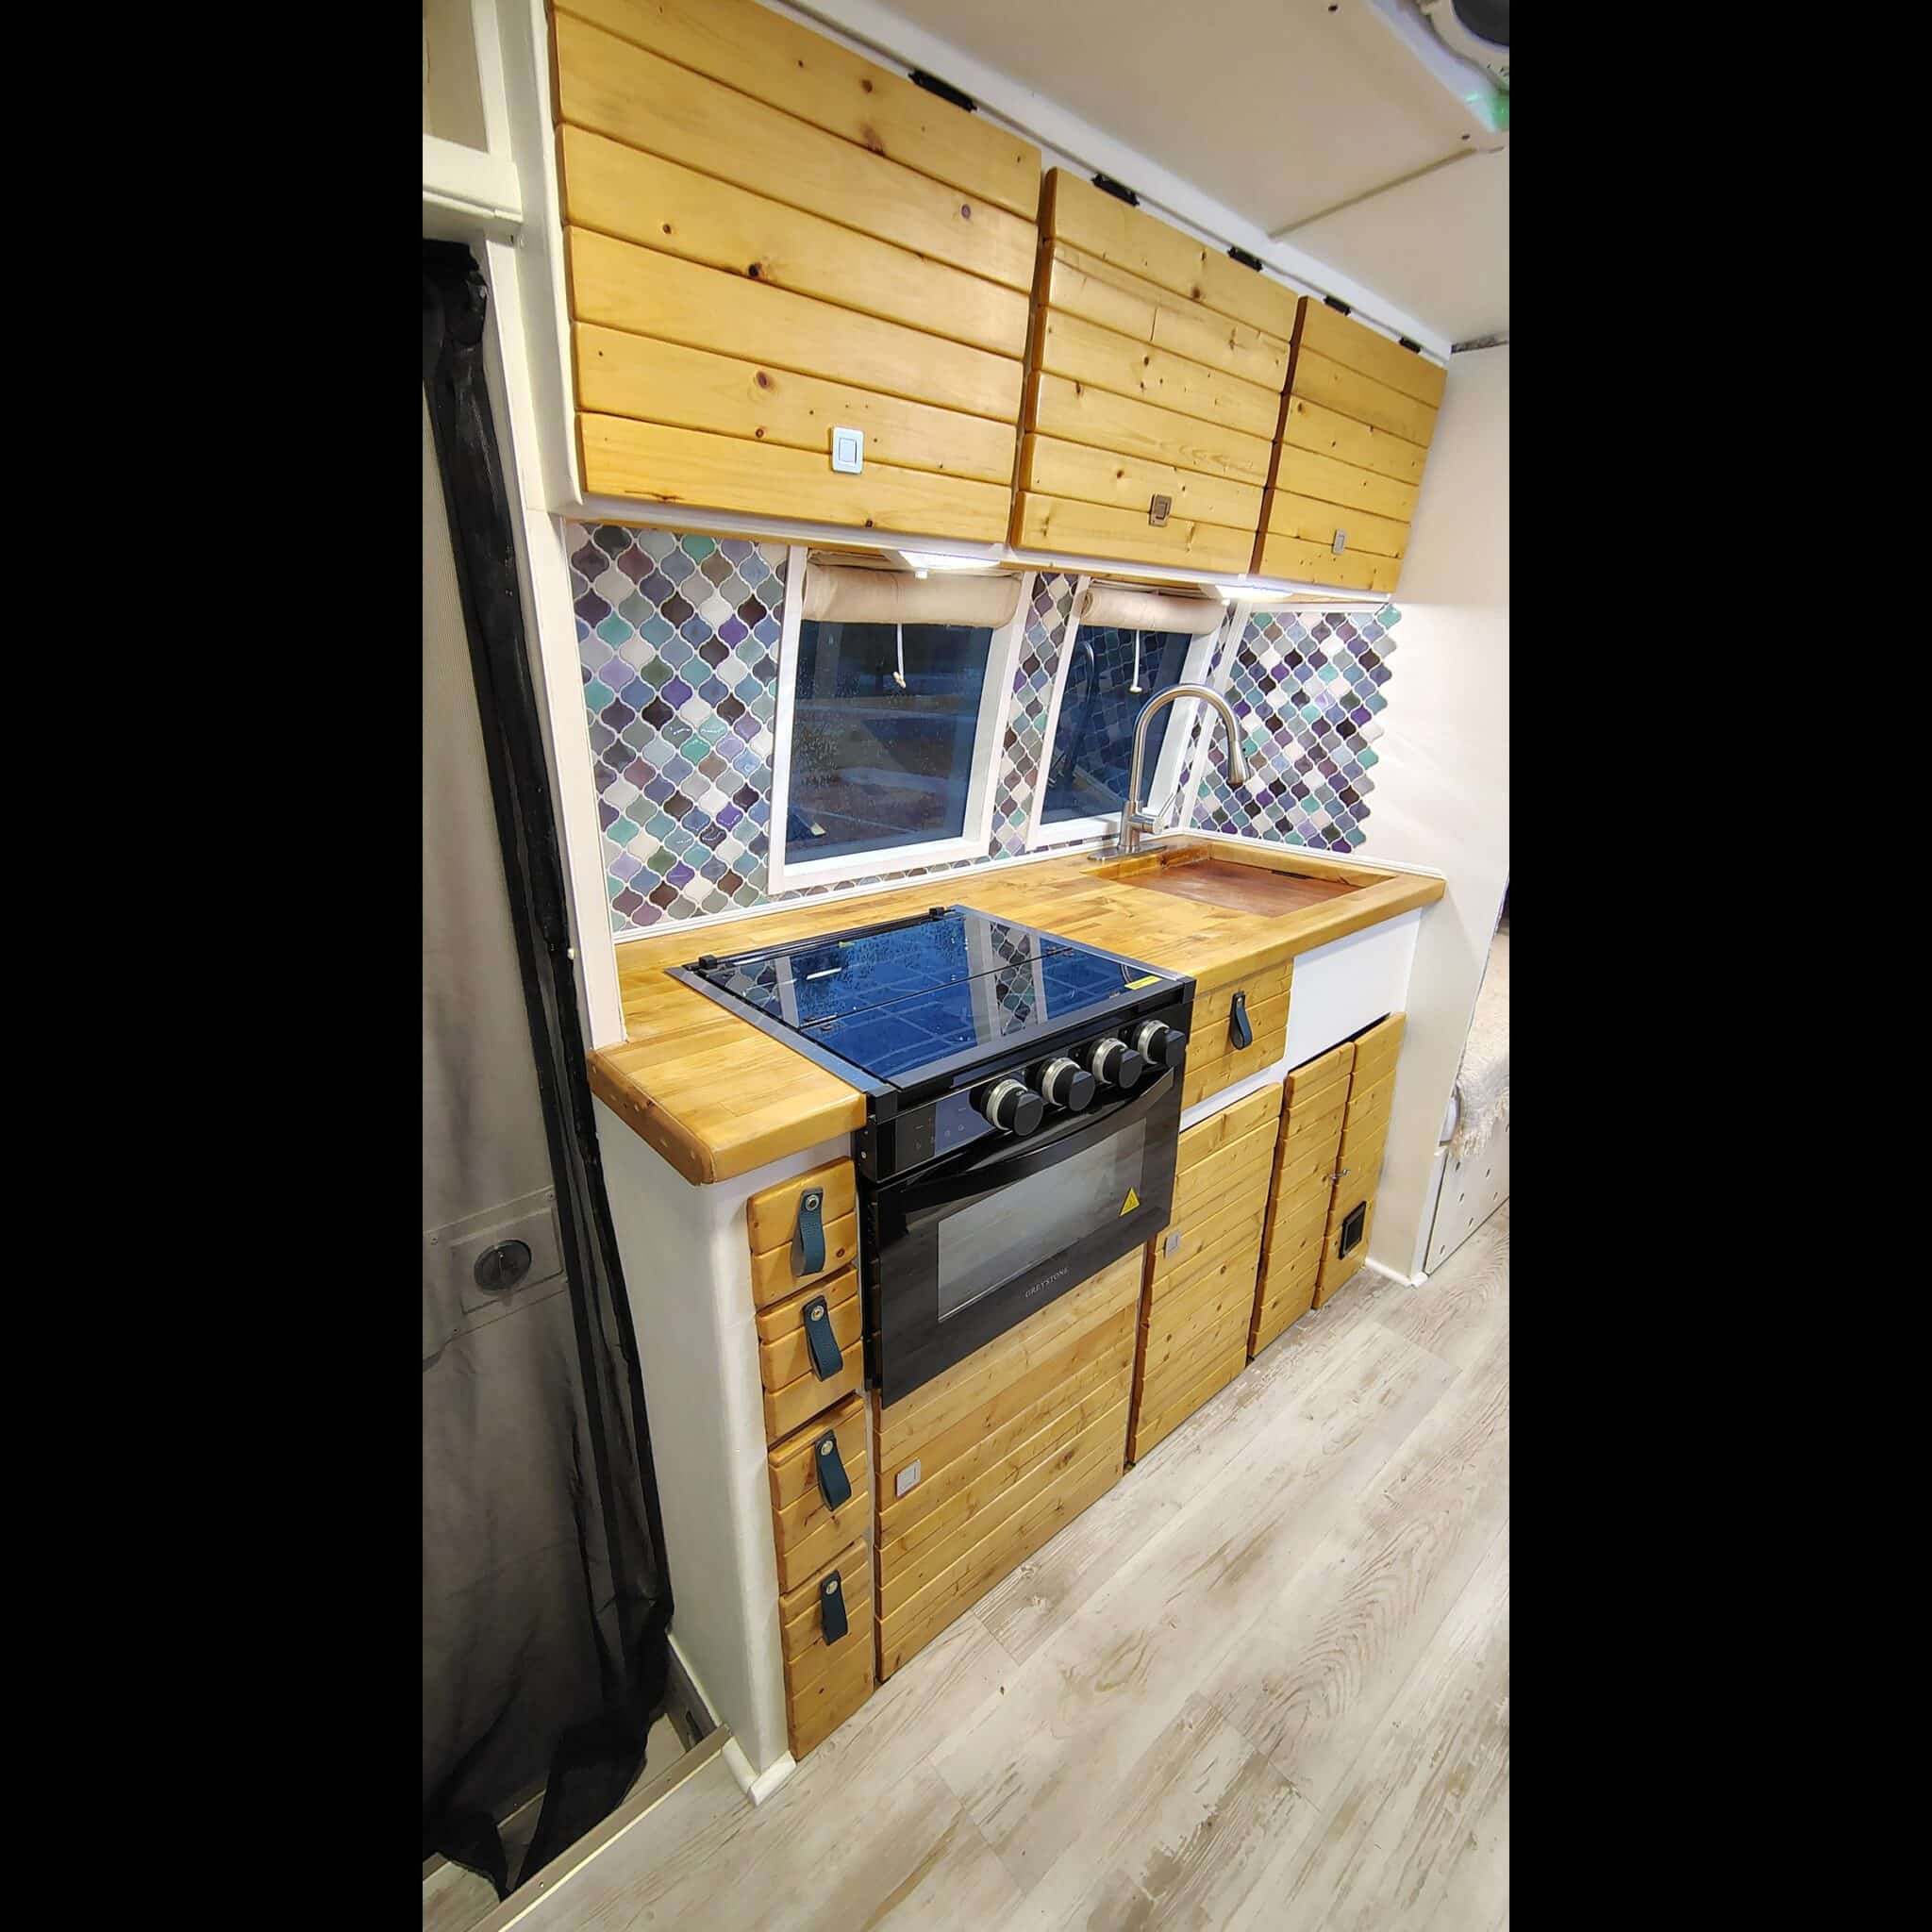
Once you’ve cleared that floor and gotten it prepped, you’re ready to move on to subfloor, insulation, and all the fun parts of the build. From there, you link up to floor planning, looking at the insulation side of things, and figuring out your overall budget. The early demo work isn’t glamorous, but it’s the difference between a skoolie that lasts twenty years and one that starts having problems in five.
a30lc7
k5xodc
7fv0sn
a5vtlv
lvowsq